Best Budget Gaming PC Build for 2026
A low price does not make a gaming computer a good value. The wrong graphics card, a weak power supply, or a motherboard with no useful upgrade path can turn a “deal” into an expensive rebuild within a year.
This guide shows how to create the best budget gaming PC build for 2026 without wasting money on cosmetic parts or performance you cannot see. You will get a balanced parts list, compatibility checks, a careful assembly process, first-boot setup, troubleshooting, maintenance, and realistic ways to cut the cost.
The target is a tower that feels quick in everyday use, drives competitive games at high frame rates at 1080p, and handles many modern games at 1440p with sensible quality settings. Exact performance changes by title, patch, driver, and graphics preset, so the build is designed around balance rather than one impressive benchmark.
Quick Answer: What Is the Best Budget Gaming PC Build in 2026?
The best budget gaming PC build pairs a Ryzen 5 7600, B650 motherboard, Radeon RX 9060 XT 16GB, 32GB DDR5-6000 memory, 1TB NVMe SSD, airflow-focused case, and reputable 650W Gold PSU. Expect roughly $900–$1,100 before Windows and peripherals, depending on sales and region.
The Build at a Glance
For most buyers, the best budget gaming PC build is not the absolute cheapest tower that launches a game. It is the lowest-cost system that meets the intended resolution, avoids obvious bottlenecks, uses safe components, and leaves a sensible path for later upgrades.
Recommended 2026 parts list
| Part | Recommended specification or example class | Target price (USD) | Why it earns the budget |
| CPU | AMD Ryzen 5 7600, 6 cores/12 threads | $170–$210 | Strong gaming responsiveness, 65W default TDP, AM5 platform, and a usable boxed cooler in standard retail packages |
| CPU cooler | Included Wraith-class cooler or $20–$35 tower cooler | $0–$35 | The stock cooler controls cost; a basic tower cooler reduces noise later |
| Motherboard | B650M, four DIMM slots, two M.2 slots, BIOS Flashback preferred | $110–$155 | Covers the features that matter without premium chipset pricing |
| Graphics card | Radeon RX 9060 XT 16GB | $350–$420 | The 16GB model offers more memory headroom than the 8GB version for modern textures and 1440p use |
| Memory | 32GB (2×16GB) DDR5-6000, EXPO kit | $80–$120 | Dual-channel capacity for current games, browsers, launchers, and background apps |
| Storage | 1TB PCIe 4.0 NVMe SSD from a known brand | $55–$85 | Fast loading and enough starting capacity for Windows plus several large games |
| Power supply | 650W, 80 PLUS Gold, reputable platform, 5+ year warranty | $70–$105 | Comfortable headroom, quieter operation, and room for a moderate GPU upgrade |
| Case | Mesh-front micro-ATX or ATX case with 2–3 fans | $55–$90 | Airflow matters more than glass, lighting, or a famous badge |
| Estimated tower total | Excludes tax, OS, and peripherals | $890–$1,220 | Sale pricing can pull a carefully chosen list close to $1,000 |
AMD lists the Ryzen 5 7600 as a six-core, 12-thread 65W processor with boost speeds up to 5.1GHz. AMD’s official Radeon RX 9060 XT 16GB specifications list 16GB of GDDR6 memory, 160W typical board power, and a 450W minimum PSU recommendation. A quality 650W unit is suggested here for headroom, lower fan noise, and future flexibility—not because this build needs 650W continuously.
| 💡 Quick Hack: If the RX 9060 XT 16GB costs more than 15–20% above its normal local price, pause the purchase. Compare a discounted previous-generation 12GB or 16GB card, or buy the rest only after confirming the GPU deal. The graphics card has the greatest effect on gaming value. |
Who this configuration suits
This best budget gaming PC build is aimed at a first-time builder, student, home gamer, or creator who wants one dependable desktop for several years. It is a strong match for 1080p high-refresh monitors and a practical entry into 1440p gaming.
Choose a different configuration if the machine is mainly for professional 3D rendering, heavy 4K video production, competitive gaming above 300Hz, or uncompromised 4K ray tracing. Those workloads justify a larger CPU, GPU, cooling, and power budget.
Essential Tools and Materials
PC assembly needs fewer tools than most people expect. Good lighting, patience, and a clean work surface prevent more errors than a large toolkit.
| Tool or material | Required? | Estimated cost | Skill level | Practical note |
| #2 Phillips screwdriver | Yes | $5–$15 | Beginner | A magnetized tip helps hold motherboard and M.2 screws |
| Small #1 Phillips screwdriver | Helpful | $4–$10 | Beginner | Useful for tiny M.2 screws if the board lacks a tool-free latch |
| USB flash drive, 8GB+ | Yes | $5–$12 | Beginner | Used for Windows installation, BIOS files, or diagnostics |
| Reusable cable ties or hook-and-loop straps | Helpful | $4–$10 | Beginner | Easier to reopen than single-use zip ties |
| Isopropyl alcohol, 90%+ | Optional | $4–$8 | Beginner | Cleans old thermal compound during reseating or upgrades |
| Lint-free coffee filters or wipes | Optional | $2–$5 | Beginner | Leaves less residue than facial tissue |
| Thermal paste | Usually optional | $5–$10 | Beginner | Most boxed and aftermarket coolers include paste |
| Anti-static wrist strap | Optional | $6–$12 | Beginner | Useful in dry rooms; clip to unpainted grounded metal |
| Flashlight | Helpful | $0–$15 | Beginner | Makes front-panel labels and latch positions easier to see |
| Parts tray or small bowl | Helpful | $0–$5 | Beginner | Prevents screws from disappearing into carpet |
Safety rule: Shut down the PC, switch off the PSU, unplug the power cable, and press the case power button for several seconds before working inside. Never open the power-supply enclosure; capacitors can retain dangerous charge.
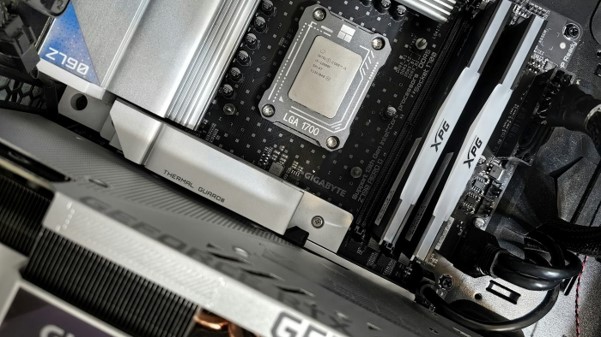
Set the Performance Target Before Shopping
Start with the monitor and games, not a list of popular components. A 1080p 144Hz display needs a different spending balance than a 4K television, and an esports player values CPU consistency differently from someone playing cinematic single-player games.
Write down four decisions:
Resolution: 1080p or 1440p for this budget.
Refresh rate: 60–75Hz for casual play or 120–180Hz for smoother motion.
Game type: esports, simulation, strategy, or graphically demanding AAA titles.
Upgrade horizon: no upgrade planned, GPU upgrade in two years, or long-term platform growth.
Planning the best budget gaming PC build around those four answers stops “specification creep.” Extra cores, an expensive liquid cooler, and a luxury motherboard do not improve the experience if the graphics card remains underfunded.
| Pro-Tip: Allocate roughly 35–45% of the tower budget to the graphics card. Treat this as a starting range, not a rigid law. A simulation-heavy build may justify more CPU spending; a visually demanding 1440p build usually benefits from more GPU spending. |
Check Every Compatibility Point
Compatibility is more than matching the CPU socket. Review the complete physical and electrical chain before ordering.
CPU, socket, and BIOS
The Ryzen 5 7600 uses AMD’s AM5 socket and DDR5 memory. Pair it with a B650 or later compatible AM5 motherboard. If choosing a newer processor or an older-stock motherboard, verify that the installed BIOS supports the exact CPU.
A board with BIOS Flashback can update firmware from a USB drive without a working CPU, although the exact button name and procedure vary by manufacturer. Download only from the motherboard maker’s official support page and never interrupt power during the update.
Memory support
Buy one matched 2×16GB kit rather than two unrelated sticks. Check the board’s memory support list when possible, then install the modules in the manual’s preferred two-stick slots—commonly A2 and B2.
DDR5-6000 with an AMD EXPO profile is a useful performance-and-price target for this platform. Memory will normally start at a slower safe speed until EXPO is enabled in BIOS.
Case, motherboard, and cooler clearance
Confirm that the case supports the board size: micro-ATX, ATX, or mini-ITX. Then check maximum CPU-cooler height, graphics-card length, graphics-card thickness, radiator support if relevant, and whether front fans reduce GPU clearance.
GPU and power connections
Check the exact graphics-card model, not only the GPU name. Partner cards differ in length, thickness, cooler design, and power connector position.
Confirm that the PSU has the required native connector. Do not mix modular PSU cables from different models—even cables from the same brand can use different pinouts and damage components.
Storage lanes and ports
Some M.2 sockets share lanes with SATA ports or expansion slots. Read the motherboard manual if you plan multiple drives, a capture card, or other PCIe devices.
| 💡 Quick Hack: Put the exact part numbers into a compatibility checker, but still verify the motherboard manual and case specification page yourself. Automated tools can miss cooler-RAM interference, unusually thick graphics cards, or lane-sharing rules. |
Buy for Value Without Buying Twice
When buying the best budget gaming PC build, compare the final delivered price, return policy, and warranty—not the product-card discount. A $10 saving disappears if returning a dead board costs shipping or the seller is not an authorized retailer.
Where to save safely
Case: Choose steel, mesh, and included fans over glass thickness or RGB controllers.
Cooler: Begin with the boxed CPU cooler if included. Upgrade only if noise or temperatures bother you.
SSD: A good mainstream PCIe 4.0 drive is enough for gaming; premium sequential speeds rarely transform game play.
Motherboard: Pay for the ports, slots, Wi-Fi, and BIOS features you will actually use.
Lighting: Add inexpensive LED strips later instead of paying a large RGB premium on every component.
Where not to cut aggressively
Power supply quality
GPU memory capacity when the price difference is reasonable
Case airflow
A matched dual-channel memory kit
Seller protection for expensive components
The 80 PLUS badge measures efficiency, not every aspect of PSU quality. Use it as one filter, then check professional electrical reviews, protections, warranty length, and whether the exact model appears in the official 80 PLUS certified PSU database.
| 💡 Quick Hack: Open-box cases and air coolers are generally lower-risk than open-box motherboards or power supplies. Cosmetic damage is easy to inspect; hidden electrical damage is not. |
Prepare the Workspace and Inventory the Parts
Build on a large table over hard flooring if possible. Avoid a bed, blanket, or deep carpet. Good overhead light and a small tray for screws are worth more than fancy tools.
Unbox each part without discarding packaging. Check model labels against the order, inspect for bent connectors or visible damage, and locate the motherboard manual. Keep protective caps and antistatic bags until the computer passes testing.
Touch the unpainted metal chassis periodically to equalize static charge. If using an anti-static strap, connect it as directed to grounded unpainted metal. Handle boards by their edges and avoid touching gold contacts or socket pins.
Assemble the Motherboard Outside the Case
Building the core on the motherboard box gives better access and reduces awkward force inside the chassis. The box is a work platform; do not place the board on the outside of its antistatic bag because the bag’s outer surface is not intended as a work mat.
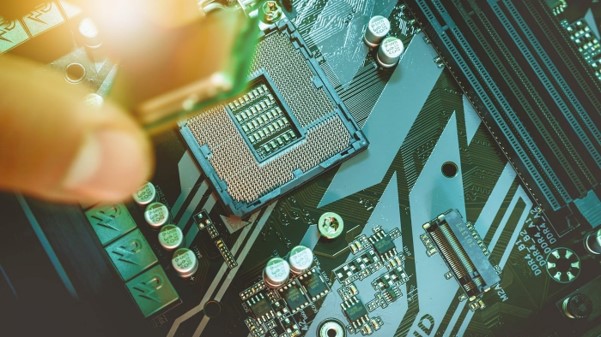
Install the CPU
Place the motherboard flat and release the socket retention arm.
Hold the CPU by its edges.
Match the small triangle on the CPU with the triangle on the socket.
Lower it straight into position. Do not slide, twist, or press it.
Close the retention frame and arm. The protective socket cover may release as the mechanism closes; keep it for warranty shipping.
If the CPU does not settle naturally, stop and recheck alignment. Forcing it can damage the socket.
Install the memory
Open the latches for the recommended slots. Align the module notch with the slot key, then press evenly until the module clicks fully into place. A half-seated DIMM is one of the most common causes of a new PC powering on without displaying an image.
Install the M.2 SSD
Remove the M.2 heatsink if present, insert the SSD at a slight angle, lower it, and secure it with the screw or latch. Remove the protective film from the heatsink thermal pad before reinstalling it.
Install the CPU cooler
Follow the cooler’s manual because bracket requirements vary. If thermal paste is not pre-applied, place a small pea-sized amount near the center of the CPU heat spreader. Tighten mounting screws gradually in an alternating pattern rather than fully tightening one corner first.
Connect the fan cable to CPU_FAN, not a random chassis-fan header. A board may refuse to boot or show an error when it cannot detect a CPU fan.
| Pro-Tip: Take one clear phone photo of the installed CPU, memory, SSD, and cooler cables before the board goes into the case. It becomes a fast reference if troubleshooting later. |
Prepare the Case and Install the Motherboard
Remove both side panels and the front panel only if the manual permits. Lay the case on its side.
Check motherboard standoffs carefully. There must be one standoff under each mounting hole and no extra standoff touching the board where there is no hole. An incorrect standoff can short the motherboard.
If the board has a separate I/O shield, snap it into the case from inside before installing the board. Integrated shields need no separate step.
Lower the motherboard so its rear ports line up with the I/O opening and its screw holes sit over the standoffs. Start every screw loosely, then tighten until snug. Do not crush the board.
Connect the front-panel power switch, reset switch, power LED, storage LED, USB, and front-audio cables using the motherboard diagram. LEDs are polarity-sensitive; switches are not.
| 💡 Quick Hack: Use a phone camera to zoom in on tiny front-panel labels. It is often clearer than bending over the case with a flashlight. |
Install the Power Supply and Route Cables
Install the PSU with its fan facing a ventilated opening. In most modern cases with a filtered bottom vent, the fan faces downward. If the case sits on thick carpet or lacks bottom ventilation, follow the case and PSU manuals rather than guessing.
Before fastening a modular PSU, connect only the cables needed:
24-pin motherboard power
8-pin CPU/EPS power, plus any required additional EPS connector
GPU power cable
SATA power for hubs or drives, if used
Route the CPU power cable behind the motherboard tray before the graphics card blocks access. Keep cables away from fan blades and avoid sharp bends immediately at power connectors.
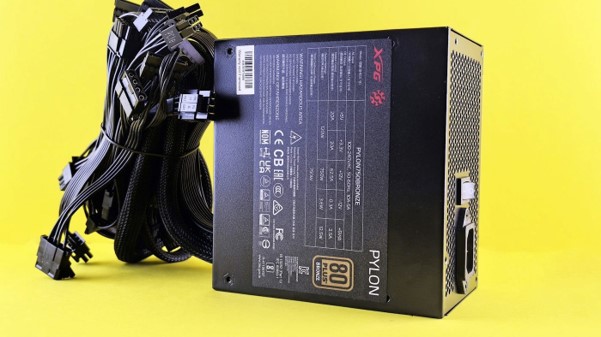
Never reuse a modular cable from an old PSU unless the manufacturer explicitly confirms compatibility for both exact models. The component-side connector may look standard while the PSU-side wiring differs.
Install the Graphics Card
Remove the correct rear expansion-slot covers. Open the motherboard’s PCIe retention latch, align the card with the top full-length PCIe slot, and press evenly until seated.
Secure the bracket to the case, then connect GPU power fully. Use separate PCIe power leads when the card and PSU instructions recommend them rather than heavily daisy-chaining one cable.
Large cards may sag. A basic support bracket or carefully positioned case support can reduce stress, but it must not touch fan blades or circuit components.
Set the Airflow and Finish Cable Management
Use a simple airflow pattern: front and bottom fans draw cool air in; rear and top fans exhaust warm air. Two front intakes and one rear exhaust are enough for many budget systems.
Airflow direction usually runs from the open side of a fan toward the side with the support struts and label. Check the frame arrows when available.
Bundle cables behind the motherboard tray with reusable straps. Leave gentle service loops near connectors so a cable is not held under tension. The goal is clear airflow and easy maintenance, not a perfectly flat cable wall.
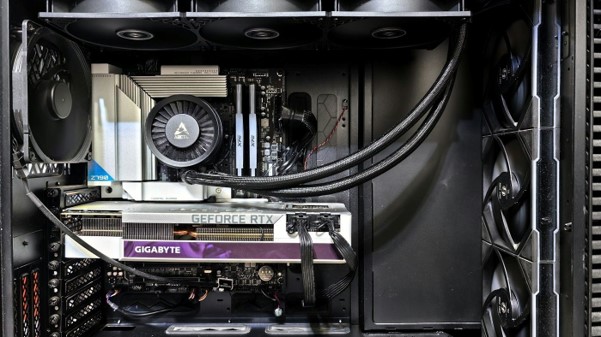
Perform a Pre-Boot Inspection
Before installing the glass panel, confirm all of the following:
CPU cooler is firmly mounted and connected to CPU_FAN.
Both memory modules are fully latched.
24-pin motherboard and 8-pin CPU power are connected.
GPU is fully seated, powered, and secured.
Monitor cable is plugged into the graphics card, not the motherboard, when using the discrete GPU.
No loose screw remains inside the case.
No cable touches a fan blade.
PSU input switch is set correctly and the power cable is connected.
For the first start, leave the side panel off so diagnostic LEDs are visible. DDR5 memory training can make the first boot take longer than expected and may involve restarts. Give the board several minutes before assuming failure, especially after changing memory settings.
Configure BIOS Correctly
Enter BIOS by pressing the key shown during startup, commonly Delete or F2.
Check that the CPU, full memory capacity, SSD, and CPU-fan speed appear. Review CPU temperature; a rapidly climbing temperature suggests a cooler-mounting problem.
Then make measured changes:
Enable the memory’s EXPO profile.
Confirm UEFI boot mode and TPM/Secure Boot settings for Windows 11.
Enable Resizable BAR or Smart Access Memory if supported.
Set sensible fan curves rather than maximum fan speed.
Update BIOS only when it solves a compatibility, stability, or security need, following the manufacturer’s exact instructions.
| Pro-Tip: Change one major setting at a time and photograph the original page. If instability appears, you will know which change caused it. |
Install Windows, Drivers, and Updates
Create an official Windows installation USB on another computer. During setup, select the new NVMe drive carefully so another attached storage device is not erased.
Microsoft lists TPM 2.0, UEFI Secure Boot capability, compatible DirectX 12 graphics, and other minimums in its Windows 11 hardware requirements. This hardware comfortably exceeds the basic CPU, memory, and storage minimums.
After Windows loads:
Run Windows Update until no important updates remain.
Install AMD chipset drivers.
Install the latest stable Radeon graphics driver from AMD Drivers and Support.
Install motherboard network, audio, or Wi-Fi drivers only when Windows has not supplied a suitable version or the manufacturer provides needed features.
Verify Device Manager shows no unknown devices.
Avoid “driver booster” utilities. They can install the wrong package or add unwanted software.
Test Stability Before Calling It Finished
Do not begin aggressive overclocking on day one. First establish a clean baseline.
Run these checks:
Memory: a bootable memory test or a trusted in-Windows memory test.
CPU: a 10–30 minute multicore workload while monitoring temperature.
GPU: a repeatable graphics benchmark or demanding game.
Storage: a health check using the SSD manufacturer’s utility or a reputable SMART reader.
Real use: play two or three different games for at least an hour each.
Watch for crashes, visual artifacts, driver resets, unexpected restarts, or temperatures that continually climb. Record benchmark versions, settings, room temperature, and scores so future changes can be compared fairly.
| 💡 Quick Hack: Save a screenshot of the stable baseline and a copy of the parts invoices in a cloud folder. Warranty claims become far easier when serials, dates, and original behavior are documented. |
Common Mistakes to Avoid
Even the best budget gaming PC build can perform poorly when a small assembly or purchasing error is missed. These five failures cause a large share of first-build problems.
- Overspending on the CPU and starving the GPU
A premium processor paired with an entry-level graphics card often produces a worse gaming experience than a balanced system. Set the resolution first and protect the GPU budget.
- Buying a cheap power supply by wattage alone
A large number on the label does not prove good voltage regulation, protections, component quality, or truthful capacity. Check the exact model, independent reviews, certification listing, and warranty.
- Installing memory in the wrong slots
Two modules placed side by side may run in an unintended configuration. Use the manual’s specified pair—commonly A2 and B2—and confirm dual-channel operation after boot.
- Connecting the monitor to the motherboard
The system may display through integrated graphics while the powerful discrete GPU sits unused. Connect the gaming monitor to the graphics card’s HDMI or DisplayPort output.
- Removing too many dust filters for “better airflow”
An unfiltered intake may lower temperature slightly at first but coats heatsinks quickly. Keep filtered intake fans, clean filters, and maintain more intake than exhaust where practical.
Advanced Tips and Next-Level Hacks
Once the best budget gaming PC build is stable, small refinements can improve acoustics, responsiveness, and long-term value without replacing core hardware.
Tune fan curves before buying more cooling
Default fan profiles can ramp sharply with brief temperature spikes. Use BIOS fan control to create a smoother curve, then test temperatures. A quieter curve often fixes perceived “cooling problems” for free.
Undervolt carefully
A modest GPU undervolt may reduce power, heat, and noise while keeping similar performance. Change small steps, test thoroughly, and keep a known-stable profile. Silicon quality varies; another user’s settings are not guaranteed on your card.
Keep 15–20% of the SSD free
Operating systems, game updates, shader caches, and SSD maintenance work better with free space. Move rarely played games to a secondary drive rather than filling the boot SSD completely.
Upgrade in the correct order
For higher-resolution gaming, the graphics card usually comes first. For CPU-limited high-refresh games or simulation workloads, an AM5 CPU upgrade may help more. Measure utilization and frame-time behavior before buying.
Use the integrated graphics for diagnosis
The Ryzen 5 7600 includes basic integrated graphics. If the discrete GPU produces no display, remove the card and connect the monitor to the motherboard for troubleshooting. This is a diagnostic advantage, not the intended gaming mode.
| Pro-Tip: Keep the spare PCIe slot covers, socket cover, modular cable pouch, and original GPU packaging in one labeled box. They are valuable for upgrades, resale, and safe warranty shipping. |
Troubleshooting Guide
Troubleshooting the best budget gaming PC build should be systematic: remove variables, change one item, and record the result. Randomly reseating everything at once can hide the true cause.
Nothing happens when the power button is pressed
Confirm the wall outlet and power strip work.
Check the PSU switch and input cable.
Recheck the 24-pin and CPU/EPS connectors.
Briefly test the motherboard’s power-switch pins as instructed in its manual to rule out a miswired case button.
Inspect standoff placement and loose screws.
Fans spin, but there is no display
Connect the monitor to the graphics card.
Select the correct monitor input.
Reseat the GPU and its power cable.
Reseat one memory stick in the recommended single-stick slot, then test each module.
Wait for DDR5 memory training.
Read the motherboard diagnostic LEDs or beep code.
Clear CMOS using the manual’s procedure.
Windows crashes or games close unexpectedly
Return BIOS tuning to defaults. Disable EXPO temporarily, remove undervolts, and test memory. Then cleanly reinstall the graphics driver if crashes are isolated to games.
Check Windows Event Viewer and Reliability Monitor for timing clues, but do not assume every logged warning caused the crash. Correlate errors with repeatable tests.
Temperatures are too high
Confirm the cooler’s protective film was removed, the mounting pressure is even, and the fan is connected. Check that intake and exhaust fans face the correct direction and filters are not blocked.
Room temperature matters. Compare CPU and GPU temperature rise above ambient rather than copying a result from a colder room.
The PC is louder than expected
Identify the source by listening near the CPU cooler, GPU, PSU, and case fans without touching moving blades. Adjust fan curves, secure loose panels, and move cables away from fans.
Coil whine is an electrical sound that may vary with frame rate. Limiting menu frame rates or changing load can reduce it, but it is different from fan or bearing noise.
The SSD is missing
Check that the drive is visible in BIOS. Reseat it, review lane-sharing restrictions, and ensure the M.2 socket supports the drive type. A new secondary drive may also need to be initialized in Windows Disk Management; verify the correct disk before formatting.
Maintenance Schedule
| Frequency | Task | Why it matters |
| Monthly | Check free storage and failed updates | Prevents a full boot drive and unnoticed update loops |
| Every 2–3 months | Clean exterior filters | Maintains airflow without opening the system |
| Every 6 months | Inspect interior dust and cable position | Finds blocked heatsinks or a cable drifting toward a fan |
| Every 6–12 months | Review GPU and chipset drivers | Captures useful fixes without chasing every release immediately |
| Annually | Run storage health and memory checks | Provides an early warning before important data is affected |
| Every 2–4 years | Consider thermal-paste service only if temperatures worsen | Avoids unnecessary disassembly when cooling remains normal |
Use compressed air outdoors or in a ventilated area while preventing fans from spinning freely. Do not use a household vacuum directly on components because static and physical contact can create risk.
Back up saved games, documents, photos, and recovery keys. A gaming PC can reinstall games; it cannot recreate personal files.
Frequently Asked Questions
Is $1,000 enough for a good gaming PC in 2026?
Yes, when the tower budget is spent on performance rather than premium cosmetics. Around $1,000 can cover a modern six-core CPU, capable 16GB graphics card, 32GB DDR5, 1TB SSD, safe PSU, and airflow case during normal pricing. Monitor, Windows license, tax, and peripherals can push the complete setup higher.
Is 16GB or 32GB of RAM better for a budget gaming PC?
Sixteen gigabytes can still run many games, but 32GB is the more comfortable target for a new 2026 build. It leaves room for launchers, voice chat, browsers, mods, and background tools. If starting with 16GB, use a matched dual-channel kit and plan the upgrade carefully.
Is the RX 9060 XT 8GB worth buying instead of the 16GB version?
Only when the price gap is large and the goal is mainly 1080p gaming with controlled texture settings. The 16GB model gives more memory headroom for demanding textures, mods, and 1440p use. Compare the exact delivered price; do not pay a huge premium merely for capacity.
Can a beginner build this PC safely?
Yes. The connectors are keyed, the manuals provide diagrams, and the process requires little force. The biggest beginner advantages are a large work surface, careful compatibility checking, patience with front-panel cables, and stopping whenever a component does not seat naturally.
Does this build need liquid cooling?
No. The Ryzen 5 7600 can operate with its appropriate boxed cooler, and an inexpensive tower air cooler is a sensible noise upgrade. Liquid cooling adds cost, pump noise, installation complexity, and more failure points without being necessary for this power level.
Should I buy used PC parts to save money?
Used cases, air coolers, and sometimes CPUs can be good values when inspected and tested. Used graphics cards require more caution: request proof under load, inspect fans and connectors, verify the serial, and understand the remaining warranty. Avoid used power supplies unless their history and exact condition are exceptionally clear.
Conclusion
The best budget gaming PC build is the one that directs money toward visible performance, protects reliability, and leaves room to grow. A Ryzen 5 7600, RX 9060 XT 16GB, 32GB DDR5, 1TB NVMe SSD, good-airflow case, and reputable 650W PSU form a balanced 2026 foundation without luxury-part waste.
Choose the target resolution first, verify every physical and electrical detail, build slowly, and test at stock settings before tuning. Which part of your build are you deciding on right now—the graphics card, the motherboard, or the final budget?
editor's pick
latest video
news via inbox
Nulla turp dis cursus. Integer liberos euismod pretium faucibua