Best Video Editing Apps for Phone 2026:
Phone editing has reached the point where the biggest limitation is often not the device—it is choosing the wrong app for the job. Some editors are brilliant for a 20-second Reel but become frustrating on a ten-minute tutorial, while others offer desktop-style controls that overwhelm a first-time creator.
This guide compares the best video editing apps for phone in 2026, then shows exactly how to choose one, prepare a project, edit efficiently, export cleanly, and recover when the app crashes or the final video looks soft. The goal is not to collect ten apps; it is to find the smallest toolset that reliably produces the videos you actually publish.
What Are the Best Video Editing Apps For Phone?
| The strongest phone video editors in 2026 are CapCut for fast social content, VN for free watermark-free editing, Adobe Premiere for professional iPhone work, LumaFusion for multitrack projects, KineMaster for layers and effects, iMovie for simple Apple editing, and InShot or YouCut for quick everyday exports. |
The “best” choice depends on platform support, project length, device performance, caption needs, export control, licensing, and whether you prefer a free tier, subscription, or one-time purchase. Use the comparison below as a shortlist, then test the top two apps with the same 60-second project before committing.
Quick Picks: Which App Should You Download First?
Best overall for social video: CapCut
Best free editor without a watermark: VN
Best professional iPhone editor: Adobe Premiere
Best for longer multitrack projects: LumaFusion
Best for effects, layers, and green screen: KineMaster
Best simple editor for Apple users: iMovie
Best for fast resizing and social posts: InShot
Best lightweight free option: YouCut
Best AI-heavy workflow: PowerDirector
Best vertical-first editor: Spring
Essential Tools and Materials Breakdown
Mobile editing can start at zero extra cost, but a few inexpensive accessories prevent the problems that waste the most time: unstable footage, bad audio, low battery, interrupted exports, and full storage. The table separates essentials from upgrades so beginners do not overspend.
myflexbots.com • Page
MYFLEXBOTS | APPS & CREATOR TOOLS
| Tool or resource | Practical minimum | Estimated cost | Skill level | Why it matters |
| Smartphone | Recent iPhone or Android phone with stable OS | $0 if already owned | Beginner | Runs the editor; newer chips improve effects, preview speed, and 4K export. |
| Free storage | At least 10–20 GB before a medium project | $0 | Beginner | Apps create caches, proxies, previews, downloads, and export files in addition to the source footage. |
| Editing app | One primary editor plus one backup | $0 to start | Beginner | Avoids app hopping while preserving a fallback for unsupported formats or a failed project. |
| Wired earbuds or headphones | Any reliable pair | $0–$40 | Beginner | Reveals hiss, clipping, background noise, rough cuts, and music that is too loud. |
| Charger or power bank | Fast charger appropriate for the phone | $15–$60 | Beginner | Long exports can drain the battery and trigger low-power performance limits. |
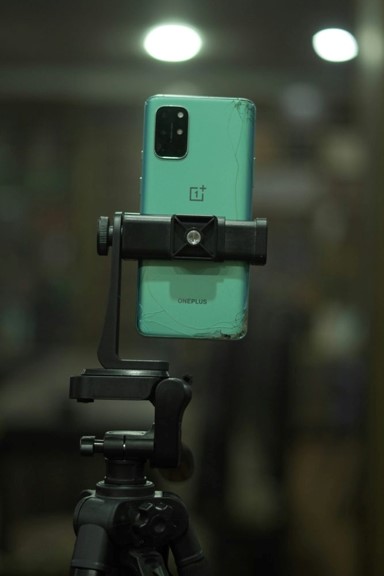
| Phone tripod or clamp | Stable mount with adjustable angle | $15–$50 | Beginner | Reduces stabilization work and makes talking-head footage easier to cut. |
| External microphone | Lavalier, USB-C, or Lightning mic | $20–$120 | Intermediate | Improves clarity more than most filters, transitions, or premium effect packs. |
| Cloud or external backup | Drive, iCloud, USB-C storage, or computer transfer | $0–$10/month | Beginner | Protects source clips and finished masters from app deletion, device failure, or storage cleanup. |
| Premium plan or paid editor | Only after a real limit appears | Varies by region | Intermediate | May add assets, cloud sync, AI credits, advanced effects, or watermark removal. |
| 💡 Quick Hack: Before paying for an app, edit the same 60-second clip in two free versions. Include a cut, caption, music track, speed change, overlay, color adjustment, and final export. The test exposes workflow friction far better than a feature checklist. |
The 10 Best Mobile Video Editors Compared
The shortlist below focuses on editors that solve distinct jobs rather than ten nearly identical choices. When comparing the best video editing apps for phone, prioritize the app that removes your main bottleneck: speed, timeline precision, captions, advanced layers, cross-device work, or simplicity.
myflexbots.com • Page
MYFLEXBOTS | APPS & CREATOR TOOLS
| App | Platforms | Cost model | Best for | Standout strengths | Main trade-off |
| CapCut | iOS, Android | Free + Pro | Social video and fast creation | Templates, captions, background removal, keyframes, effects | Some desirable assets and AI tools require Pro; interface changes often |
| VN | iOS, Android | Free + optional purchases | Watermark-free editing | Multitrack timeline, keyframes, auto captions, 4K/60 export | Fewer guided templates and ecosystem tools than CapCut |
| Adobe Premiere | iPhone | Free core + AI credits/desktop plan | Professional iPhone editing | Frame-accurate timeline, captions, 4K watermark-free export, desktop handoff | No Android version available as of July 2026 |
| LumaFusion | iOS, Android, ChromeOS | Paid purchase + optional add-ons | Long-form and multitrack work | Professional timeline, audio control, effects, project organization | Costs more upfront and takes longer to learn |
| KineMaster | iOS, Android | Free + Premium | Layers, effects, chroma key | Unlimited layers, keyframes, color grading, speed control | Busy interface; premium is more comfortable for regular work |
| PowerDirector | iOS, Android | Free + subscription | AI-assisted production | Auto editing, captions, effects, generation, enhancement | Feature depth and subscriptions can feel heavy for simple jobs |
| InShot | iOS, Android | Free + Pro | Fast social resizing | Easy trims, canvas tools, speed, transitions, 4K/60 export | Less comfortable for complex long timelines |
| iMovie | iPhone, iPad | Free | Simple Apple workflow | Storyboards, Magic Movie, clean interface, 4K support | Limited tracks and advanced control |
| YouCut | iOS, Android | Free + optional purchases | Lightweight everyday edits | No watermark, trimming, music, captions, simple timeline | Not built for deep compositing or complex audio |
| Spring | iOS, Android | Free | Vertical short-form video | Vertical-first interface and quick mobile workflow | Narrower feature set than full KineMaster |
- CapCut — Best Overall for Fast Social Video
CapCut is the most practical first download for creators producing TikTok videos, Reels, Shorts, product clips, talking-head posts, and trend-driven edits. It combines a touch-friendly timeline with templates, automatic captions, keyframes, background removal, speed tools, effects, and direct social formats.
Its biggest advantage is speed. A beginner can get a polished first cut quickly, while an experienced editor can ignore the templates and build a manual timeline. CapCut is especially useful when captions, cutout effects, animated text, and frequent platform-specific resizing are part of the normal workload.
Choose CapCut when turnaround matters more than strict project portability. Skip it when you need a conservative interface that stays unchanged for months, a one-time-purchase model, or a complex long-form project with extensive media management.
- VN — Best Free Editor Without a Watermark
VN Video Editor is a strong choice for creators who want precise manual editing without starting every project inside a template system. Its official listing highlights a multitrack timeline, keyframe control, auto captions, text-to-speech tools, and high-resolution exports without a forced watermark.
VN feels closer to a compact traditional editor than a social effects app. That makes it good for tutorials, vlogs, interviews, school projects, travel videos, and brand content where clean cuts and controlled pacing matter more than the newest visual trend.
Choose VN when budget is tight but timeline control matters. Its learning curve is still reasonable, although creators who depend on massive template libraries or integrated stock ecosystems may prefer CapCut or PowerDirector.
- Adobe Premiere — Best Professional Editor on iPhone
Adobe Premiere on iPhone is a free standalone mobile editor built around a resizable multitrack timeline, precise trimming, automatic captions, assistive AI, creative assets, 4K exports, and a workflow that can continue in desktop Premiere for paid subscribers.
The app is compelling for creators already working in Adobe tools because mobile footage can become the first stage of a larger production instead of a dead-end social edit. Adobe also positions core editing and watermark-free 4K exports as free, while generative Firefly features use credits.
The key limitation is platform support: Adobe states that the new Premiere mobile app is available on iPhone, with Android still in development as of July 2026. Adobe Premiere Rush is no longer a sensible recommendation for new users because Adobe stopped new downloads in 2025 and scheduled full discontinuation for September 2026.
- LumaFusion — Best for Long-Form Multitrack Projects
LumaFusion is the closest option on this list to a purpose-built professional editing environment. It supports structured multitrack editing, markers, notes, insert and overwrite workflows, linked clips, track controls, effects, titles, and detailed audio work.
This is the better choice for documentaries, interviews, educational videos, event recaps, client deliverables, and YouTube projects where the timeline may contain many clips and audio elements. The paid purchase can also be more predictable than a recurring subscription for creators who do not need a constantly refreshed effects library.
Expect a learning period. LumaFusion rewards organization and deliberate editing, but it is unnecessary for a creator who mostly trims one clip, adds a caption, and publishes within ten minutes.
- KineMaster — Best for Layers, Keyframes, and Green Screen
KineMaster is built for creators who think in layers. Its official feature page emphasizes a multilayer timeline, frame-level keyframes, color grading, speed control, chroma key, blending modes, and other tools usually associated with more advanced editors.
It is particularly effective for promotional edits, lyric videos, gameplay overlays, tutorials with screen inserts, animated product graphics, and green-screen compositions. KineMaster also offers cloud project saving and sharing, which can help when work moves between devices or collaborators.
The interface is denser than InShot or iMovie, and regular users may prefer the premium experience. Still, it offers one of the best balances between deep mobile controls and a workflow that remains understandable on a phone screen.
- PowerDirector — Best for AI-Assisted Editing
PowerDirector targets creators who want AI to produce a useful first pass or handle tedious tasks. CyberLink promotes auto editing, text-based workflows, captions, voice tools, enhancement, background work, generated media, and templates designed for Shorts, Reels, and TikTok.
That breadth is valuable for high-volume creators and small teams producing many variations from the same footage. It can be excessive for simple trimming, however, and the growing collection of AI tools makes it important to understand which features are local, cloud-based, credit-limited, or tied to a subscription.
- InShot — Best for Quick Resizing and Everyday Posts
InShot is designed around fast trimming, canvas resizing, music, voiceovers, filters, text, stickers, transitions, speed changes, and direct social sharing. Its current App Store listing supports exports up to 4K at 60 frames per second on compatible devices.
Use it when the job is straightforward: turn several phone clips into a clean post, fit horizontal footage inside a vertical canvas, add a title, and export. The timeline becomes less comfortable as projects grow complicated, so long interviews or dense layer work are better handled in VN, KineMaster, Premiere, or LumaFusion.
- iMovie — Best Simple Editor for Apple Users
Apple iMovie remains useful because it is free, stable, easy to understand, and integrated with iPhone and iPad. Magic Movie and Storyboards guide beginners, while manual projects support trimming, titles, music, transitions, picture-in-picture, split screen, speed changes, and 4K output on compatible devices.
iMovie is ideal for family videos, school assignments, simple YouTube uploads, event recaps, and first-time editors who value clarity over effects. Its limitation is not quality; it is control. Creators quickly outgrow it when they need many tracks, advanced captions, detailed color work, or complex motion graphics.
- YouCut — Best Lightweight Free Option
YouCut offers a straightforward timeline, trimming, merging, music, effects, captions, text-to-speech, and social tools without forcing a watermark on standard edits. Its lighter feel is useful on midrange phones or for users who want fewer menus.
Choose YouCut for casual videos, basic YouTube edits, status videos, slideshows, and simple social posts. It is not intended to replace a deep compositor, but that restraint is exactly why many beginners can finish projects instead of getting lost in settings.
- Spring — Best Vertical-First Short-Form Editor
Spring comes from KineMaster and uses a vertical editing experience designed for short-form work on phones and tablets. It is a sensible alternative when the full KineMaster interface feels too dense but the creator still wants more control than a one-tap template.
Spring belongs on the shortlist for vertical creators who publish frequently and want an interface aligned with the final viewing format. For horizontal long-form projects or heavy compositing, use the full KineMaster app or another multitrack editor.
| Pro-Tip: Do not keep every app installed “just in case.” Mobile editors can consume gigabytes through caches, downloaded templates, fonts, effects, proxies, and duplicate exports. Keep one main editor, one fallback, and a simple utility for compression or format conversion. |
How to Choose the Right App in Seven Decisions
A reliable way to identify the best video editing apps for phone is to decide what the finished video must do before comparing feature lists. Work through these seven decisions in order.
Decision 1: Match the app to the final platform
A Shorts or Reels workflow needs vertical previews, fast captions, safe-zone awareness, speed, and quick resizing. A ten-minute YouTube tutorial needs timeline precision, media organization, clean audio, project recovery, and reliable exports. A client commercial may require brand fonts, reusable graphics, controlled color, and several review versions.
Decision 2: Confirm platform and device support
Check the exact phone, operating-system version, free storage, and app-store availability. Do not assume an app has identical features on iPhone and Android. LumaFusion track counts and capabilities can differ by platform, while the new Adobe Premiere mobile app is currently iPhone-only.
Decision 3: Choose a pricing model you can sustain
Free tier: Best for testing and occasional use, but verify watermark, export, asset, and AI restrictions.
Subscription: Useful when new templates, stock assets, cloud tools, or AI features save measurable time every month.
One-time purchase: Attractive for long-term editing when the core toolset is stable and recurring assets are not essential.
Decision 4: Separate core editing from novelty features
Core features are reliable trimming, splitting, ripple behavior, undo history, audio control, captions, project saving, and predictable export. Novelty features are useful only after those basics work. A dazzling AI effect cannot compensate for a timeline that makes every cut slow.
Decision 5: Test export control
Confirm the app can export the required aspect ratio, resolution, frame rate, codec, and quality without a watermark you cannot accept. For YouTube, MP4 with H.264 video and AAC audio remains a dependable general target; Google publishes detailed YouTube recommended upload encoding settings for creators who need exact specifications.
Decision 6: Evaluate the audio workflow
Good mobile editing is often decided by audio, not picture quality. Look for easy clip gain, fades, voice enhancement, noise control, waveform visibility, ducking, separate voiceover recording, and the ability to move music precisely. Test with headphones, not the phone speaker.
Decision 7: Check project recovery and portability
Duplicate a project, close the app, restart the phone, reopen it, and make another export. Then confirm whether the project depends on files remaining in the camera roll. A professional workflow needs a recovery plan before the first crash, not after it.
| 💡 Quick Hack: Take screenshots of the project settings and export screen for every recurring format. A small folder labeled “Reel 1080×1920,” “YouTube 4K,” and “Client Review” prevents guesswork when deadlines are tight. |
Step-by-Step Phone Video Editing Workflow
Once you have shortlisted the best video editing apps for phone, use the same disciplined workflow in any editor. The button names will differ, but the order below reduces rework, export failures, and inconsistent quality.
Write the delivery specification before importing
Platform and audience: YouTube, Shorts, Instagram, TikTok, website, presentation, client review, or private sharing.
Aspect ratio: 16:9 horizontal, 9:16 vertical, 1:1 square, or 4:5 portrait.
Target length: Set a maximum rather than “as long as needed.”
Resolution and frame rate: Usually match the source and platform unless there is a deliberate reason to convert.
Audio rules: Original speech, music license, language, captions, and loudness expectations.
Review process: One final export or multiple versions with approval rounds.
This specification controls every later decision. Editing a horizontal master and deciding at the end that it must become vertical often forces a second edit because faces, text, product shots, and screen recordings no longer fit.
Prepare the phone
- Update the editing app only if you have time to test it; do not update immediately before a deadline.
- Restart the phone to clear temporary memory and stalled background processes.
- Free at least 10–20 GB for a normal project, and more for long 4K footage.
- Connect to power or begin with a high battery level.
- Turn on Do Not Disturb so calls and notifications do not interrupt recording or concentrated editing.
- Download required fonts, music, templates, and assets before traveling or losing Wi-Fi.
Apple users can follow the official manage storage on iPhone guide when the editor reports insufficient space.
Organize footage before building the timeline
Delete obvious mistakes only after confirming a backup. Then create an album or folder for the project and rename external audio, logos, screenshots, and downloaded media where the device allows it. Separate A-roll (main story or speech) from B-roll (supporting shots), music, graphics, and exports.
| 💡 Quick Hack: Record a two-second shot of your hand covering the lens between scenes. The black frames are easy to spot in the media browser and act as visual dividers when dozens of clips look similar. |
Create the project with the final aspect ratio
Set the canvas before detailed editing. Import one representative clip first and confirm that the app interprets its orientation, color, and frame rate correctly. If the editor offers a project frame-rate choice, match the dominant footage unless the delivery specification requires something else.
Build the rough cut without effects
Place the main speaking, demonstration, or story clips in order. Remove false starts, long pauses, repeated points, camera setup, and unusable sections. Do not spend time on transitions, color, or animated text until the story works with plain cuts.
Watch the rough cut at normal speed, then again without sound. The silent pass exposes dead visual stretches; the audio-only pass exposes repetition, abrupt sentences, and missing context.
Tighten pacing and add B-roll
Use B-roll to explain, prove, or hide a necessary cut—not merely to decorate. A product close-up should appear when the product is discussed. A screen recording should show the exact step being described. A reaction shot should add meaning, not delay the point.
For short-form work, remove setup language aggressively. Replace “Today I am going to show you…” with the result, problem, or surprise. For long-form tutorials, preserve enough breathing room that viewers can follow the procedure.
Clean and balance the audio
- Set speech first. Normalize or raise quiet dialogue carefully, avoiding clipping.
- Apply noise reduction lightly; aggressive settings create metallic voices.
- Cut or fade handling noise, coughs, taps, and abrupt room-tone changes.
- Add music under the voice and lower it until every word remains effortless to understand.
- Use short fades at music starts, stops, and edits.
- Check through headphones and the phone speaker because audiences use both.
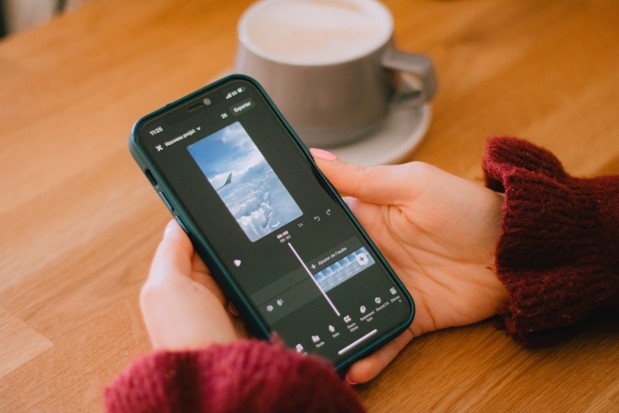
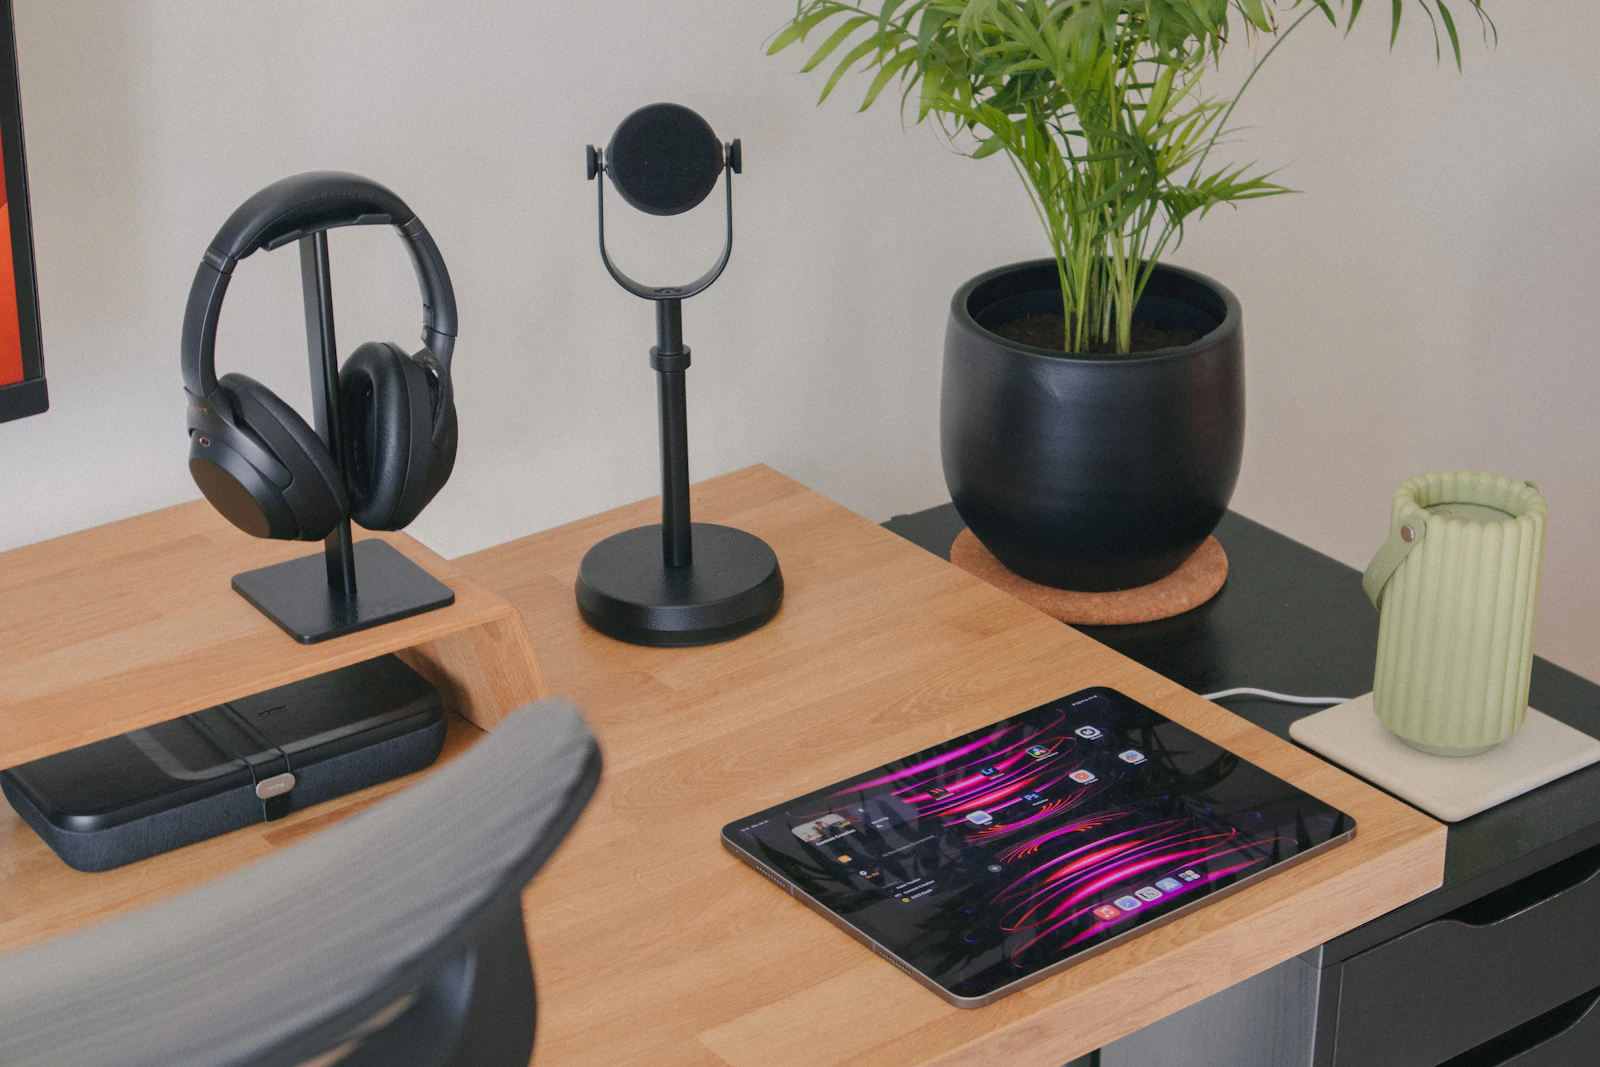
Caption: Audio monitoring is not optional: headphones reveal clipping, hiss, harsh noise reduction, and music that masks speech.
Add captions and text with a readable system
Generate automatic captions only after the dialogue edit is stable. Correct names, numbers, brands, technical terms, and punctuation manually. Break captions at natural phrases, keep them away from platform buttons, and use strong contrast against changing backgrounds.
Use one primary font and one emphasis style.
Keep headline text short enough to read before the shot changes.
Avoid placing essential text at the extreme top or bottom of vertical video.
Use animation to direct attention, not to make every word move.
| Pro-Tip: Create three reusable text presets: headline, caption, and small source label. Consistent presets make a phone-edited channel look more professional than dozens of random fonts and animations. |
Correct color before adding a heavy look
Start with exposure, white balance, contrast, highlights, shadows, and saturation. Match adjacent clips so skin, walls, products, and skies do not jump in color. Apply filters or LUT-style looks only after the footage is balanced, and reduce the strength until the look supports the story instead of announcing itself.
Add transitions and motion deliberately
Most professional edits rely primarily on straight cuts, simple dissolves, or motivated motion transitions. Use a transition when time, place, viewpoint, or energy changes. Repeating a different transition between every clip makes the viewer notice the software instead of the content.
Export a short test before the final render
Export a 10–20 second section containing captions, movement, music, effects, and a difficult color shot. Watch it outside the editor. This catches missing fonts, soft text, dropped frames, strange audio, unsupported effects, and quality settings before a long export consumes battery and storage.
Export the master and a delivery copy
The master should preserve the best practical quality for future reuse. The delivery copy may be smaller or platform-specific. For a common YouTube workflow, MP4, H.264, and AAC are safe targets, but creators should consult the official YouTube recommended upload encoding settings when precise bitrate, frame-rate, or HDR decisions matter.
Match the original frame rate unless deliberate conversion is required.
Use 1080p for most social video; choose 4K when the source, phone, app, storage, and platform justify it.
Avoid repeated export-and-reimport cycles because each lossy generation can reduce quality.
Keep the finished file until the platform has processed and displayed the upload correctly.
Perform a final quality-control pass
- Watch the entire exported file from beginning to end, not only the timeline preview.
- Confirm the first frame, final frame, title spelling, captions, logos, links, and calls to action.
- Listen once with headphones and once through the phone speaker.
- Check the video in the destination app’s upload preview for cropping and safe-zone problems.
- Verify that no private notifications, account details, faces, addresses, or client information appear accidentally.
| 💡 Quick Hack: Save a five-item export checklist as the phone’s lock-screen note or pinned task: spelling, captions, audio, crop, privacy. The checklist takes under a minute and prevents the most embarrassing publishing mistakes. |
Common Mistakes to Avoid
Beginners often judge the best video editing apps for phone by effects and ratings, then discover the real problems only after building a project. Avoid these errors before they become part of the workflow.
- Choosing an app because a creator used one viral effect
A viral effect does not prove the app is efficient for your project length, device, caption language, export format, or budget. Test a complete mini-project instead of one feature.
- Editing before locking the aspect ratio
Late reframing can crop faces, screen recordings, captions, and products. Choose the destination and canvas first, then compose every layer for that frame.
- Using copyrighted music without checking rights
A track available inside one app is not automatically cleared for every platform, paid advertisement, client, country, or commercial use. Read the license and preserve proof.
- Applying aggressive noise reduction, sharpening, and filters
Overprocessing creates metallic voices, halos, waxy skin, crushed shadows, and unstable color. Make small changes and review the exported file on more than one screen.
- Building the final cut from downloaded social-media copies
Reposted or messaged clips may already be compressed. Whenever possible, edit from original camera files or the highest-quality transfer.
- Keeping every source clip on the timeline
More footage does not make a better video. Cut repeated points, weak angles, technical mistakes, and anything that does not advance the viewer’s understanding or emotion.
- Deleting sources immediately after export
A single export can contain an unnoticed spelling mistake, missing clip, audio glitch, or platform crop problem. Keep the project and originals until delivery is approved and backed up.
Advanced Tips and Next-Level Mobile Editing Hacks
Power users get more from the best video editing apps for phone by designing repeatable systems rather than editing every video from zero. These techniques improve speed without making the result look automated.
Create a master template: Build a clean project with brand fonts, colors, logo placement, caption style, audio levels, intro/outro options, and export notes. Duplicate it for each new video.
Use an adjustment layer or shared effect when available: Apply a common color or effect across several clips, then refine individual shots only where necessary. This keeps the look consistent and reduces repetitive work.
Edit dialogue before syncing B-roll and music: A stable spoken structure prevents hours of repositioning overlays after every sentence is shortened.
Use markers as a shot list: Mark hook, proof, example, CTA, sponsor, chapter break, and missing B-roll. Markers turn a long timeline into visible production tasks.
Create two masters for reusable content: Export a clean master without captions or platform logos and a publish version with text. The clean copy can be reframed, translated, repurposed, or licensed later.
Batch similar tasks: Do all caption corrections together, all audio fades together, and all color matching together. Constantly switching task types slows editing and increases inconsistency.
Record room tone: Capture ten seconds of silence in the recording location. Use it to smooth awkward audio cuts instead of leaving sudden digital silence.
Use screen recordings as proof, not wallpaper: Trim screen captures to the exact taps and results needed. Zoom or highlight only the critical control so viewers are never searching the screen.
| 💡 Quick Hack: For recurring talking-head videos, record one clean “look at camera” pause before and after each paragraph. Those neutral frames make cuts, punch-ins, captions, and B-roll transitions much easier to hide. |
Troubleshooting and Long-Term Maintenance Guide
Mobile editing problems usually come from storage pressure, heat, unsupported media, unstable app updates, damaged source files, excessive layers, or export settings that exceed the phone’s practical limits. Diagnose the simplest cause first.
The app crashes when opening the project
Restart the phone and close other demanding apps.
Free storage; a project may need several times the final export size for caches and temporary files.
Duplicate the project before removing any layer.
Disable the newest effect, AI tool, high-resolution overlay, or third-party font.
Open an earlier autosave or cloud copy if the app provides one.
The export freezes or stops at the same percentage
Note the percentage and inspect the corresponding point in the timeline.
Replace or transcode the clip, image, transition, or audio file located there.
Export a shorter range around the problem to confirm the cause.
Lower the export resolution or frame rate only after testing the suspect asset.
Keep the phone cool, connected to power, and awake if the app requires it.
The final video looks blurry
Confirm the source is original rather than a compressed messaging-app copy.
Check project canvas, export resolution, bitrate or quality slider, and platform processing status.
Do not upscale 720p footage and expect true 4K detail.
Avoid zooming far beyond the source resolution.
Upload over a reliable connection and wait for the platform’s HD processing to finish.
Audio drifts out of sync
Use a project frame rate that matches the dominant footage.
Convert problematic variable-frame-rate screen recordings before a long edit when possible.
Split and realign drifting external audio at natural pauses.
Avoid repeatedly changing speed on linked audio and video without checking sync.
Export a test section before rendering the complete project.
Captions are wrong or disappear behind interface buttons
Regenerate captions after the dialogue edit is final.
Correct proper nouns and numbers manually.
Move captions into a safe central zone for vertical video.
Test the upload preview inside the destination platform.
Burn in only when the publishing workflow requires permanent captions; otherwise consider platform captions for accessibility and edits.
Colors change after export
Check whether the source is HDR while the project or platform expects standard dynamic range.
Avoid mixing HDR and SDR clips without a deliberate conversion workflow.
Review the export in another player and device before changing the grade.
Use conservative saturation and highlight settings on phone screens, which may display more vividly than other devices.
The project uses too much storage
Delete unused downloaded templates, cached media, and duplicate exports from inside the app where possible.
Back up completed masters and source footage before clearing project files.
Remove failed exports and old review versions.
Keep only the active project and one recent backup on the phone.
Monthly Maintenance Checklist
Back up completed projects and clean masters.
Delete old caches and unused downloaded assets from the app.
Review subscriptions and cancel tools that did not save time that month.
Update the app after checking recent release notes and preserving active projects.
Test one standard export after major operating-system or app updates.
Keep proof of licenses for music, stock clips, fonts, and templates used commercially.
| Pro-Tip: Never update the phone OS, editing app, and active project workflow on the same deadline day. Change one variable at a time, make a test export, and preserve a duplicate project before major updates. |
Frequently Asked Questions
Which of the best video editing apps for phone is best overall?
CapCut is the strongest general recommendation for fast social content because it combines a manageable timeline with captions, templates, effects, background tools, and direct vertical formats. VN is better for creators who prefer a cleaner manual workflow without a forced watermark, while LumaFusion or Premiere suits more structured professional work.
What is the best free video editor without a watermark?
VN is one of the strongest free watermark-free options and includes a multitrack timeline, keyframes, captions, and high-resolution export. YouCut is a lighter alternative for basic edits. Free policies can change, so verify the export screen before building an important project.
Which video editor is best for a low-end Android phone?
Start with YouCut or InShot, use 1080p rather than 4K, limit stacked effects, close background apps, and maintain generous free storage. VN can also work well, but performance depends on footage format, duration, layers, and the specific phone—not only the app name.
Is Adobe Premiere available on Android phones?
The new Adobe Premiere mobile app is available on iPhone as of July 2026. Adobe says an Android version is in development, but it is not currently available. Premiere Rush is being discontinued and should not be the foundation of a new Android workflow.
Can a phone edit 4K video?
Yes, many recent phones and several apps support 4K editing and export. The practical limits are heat, storage, battery, codec support, effect complexity, and export time. For social content, a clean 1080p export is often faster and visually sufficient.
How much free storage is needed for phone video editing?
Keep at least 10–20 GB free for a moderate project and substantially more for long 4K footage. The editor may store originals, proxies, previews, cached effects, downloaded assets, project data, and the finished export at the same time.
Can a phone replace desktop video editing software?
A phone can replace a desktop for short-form content, many tutorials, interviews, travel edits, school projects, and some client work. Desktop software remains better for very long timelines, advanced audio mixing, heavy effects, large media libraries, detailed color management, collaboration, and complex delivery requirements.
Conclusion: Pick One Editor and Build a Repeatable System
The best video editing apps for phone are not defined by the longest feature list. The right app is the one that runs reliably on your device, matches your publishing format, keeps audio and captions under control, exports without surprises, and lets you repeat the process without rebuilding everything each week.
Start with CapCut for speed, VN for a capable free manual editor, Premiere for a professional iPhone workflow, LumaFusion for longer multitrack projects, KineMaster for layered effects, or iMovie, InShot, YouCut, PowerDirector, and Spring when their specific strengths match the job. Then create a template, keep a backup, test exports early, and improve the workflow one bottleneck at a time.
editor's pick
latest video
news via inbox
Nulla turp dis cursus. Integer liberos euismod pretium faucibua