How to Set Up Two Factor Authentication:Step-by-Step Guide
A stolen password should not be enough to hand over your email, social profiles, cloud files, or business dashboard. Learning how to set up two factor authentication adds a second proof of identity, so a password leak is far less likely to become a complete account takeover.
This guide shows you which verification method to choose, how to configure it without locking yourself out, how to protect recovery codes, and how to fix the problems that appear after a phone change. The process is practical, mostly free, and usually takes less than fifteen minutes per important account.
Caption: Two-factor authentication adds a second barrier between a stolen password and your private account data. Photo: FlyD on Unsplash

What Is the Fastest Safe Way to Enable 2FA?
| Featured snippet answer: To learn how to set up two factor authentication, open the account’s Security or Sign-In settings, choose an authenticator app, passkey, or security key, register the method, enter the test code, save recovery codes offline, add a backup option, then sign out and test a fresh login. |
Why a Second Factor Changes the Risk
A password is something you know. A second factor is usually something you have, such as a phone, authenticator app, passkey, or hardware key, or something you are, such as a fingerprint used to unlock a trusted device. The attacker now needs more than a copied password.
The strongest practical choices are phishing-resistant methods built around passkeys or FIDO security keys. CISA multifactor authentication guidance recommends moving toward FIDO-based authentication because a fake login page cannot simply collect and replay the credential.
Authenticator-app codes are still a strong, widely supported upgrade for ordinary accounts, but a convincing phishing page can ask you to type the code. SMS is better than using only a password, yet it depends on the security of your phone number and mobile account. Choose the strongest method the service supports, then keep a separate recovery path.
Essential Tools, Costs, and Skill Levels
The easiest way to approach this setup is to prepare the recovery pieces before touching the security switch. Most people can complete the process with tools they already own, while higher-risk accounts may justify two physical security keys.
| Tool or Material | Why You Need It | Estimated Cost | Skill Level | Key Caution |
| Current account password | Confirms you are authorized to change security settings | $0 | Beginner | Reset it first if you do not know it |
| Updated phone or tablet | Runs an authenticator app, receives prompts, or stores passkeys | $0 if owned | Beginner | Install OS updates and use a screen lock |
| Authenticator app | Generates time-based codes even without mobile service | $0–$40/year | Beginner | Choose a reputable app with documented backup or export |
| Password manager or offline record | Stores backup codes and account notes | $0–$60/year | Beginner | Protect the vault with its own strong security |
| Backup phone number | Provides a recovery route when supported | Normal carrier cost | Beginner | Do not make SMS your only recovery method |
| Two FIDO security keys | Provides phishing-resistant sign-in and a spare | $50–$160 total | Beginner–Intermediate | Confirm USB/NFC compatibility before buying |
| Second device for testing | Checks that the new method works before you close the session | $0 if borrowed or owned | Beginner | Use a private browser window or trusted device |
Prices vary by region, subscription plan, and hardware model. You do not need to buy a security key for every low-risk account, but email, password-manager, financial, administrator, and business-owner accounts deserve the strongest option available.
Secure the Account’s Recovery Information First
Before changing the login method, confirm that the recovery email address and phone number belong to you and are still accessible. Remove old work addresses, disconnected numbers, and devices you no longer control.
This is the safest starting point for how to set up two factor authentication because recovery settings often decide whether a lost phone becomes a five-minute inconvenience or a week-long support case. Change the password first if it is reused, weak, or exposed, then sign out unknown sessions.
Check the recovery email: Open it in a separate tab and verify that you can receive a message.
Check the phone number: Confirm the country code, final digits, and carrier access.
Review active sessions: Sign out devices, browsers, and locations you do not recognize.
Record the account owner: For business accounts, document who controls recovery and who can approve changes.
| 💡 Quick Hack: Do not begin with your least important account. Start with your primary email because it resets many other services, then protect your password manager, cloud storage, banking, social media, and website administrator accounts. |
Choose the Best Verification Method
The best method is not simply the one with the most technical name. It must resist the threats you face, work on your devices, and include a recovery path you will actually maintain.
| Method | Security | Convenience | Main Weakness | Best Use |
| Passkey | Excellent; phishing-resistant when implemented correctly | Fast biometric or device-PIN sign-in | Device ecosystem and account recovery must be understood | Most users when the service supports it |
| FIDO security key | Excellent; phishing-resistant | Tap, insert, or use NFC | Key can be lost; buy and register a spare | Email, admin, financial, developer, and high-risk accounts |
| Authenticator app (TOTP) | High for common attacks; not fully phishing-resistant | Open app and type rotating code | Phone migration and backup require planning | Best widely supported default |
| Push approval with number matching | High when prompts show context and numbers | Approve a legitimate prompt | Unexpected prompts can create fatigue | Work accounts and supported consumer services |
| SMS or voice code | Moderate; better than password-only | Simple and widely available | Phone-number takeover, delivery failures, travel issues | Fallback when stronger methods are unavailable |
| Email code | Depends on the security of the email account | Easy | Circular recovery if the email itself is compromised | Low-risk backup, not the main protection for email |
For technical background, the NIST Digital Identity Guidelines explain authenticator types, assurance levels, and phishing resistance. For a normal personal account, use a passkey or security key when offered; otherwise use an authenticator app and keep SMS only as a fallback.
| Pro-Tip: Do not confuse “two steps” with “two factors.” A password plus a security question is still two knowledge checks. A password plus a phone-based code combines something you know with something you have. |
Install and Prepare an Authenticator App
Choose an authenticator from a reputable provider, install it from the official Apple App Store or Google Play Store, and protect the phone with a PIN, password, fingerprint, or face unlock. Avoid copied apps, unofficial download sites, and apps that demand unrelated permissions.
Before adding accounts, review whether the app offers encrypted cloud backup, device transfer, manual export, or no backup at all. No single approach is perfect: cloud sync improves recovery, while an offline-only vault reduces cloud exposure but demands a careful migration plan.
Turn on automatic date and time on the phone; TOTP codes depend on accurate time.
Name accounts clearly when the app permits labels, especially when you manage several clients or websites.
Enable the app’s own lock or privacy screen when available.
Do not photograph QR codes or leave setup secrets in Downloads, email, chat, or cloud photo backup.
| 💡 Quick Hack: Create a temporary checklist with one row per account: account name, method, backup method, recovery-code location, and test date. Never place the actual password or one-time secret in the checklist. |
Open the Account’s Security Settings
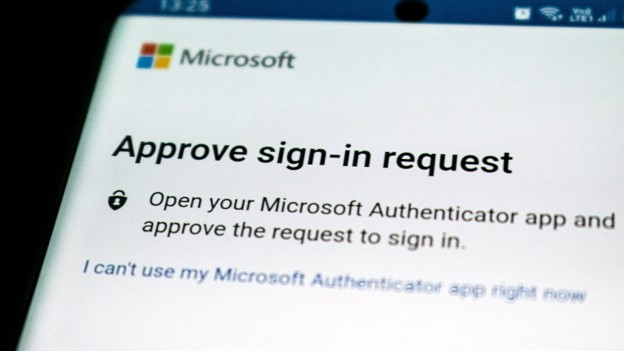
Sign in from a trusted computer or your normal device. Look for Security, Sign-In & Security, Password and Security, Login Security, Two-Step Verification, Two-Factor Authentication, or Multi-Factor Authentication.
Do not follow a setup link from an unexpected email or message. Type the service address yourself, use the official app, or open the security page from the account menu. A phishing site can copy the entire enrollment screen and steal the password and temporary code.
Keep the current session open until the new method has been tested.
Confirm the domain name before entering a password or verification code.
Read every option before choosing a default method; some services quietly select SMS first.
For business accounts, confirm whether an administrator must enforce or approve the change.
Register the App, Passkey, or Security Key
The exact screens vary, but the core sequence is the same whenever you learn how to set up two factor authentication on a new service: select the method, prove you control it, complete a test challenge, and confirm the method is active.
Using an Authenticator App
- Choose Authenticator app, Authentication app, or TOTP in the security menu.
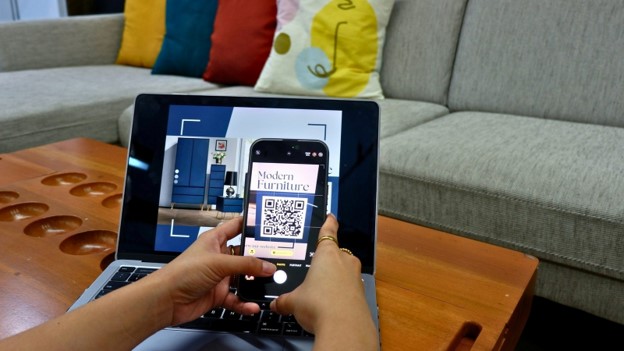
- The website displays a QR code and may also show a manual setup key.
- In the authenticator app, tap Add account or the plus sign, then choose Scan QR code.
- Scan the code once. The app creates a six-digit code that normally changes every 30 seconds.
- Enter the current code on the website before it expires.
- Wait for the confirmation message, then leave the security settings open for the recovery steps.
Treat the QR code and manual setup key like a password. Anyone who copies that secret can generate the same codes. If the code was exposed during setup, cancel the enrollment and create a new one instead of hoping it was not saved.
Using a Passkey
- Choose Create a passkey or Add passkey in the account security settings.
- Select the phone, computer, password manager, or security key where the passkey will be stored.
- Approve the registration using the device PIN, fingerprint, or face verification.
- Name the passkey when the service allows labels, such as “Personal iPhone” or “Office laptop.”
- Add a second passkey or recovery method on a separate device when supported.
A passkey is not merely a short code. The private credential remains on the trusted device or credential provider, while the website stores a public counterpart. The site should never need your fingerprint data; biometrics normally unlock the credential locally.
Using a Hardware Security Key
- Choose Security key, FIDO key, or Hardware key.
- Insert the USB key, tap it with NFC, or connect it using the supported method.
- Touch the key or enter its PIN if prompted.
- Give the key a clear name and register a second key before ending the session.
- Store the spare somewhere separate from the everyday key.
| Pro-Tip: Register two hardware keys during the same session. Keep one on your keyring or at your desk and the second in a secure off-site or locked location. A spare key is cheaper than an emergency account-recovery failure. |
Save Recovery Codes Correctly
Recovery codes are single-use emergency passwords. Generate them immediately, download or print them, and store them somewhere you can reach without the phone used for authentication.
Good option: Store the codes in an encrypted password-manager secure note with a strong vault password and its own recovery plan.
Stronger separation: Print the codes and place them in a locked document box or safe.
Business option: Store a sealed copy in an approved company credential vault with access logging.
Bad option: A screenshot in the phone gallery, a draft email, a chat message, or a plain-text file on the desktop.
Cross out or delete a recovery code after using it, then generate a new set when the supply becomes low or when you suspect the file was exposed. Readers who accidentally delete the only saved copy can review how to recover deleted files safely, but prevention is far more reliable than emergency recovery.
Add a Backup Method Without Weakening the Account
A backup method should rescue you without becoming the easiest path for an attacker. Prefer a second security key, a second passkey on another trusted device, recovery codes, or an administrator-assisted recovery process. Use a backup phone number only when the service requires it or stronger options are unavailable.
Do not add a relative’s number, shared office phone, or former employee’s address without permission and documentation. For business accounts, recovery ownership should belong to the company, not to one employee’s private phone number.
| 💡 Quick Hack: For family or small-business accounts, seal the recovery instructions rather than sharing daily access. The envelope or vault entry should explain the service, owner, recovery-code location, and emergency contact without exposing the normal password. |
Test the New Login Before You Trust It
Open a private browser window or use another trusted device. Sign in with the password, complete the second-factor prompt, and confirm that the account opens normally. Then test one backup route without consuming every recovery code.
Confirm the authenticator entry has a clear account name and correct username.
Confirm the push notification identifies the service and shows expected location or number matching when available.
Confirm both hardware keys work before storing the spare.
Confirm recovery codes are readable and stored outside the phone.
Confirm old devices and old phone numbers are removed only after the new method works.
Finally, sign out of one test session and sign back in. Do not remove the old method, factory-reset a phone, or hand back a work device until the replacement method and recovery path have passed this test.
Platform Walkthroughs
Menus change over time, but the routes below reflect the current structure of the major platforms. When a label differs, use the account’s search box for “security,” “two-step,” or “two-factor.”
Google Account
To follow how to set up two factor authentication on Google, open your Google Account, choose Security, find “How you sign in to Google,” and select 2-Step Verification. Add a passkey, Google prompt, authenticator app, security key, or another supported method, then create backup codes.
Google notes that text or call codes can be vulnerable to phone-number-based attacks. Use the official Google 2-Step Verification setup instructions for the latest menu wording, then review backup codes and trusted devices before closing the page.
Microsoft Account and Microsoft 365
For how to set up two factor authentication on a personal Microsoft account, open the Security dashboard, choose Advanced security options, and turn on two-step verification. Microsoft can use Authenticator, email, phone, or other supported security information.
Work and school accounts may be controlled by an administrator and may require Microsoft Authenticator, number matching, a security key, or a company policy. Follow Microsoft’s two-step verification instructions and register more than one allowed method before replacing a phone.
Apple Account
For how to set up two factor authentication on an Apple Account, open Settings on iPhone or iPad, tap your name, choose Sign-In & Security, and turn on Two-Factor Authentication. On a Mac, open System Settings, click your name, then choose Sign-In & Security.
Add at least one trusted phone number and review the trusted-device list. Apple’s two-factor authentication support page explains the current steps, while high-risk users can also review Apple security key requirements before replacing verification codes with physical keys.
Facebook and Instagram
For how to set up two factor authentication on Facebook or Instagram, open Accounts Center, choose Password and security, select Two-factor authentication, choose the account, and select an authentication app, security key, or supported phone method. Generate recovery codes after activation.
Business owners should protect the personal profiles that control Pages, ad accounts, and Instagram assets—not only the public brand account. Review Meta’s Facebook two-factor authentication help and remove former staff from business access after confirming a current administrator.
WordPress Administrator Accounts
For how to set up two factor authentication on WordPress, first confirm that your host or security suite does not already provide it. Otherwise, install a reputable TOTP-compatible plugin from the official WordPress directory, activate it, open the user profile or plugin security settings, scan the QR code, verify the code, and save backup codes.
The official WordPress Two Factor plugin supports TOTP and backup verification codes. Enforce 2FA for administrators and editors before lower-risk roles, test a second admin account, and never depend on one plugin login path without a documented recovery process.
| Pro-Tip: Before enforcing WordPress 2FA for every user, create a staging-site test or a second administrator account. Confirm login, backup-code use, email delivery, and plugin conflict behavior before locking out the production team. |
Five Common Setup Mistakes to Avoid
- Making SMS the only method
SMS is convenient but can fail while traveling, after a carrier change, or during a phone-number takeover. Use an authenticator, passkey, or security key as the main method and keep SMS as a fallback only when needed.
- Saving the QR code as a screenshot
The enrollment QR contains the secret used to generate future codes. Delete exposed screenshots, revoke the authenticator method, and enroll again with a new secret.
- Skipping recovery codes
A setup is incomplete until you can recover without the phone. Generate codes, store them safely, and verify that another trusted person or administrator can follow the documented process when appropriate.
- Replacing the phone before migrating
Factory-resetting or trading in a phone can erase unsynced authenticator entries. Transfer or back up the app, add the new device, test it, then remove the old device.
- Approving every push notification
Repeated prompts may be an MFA-fatigue attack. Deny unexpected requests, change the password, review sessions, and report the event to the organization’s security team.
Advanced Tips and Next-Level Security Hacks
Protect the Accounts That Reset Everything Else
Your primary email and password manager form the center of the recovery chain. Use phishing-resistant authentication on both when available, a unique password, two recovery methods, and a written inventory of which accounts depend on them.
| 💡 Quick Hack: Search your inbox for phrases such as “verify your email,” “welcome,” and “password reset” to discover forgotten accounts. Protect or close the accounts that can still affect money, identity, business assets, or customer data. |
Use Separate Admin and Everyday Accounts
Website owners, cloud administrators, and business managers should avoid using the highest-privilege account for daily browsing and email. Keep one protected administrator identity for configuration changes and a lower-privilege account for routine work.
This reduces the damage caused by a stolen browser session or malicious extension. It also makes security logs clearer because sensitive changes come from a small, controlled set of accounts.
Prefer Number Matching Over Blind Push Approval
When the service offers number matching, the login screen displays a number that must be selected or entered in the authenticator app. This forces the person approving the request to connect it with an active sign-in instead of tapping Approve automatically.
| Pro-Tip: Treat an unexpected prompt as a password-compromise warning. Deny it, open the official account security page, change the password, and review recent sessions rather than waiting to see whether another prompt appears. |
Use Biometrics as a Local Unlock, Not a Shared Secret
Fingerprints and face recognition are useful because they unlock a device, passkey, or authenticator locally. Do not upload biometric images, send fingerprint scans, or assume every “biometric login” design handles sensitive data the same way.
Use a strong device PIN as the fallback, remove biometric access for former users, and understand what happens after a restart or several failed attempts. The device PIN often becomes the final gate.

Build a Small Account-Security Inventory
Maintain a simple inventory with the service name, account owner, username, second-factor method, recovery location, spare-key holder, and last review date. Store it in an encrypted system and exclude passwords and TOTP secrets.
A secure workflow tool can remind you to review the inventory without storing the credentials themselves. See MyFlexBots’ guide to the best productivity apps for secure work for ideas on reminders, documentation, and team coordination.
Troubleshooting: Fix 2FA Problems Without Making Them Worse
The Authenticator Code Is Rejected
Wait for a fresh code and type it immediately; the current code may be near expiry.
Turn on automatic date, time, and time zone on the phone.
Confirm you selected the correct account entry when several services have similar names.
Confirm the username and environment, such as production versus staging, match the login page.
If every code fails, use a backup method, remove the broken enrollment, and scan a newly generated QR code.
The Push Notification Never Arrives
Open the authenticator app manually; the pending request may be waiting inside even when the notification was suppressed. Check internet access, notification permissions, battery optimization, focus mode, and whether the account is still registered in the app.
A phone or computer that is severely overloaded may delay prompts and security updates. Fix the account first with a backup method, then use MyFlexBots’ guide to speed up a slow computer before assuming the authentication service is broken.
You Lost the Phone
- Use a recovery code, spare security key, trusted device, backup phone, or administrator-assisted recovery.
- Change the account password if the phone was unlocked or the password may have been stored visibly.
- Remove the lost device and revoke its sessions from the account security page.
- Contact the carrier to suspend the SIM when the phone number is at risk.
- Register the replacement device and generate a fresh set of recovery codes.
Do not repeatedly guess recovery answers or submit conflicting support requests. Some services add waiting periods after risky recovery activity, so follow one official recovery route and keep records of case numbers.
You Changed the Phone Number
Sign in through the authenticator app, passkey, trusted device, security key, or recovery code, then update the number in both the security and recovery sections. Do not assume changing the profile contact number automatically changes the 2FA number.
The QR Code Will Not Scan
Increase screen brightness and remove glare.
Move the phone farther away so the complete QR code fits inside the frame.
Clean the camera lens and allow camera permission for the authenticator app.
Use the manual setup key only in a private location, then delete any copied text.
Cancel and generate a new code if the QR was displayed during a screen share or recorded meeting.
You Receive an Unexpected Approval Request
Deny the request. Do not approve it to make the notification stop, and never tell a caller the displayed number or code. Open the official service directly, change the password, revoke unfamiliar sessions, and review whether another recovery method was added.
| 💡 Quick Hack: Take a screenshot only of the suspicious prompt details—not of recovery codes, QR secrets, or one-time codes—then report the time, service, device, and approximate location to the security team. |
A New Phone Has No Authenticator Accounts
Cloud backup may not have been enabled, or the restore may use a different backup account. Keep the old phone offline but intact, open the authenticator’s transfer or export feature, and migrate accounts while both devices are available.
When transfer is impossible, use each service’s recovery method, remove the old authenticator enrollment, and add the new one. Work through the most important accounts first and generate new recovery codes after each reset.
Maintenance Schedule: Keep 2FA Working Long-Term
| When | Maintenance Action |
| Monthly | Review unexpected prompts, failed login alerts, and unknown sessions; update the phone and authenticator app. |
| Quarterly | Check recovery email, phone number, trusted devices, spare keys, and business-account administrators. |
| Before changing phones | Back up or transfer authenticator accounts, add the new device, test logins, and keep the old phone until completion. |
| After using a recovery code | Mark it used and generate a new set when appropriate. |
| After staff changes | Remove access, revoke sessions, rotate shared secrets, and verify at least two current administrators. |
| After a suspicious prompt | Deny it, change the password, review sessions and recovery methods, and investigate the source. |
The goal is not to touch every account every week. A short recurring review prevents old numbers, abandoned phones, former employees, and missing recovery codes from quietly turning into future lockouts.
Frequently Asked Questions
How do I learn how to set up two factor authentication without a smartphone?
Use a hardware security key, desktop-compatible passkey, email or voice fallback where allowed, or a desktop TOTP app that stores secrets securely. A physical security key is usually the strongest phone-free option. Register a spare and keep recovery codes offline.
Is an authenticator app better than SMS?
Usually, yes. Authenticator codes do not depend on mobile reception or a phone number, so they reduce risks involving SIM changes and message interception. They can still be phished, so passkeys and FIDO security keys are stronger when supported.
Can I use the same authenticator app for several accounts?
Yes. A reputable TOTP app can hold many account entries. Label each one clearly, protect the app and phone, and understand the app’s backup or transfer process before adding dozens of critical accounts.
What happens if I lose both my phone and recovery codes?
Try a trusted device, spare security key, backup phone number, passkey on another device, or the service’s official recovery process. Business users may need an administrator. Recovery can be slow, which is why two independent backup routes are worth setting up in advance.
Should I store passwords and 2FA codes in the same password manager?
It is a tradeoff. One encrypted vault is convenient and still protects against many password-reuse attacks. Separating the second factor provides stronger isolation for high-value accounts. At minimum, protect the password manager with a unique master password, phishing-resistant MFA, and a separate recovery plan.
Does two-factor authentication stop every hack?
No. It greatly reduces account takeover from stolen passwords, but it does not fix malware, stolen sessions, malicious browser extensions, weak recovery processes, or social engineering. Keep devices updated, review sessions, and never approve an unexpected prompt.
Conclusion: Secure the Recovery Path, Not Just the Login
The reliable way to approach how to set up two factor authentication is to think beyond the first successful code. Choose the strongest supported method, prepare recovery before activation, save backup codes away from the phone, register a spare option, test a fresh login, and review the setup whenever devices, numbers, or staff change.
editor's pick
latest video
news via inbox
Nulla turp dis cursus. Integer liberos euismod pretium faucibua