How to Record Your Screen Step-by-Step Guide
A screen recording can explain in two minutes what a long email often fails to clarify. Whether you are teaching a client, saving a support issue, recording a product demo, or making a quick tutorial for your team, learning how to record your screen gives you a faster way to communicate with proof, context, and clarity.
The good news: you do not need a studio, expensive software, or editing experience. This guide walks through the best built-in tools, smarter setup choices, audio fixes, export settings, and troubleshooting steps so your recording looks polished instead of rushed.
Featured Snippet Box: What Is the Fastest Way to Record a Screen?
To record a screen, choose a built-in recorder, select the full screen or a specific window, enable microphone or system audio, press record, perform the steps slowly, stop the capture, trim mistakes, and export as MP4. On Windows use Snipping Tool or Xbox Game Bar; on Mac press Shift-Command-5.
Essential Tools & Materials Breakdown
The right recording setup depends on what you are capturing. A customer support clip needs clarity and small file size. A software tutorial needs cursor visibility and clean audio. A product walkthrough may need webcam, branding, and captions. Use the table below as your practical shopping list before you press record.
| Tool / Material | Best For | Estimated Cost | Skill Level | Notes |
| Windows Snipping Tool | Quick selected-area clips | Free | Beginner | Best for short tutorials and app walkthroughs on Windows 11. |
| Xbox Game Bar | Game clips and app recording | Free | Beginner | Works well for supported apps, but not every desktop workflow. |
| Mac Screenshot Toolbar | Full screen or selected screen clips | Free | Beginner | Press Shift-Command-5 and choose recording mode. |
| iPhone / iPad Screen Recording | Mobile app demos | Free | Beginner | Enable Screen Recording in Control Center before recording. |
| Android Screen Record | Android tutorials and app demos | Free | Beginner | Available in Quick Settings on most modern Android devices. |
| OBS Studio | Advanced tutorials, multi-source recording | Free | Intermediate | Ideal for webcam overlays, scenes, and controlled quality settings. |
| External Microphone | Voiceover quality | Budget to premium | Beginner | Even a basic USB mic improves clarity more than most video upgrades. |
| Video Editor | Trimming, captions, branding | Free to paid | Beginner to intermediate | Clipchamp, iMovie, DaVinci Resolve, or similar tools can polish the final file. |
| Quiet Recording Space | Cleaner audio | Free | Beginner | A soft room beats an empty echoing room. |
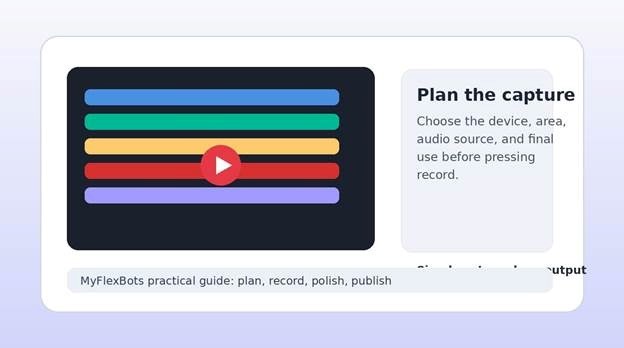
Image Integration: Planning the Capture
Decide What You Need to Capture
Before choosing software, define the job. A full-screen capture is useful when you are explaining a whole workflow. A single-window capture is cleaner for tutorials because it hides private tabs, notifications, and unrelated apps. A browser-tab recording is best for quick web demos because viewers see only the page you want them to see.
This decision also controls your editing time. The wider the capture area, the more distractions you may need to crop or blur later. For business tutorials, record the smallest useful area. For training videos, use a consistent window size so every clip feels like part of the same series.
- Use full screen for presentations, webinars, and multi-app workflows.
- Use a selected window for software tutorials, client demos, and how-to videos.
- Use mobile screen recording for app walkthroughs, social content, and troubleshooting clips.
- Use a camera plus screen layout when trust matters, such as sales demos or coaching videos.
💡 Quick Hack: Create a clean “recording desktop” user profile with a plain wallpaper, empty browser bookmarks bar, and no personal files visible. It saves editing time and reduces privacy risks.
Prepare Your Screen Like a Professional
The most overlooked part of how to record your screen is not the recording button. It is preparation. Close private tabs, mute messaging apps, disable pop-ups, clear the desktop, and open only the apps you need. One notification can ruin a great take or expose information you did not intend to share.
Increase your display scaling if your audience will watch on mobile. Tiny menu labels may look readable on your monitor but become impossible to follow after compression on YouTube, WhatsApp, or a learning platform. As a simple rule, test a five-second clip and watch it on your phone before recording a long tutorial.
- Turn on Do Not Disturb or Focus mode.
- Close password managers, private chats, analytics dashboards, and email inboxes.
- Zoom browser pages to 110% or 125% when recording detailed steps.
- Set your app window to 16:9 if the video will go on YouTube or a website.
- Set your phone upright for Shorts, Reels, and TikTok; turn it sideways for course videos.
Pro-Tip: Keep a short script beside your screen, but do not read it word-for-word. Use bullet prompts such as “open dashboard,” “show export,” and “explain result.” Your voice will sound more natural.
Choose the Best Screen Recorder for Your Device
There are two smart paths: use the built-in recorder for speed, or use a dedicated tool when you need more control. Built-in tools are perfect for fast demos. Dedicated software is better for repeatable tutorials, webcam overlays, audio routing, branded scenes, and higher-quality exports.
For Windows users, Microsoft supports Snipping Tool video capture with Windows logo key + Shift + R, while Xbox Game Bar remains useful for supported apps and games. For Mac users, Apple’s Screenshot toolbar opens with Shift-Command-5 and includes controls for full-screen or selected-area recording. OBS Studio is a free, open-source choice for more advanced recording and streaming on Windows, Mac, and Linux.
Useful official references: Microsoft Snipping Tool screen recording guide | Apple Mac screen recording guide | OBS Studio official download | Google Android screen record help
Best Choice by Use Case
- Fast explanation: built-in Windows, Mac, iPhone, or Android recorder.
- Software training: OBS Studio, Clipchamp, Camtasia, ScreenFlow, or a similar editor-recorder workflow.
- Gaming: Xbox Game Bar for quick clips or OBS Studio for control over sources and bitrate.
- Client presentation: screen plus webcam so the viewer sees both the product and the presenter.
- Bug report: selected-window recording with cursor visible and microphone narration.
💡 Quick Hack: For client support, record in small chunks instead of one long video. A 45-second fix is easier to watch, easier to send, and easier to re-record if you make a mistake.
How to Record on Windows
If you are learning how to record your screen on Windows 11, start with Snipping Tool for simple selected-area videos. Press Windows logo key + Shift + R, choose the area, and start recording. This is great when you want to capture a browser action, a software setting, or a short visual explanation without installing anything.
For app or game captures, press Windows + G to open Xbox Game Bar. Check the Capture widget, confirm your microphone setting, and start recording. If the recording button is unavailable, the app may not be supported or your system may need permissions adjusted.
- Open the screen, app, or page you want to capture.
- Turn on Do Not Disturb and close private windows.
- Press Windows logo key + Shift + R for Snipping Tool video capture, or Windows + G for Xbox Game Bar.
- Select the recording area or app window.
- Choose whether you need microphone narration.
- Press Record, wait a second, then begin your steps slowly.
- Stop the recording and save the file with a clear name such as “dashboard-export-demo-v1.mp4.”
Pro-Tip: Leave one silent second at the beginning and end of every recording. That tiny buffer makes trimming easier and prevents your first word or final click from being cut off.
How to Record on Mac
Mac users have one of the cleanest built-in workflows. Press Shift-Command-5 to open the Screenshot toolbar. Choose Record Entire Screen or Record Selected Portion. Open Options to set the save location, timer, and microphone. Then click Record and perform your steps.
If you are teaching a detailed process, use Record Selected Portion and frame only the app window. This keeps the viewer focused. If you are recording a slide deck, use full screen and rehearse transitions first so you do not capture unnecessary desktop movement.
- Press Shift-Command-5.
- Choose full-screen recording or selected-portion recording.
- Open Options and select the microphone if voice is needed.
- Choose a save location you can find quickly.
- Click Record, complete the workflow, then stop from the menu bar.
- Trim the video in QuickTime, Photos, iMovie, or your preferred editor.
💡 Quick Hack: Use a five-second timer on Mac when recording tutorials. It gives you time to move your hands, clear the cursor, and start smoothly instead of rushing after the click.
How to Record on iPhone, iPad, and Android
Mobile screen recording is perfect for app walkthroughs, checkout flows, tutorial clips, and social content. On iPhone or iPad, add Screen Recording to Control Center if it is not already there. Swipe down from the top-right corner, press the record button, wait for the countdown, and then complete your steps.
On Android, swipe down twice to open Quick Settings and tap Screen Record. If you do not see it, edit Quick Settings and drag the Screen Record tile into view. Many Android devices let you choose whether to capture audio and show touches before the countdown starts.
When recording phones, keep gestures slower than normal. Viewers need time to follow taps and swipes. Turn on touch indicators when available, especially for training videos. Avoid recording sensitive screens such as banking apps, private messages, account pages, or personal photo galleries.
- Use vertical format for TikTok, Reels, Shorts, and WhatsApp Status.
- Use horizontal format for online courses, YouTube tutorials, and website embeds.
- Turn brightness up for clearer capture, but avoid auto-brightness shifts during the video.
- Enable microphone only when narration is useful; otherwise record silently and add voiceover later.
Pro-Tip: Put your phone in airplane mode with Wi-Fi enabled if the recording needs internet. This prevents calls and mobile notifications while keeping the app connected.
Set Audio Before You Record
Bad audio makes even a sharp screen recording feel amateur. Viewers will forgive a tiny visual imperfection, but they will leave quickly if your voice is muffled, echoing, or buried under system sounds. Test your microphone before recording the full clip.
Use headphones when recording voice and system audio together. This reduces feedback and keeps app sounds from leaking into the microphone. If you are using a laptop microphone, record in a furnished room, close windows, and stay the same distance from the device.
- Record a 10-second audio test and listen with headphones.
- Keep your input level below clipping; loud peaks should not sound distorted.
- Turn off fans, mechanical keyboards, and background music if they are not needed.
- Use a simple USB microphone for repeated tutorials or course content.
- For voiceover, record narration after the screen capture if you need a cleaner delivery.
💡 Quick Hack: Place a folded towel or soft blanket on the desk near your microphone. It reduces hard-surface reflections and makes a budget mic sound less harsh.
Record the Screen Slowly and Clearly
Once recording starts, move like a teacher, not like someone checking email. Pause after important clicks. Let dropdown menus stay open long enough to be understood. If you are typing, slow down or paste prepared sample text to avoid long dead space.
A strong tutorial has a rhythm: show the goal, perform the action, confirm the result, then move to the next step. This structure helps beginners follow along and helps advanced users scan the video quickly.
- Start with the final outcome: “I’ll show you how to export this report.”
- Move the cursor to the exact place before clicking.
- Click once and pause briefly so viewers can see the change.
- Explain why the step matters, not only what to click.
- Confirm the result on screen before moving ahead.
- Stop recording as soon as the useful action is complete.
When you explain how to record your screen for a team, encourage everyone to use the same file naming pattern, resolution, and folder structure. Consistency matters when recordings become part of a training library.
Edit, Trim, Caption, and Export
Editing does not need to be complicated. Trim the empty start and end, remove long pauses, blur private information, and add simple text labels where viewers may miss an important setting. If the video is for a blog post, add a short intro title and export an MP4 file that loads quickly.
Captions are worth the extra effort. Many people watch tutorials muted, especially on mobile or at work. Captions also help non-native speakers and improve accessibility. For software tutorials, use short captions that highlight actions: “Open Settings,” “Choose Export,” “Select MP4,” and “Save File.”
- Use MP4 for the most compatible export.
- Use 1080p for most tutorials and website embeds.
- Use 4K only when tiny interface details must remain sharp and the platform supports it well.
- Use 30 fps for standard tutorials; use 60 fps for gaming, animation, or fast movement.
- Compress the final file before emailing or uploading to a CMS if file size is too large.
Pro-Tip: Save the original recording separately before editing. If you over-trim or export with the wrong settings, you can return to the clean source file instead of recording again.
Common Mistakes to Avoid
Mistake 1: Recording Too Much of the Screen
A huge capture area creates tiny text and unnecessary distractions. Record only what the viewer needs. If a full-screen capture is unavoidable, zoom in during editing or use callouts to guide attention.
Mistake 2: Ignoring Audio Until the End
Many beginners finish a long recording and then discover the microphone was muted or distorted. Always record and review a short test before the real take. This one habit prevents the most painful redo.
Mistake 3: Leaving Notifications On
Notifications can expose private information and break viewer focus. Turn on Focus mode, Do Not Disturb, or airplane mode before recording. Close email, chat, calendar, and cloud sync alerts.
Mistake 4: Moving Too Fast
You already know the workflow, but your viewer does not. Slow cursor movement, short pauses, and clear explanations make the video feel professional. Speed can be adjusted later; missing context cannot.
Mistake 5: Exporting a Giant File for a Simple Demo
A two-minute support clip does not need a massive 4K export. Use 1080p MP4 for most business recordings. Keep high bitrate exports for detailed software training, design reviews, or content where small text must remain readable.
💡 Quick Hack: If a recording is only for internal support, use a short, compressed version and include a written summary below it. The video shows proof; the text makes the fix searchable.
Advanced Tips and Next-Level Hacks
After you understand how to record your screen, the next upgrade is building a repeatable workflow. Professional creators do not reinvent the setup every time. They use templates, scene presets, naming rules, and checklists so every recording looks consistent.
Build a Recording Template
Create a folder with a checklist, title slide, branded intro, cursor settings, export preset, and thumbnail template. For myflexbots, this makes future software guides faster to produce and easier to update.
Use Scenes for Repeatable Tutorials
In OBS Studio, scenes let you switch between screen-only, webcam plus screen, browser capture, and ending slide. This is useful for courses, product demos, and recurring tutorials. Set it once, then reuse it every week.
Add a Webcam Only When It Helps
A webcam can build trust, but it can also distract from a technical tutorial. Use it for introductions, sales demos, coaching, and personal brand content. Hide it during detailed settings screens so it does not cover important UI elements.
Make Cursor Movement Easier to Follow
Large cursors, click highlights, and zoom callouts help viewers track actions. This matters especially for mobile viewers. If your tool supports click effects, use them lightly. Too many effects make the video feel noisy.
Create a Naming and Storage System
Use names like “topic-device-version-date.mp4.” For example: “screen-recording-windows-v1-2026-07.mp4.” Store originals, edited files, thumbnails, and captions in separate folders. A clean library saves hours when you update old posts.
Pro-Tip: Keep a reusable “mistakes to blur” checklist: email addresses, client names, API keys, billing screens, analytics revenue, private tabs, and notification previews.
Troubleshooting and Maintenance Guide
Problem: The Recording Has No Sound
Check whether the correct microphone was selected. Then check operating system permissions for microphone access. If you expected system audio, confirm that your recorder supports it on your device. Some tools capture microphone easily but need extra settings for internal audio.
- Run a 10-second test before every important recording.
- Unplug and reconnect the microphone if it is missing from the input list.
- Check browser permission prompts if recording in an online tool.
- Avoid Bluetooth microphones for critical tutorials if they create delay or compression artifacts.
Problem: The Video Is Laggy or Choppy
Lag usually means your computer is overloaded or the recording settings are too demanding. Close heavy apps, reduce resolution, lower frame rate, or record a smaller area. If you are capturing gaming or animation, 60 fps may help, but it also increases system load and file size.
- Try 1080p at 30 fps for standard tutorials.
- Record to a fast internal drive instead of a slow external drive.
- Disable unnecessary browser extensions and background apps.
- Update graphics drivers and the screen recorder when issues continue.
Problem: The Screen Is Black
Black screen captures often happen because of permissions, protected content, hardware acceleration, or the wrong capture source. Try window capture instead of display capture, turn off hardware acceleration in the app or browser, or use a different tool. Streaming apps and protected video services may block recording by design.
Problem: The File Is Too Large
Large files are usually caused by high resolution, high bitrate, long duration, or lossless export settings. For normal tutorials, use MP4, 1080p, 30 fps, and a balanced bitrate. Trim dead space before exporting. If the file will be embedded in a blog post, compress it or host it on a video platform instead of uploading a giant file directly to the page.
Problem: The Text Looks Blurry After Upload
Blurry text can come from recording at a low resolution, scaling the video incorrectly, or uploading a heavily compressed file. Record at the final aspect ratio whenever possible. If the final video is 1920 x 1080, set the recording area to 16:9 and avoid stretching it in editing.
This is why how to record your screen is partly a planning skill. The best quality comes from matching capture size, export size, and publishing format from the beginning.
Maintenance: Keep Your Recording Workflow Ready
If you teach clients or staff how to record your screen, pair the video with a short written checklist. The checklist helps viewers repeat the process without replaying the full clip.
A reusable template also makes how to record your screen easier for non-technical team members because they only need to follow the same setup every time.
For website content, how to record your screen works best when the recording answers one specific question and is supported by a clear step-by-step article.
A good setup should stay ready for the next recording. Update your recorder, check microphone permissions after major operating system updates, clean old files, and keep your templates organized. If you record for clients, create a pre-flight checklist and reuse it every time.
- Review your recording checklist monthly.
- Delete duplicate raw files after final backups are saved.
- Refresh templates when your brand colors, intro, or website layout changes.
- Keep a folder of approved background music, icons, captions, and thumbnails.
- Test your recorder after Windows, macOS, iOS, or Android updates.
Frequently Asked Questions
What is the easiest way to record a screen for beginners?
The easiest method is to use the built-in recorder on your device. Windows users can start with Snipping Tool or Xbox Game Bar. Mac users can press Shift-Command-5. iPhone and Android users can use the screen recording control built into the operating system.
Can I record my screen with audio?
Yes, most screen recorders can capture microphone audio, and many can also capture system audio. Before making a long recording, confirm the correct microphone is selected and create a short test clip. Audio permissions and system audio options vary by device and app.
What is the best free screen recorder?
For advanced control, OBS Studio is one of the strongest free options because it supports scenes, multiple sources, webcam overlays, and detailed quality settings. For quick videos, built-in tools on Windows, Mac, iPhone, and Android are usually enough.
How do I record my screen without showing private information?
Record only the needed window or area, close private apps, turn on Do Not Disturb, hide bookmarks, log out of personal accounts, and use sample data when possible. Review the final video before publishing so you can blur or cut anything sensitive.
Should I record in 720p, 1080p, or 4K?
Use 1080p for most tutorials because it balances clarity and file size. Use 720p for quick internal clips or slow connections. Use 4K when detailed interface text, design work, or high-quality YouTube publishing justifies the larger files and longer processing time.
How long should a screen recording be?
A support clip should usually be under two minutes. A focused tutorial often works best between three and eight minutes. Course lessons can be longer, but each video should teach one clear outcome. If the topic has many steps, split it into smaller chapters.
Final Thoughts and Call to Action
Learning how to record your screen is one of the highest-leverage digital skills for creators, marketers, support teams, teachers, and business owners. Start with the built-in tool on your device, prepare the screen, test the audio, record slowly, trim the rough edges, and export in a format your audience can watch easily.
For myflexbots readers, the biggest win is repeatability. Build a simple recording checklist today, and every future tutorial, product demo, bug report, or training clip will become faster to create and easier to understand. What type of screen recording are you planning to make first: a tutorial, a product demo, a support clip, or a social video?
editor's pick
latest video
news via inbox
Nulla turp dis cursus. Integer liberos euismod pretium faucibua