How to Remove Background From an Image: Step-by-Step
A distracting wall, messy desk, or mismatched studio backdrop can ruin an otherwise useful photo. Learning how to remove background from an image gives you a clean subject that can be placed on a product page, presentation, social post, profile, marketplace listing, or new scene without reshooting everything.
This guide covers fast AI removal, careful manual cutouts, desktop and phone workflows, difficult edges such as hair and glass, export settings, troubleshooting, and quality control. The goal is not merely to make the background disappear; it is to produce a believable, reusable image that still looks natural at full size.
The 45-Second Answer
To learn how to remove background from an image, upload a sharp photo to an AI or manual editor, let the tool identify the main subject, refine missed and over-erased areas, inspect the edge on dark and light backgrounds, then export as PNG or WebP when transparency is required. Keep an editable master for later corrections.
Essential Tools and Materials Breakdown
Background removal is a digital task, but the quality of the result depends on both the source photograph and the editing setup. You can complete a simple cutout for free, while high-volume ecommerce or agency work benefits from a repeatable folder structure, a precise pointing device, and an editor that supports masks.
| Item or tool | Purpose | Estimated cost | Skill level | Best use |
| Sharp source photo | Gives the editor clean subject edges and usable detail | $0 if already available | Beginner | Every workflow |
| AI background remover | Creates a fast first-pass subject mask | Free to about $20/month | Beginner | People, products, pets, simple objects |
| Layer-based photo editor | Refines masks, hair, shadows, color spill, and composites | Free to subscription | Intermediate | Professional or difficult cutouts |
| Mouse, trackpad, or stylus | Controls brush size and edge corrections | Included to $100+ | Beginner | Precise cleanup |
| Transparent output format | Preserves the removed area as transparency | Free | Beginner | Logos, products, overlays, web graphics |
| Replacement background | Provides a new color, scene, or branded environment | Free to licensed stock | Beginner | Marketing and ecommerce |
| Cloud or local backup | Protects the original, mask, and final exports | Free to paid | Beginner | Repeatable content production |
| 💡 Quick Hack: Before paying for a new app, test your phone’s gallery editor, operating system photo app, presentation software, or existing design platform. Many now include a basic remove-background command that is good enough for simple subjects. |
Before You Edit: Decide What the Final Image Must Do
A good cutout is defined by its destination. A tiny profile picture can tolerate simpler edges than a 2,000-pixel product image. A transparent logo needs crisp geometry, while a portrait needs soft hair detail and realistic transitions around clothing.
Before you start how to remove background from an image, answer four questions: Where will the image appear? What background will sit behind it? How large will viewers see it? Does the subject need its original shadow? These choices determine how much refinement is worth your time.
Choose the correct final background
- Transparent: Best when the subject must work over several colors, layouts, or slides.
- Pure white: Common for catalogs, documentation, and clean product layouts.
- Solid brand color: Useful for consistent social media thumbnails and campaign graphics.
- Realistic scene: Requires matching perspective, light direction, color temperature, and depth of field.
- Blurred original setting: Keeps context while reducing distraction and often hides minor edge imperfections.
Protect privacy before uploading
Online removers may process images on remote servers. Do not upload confidential documents, private customer photos, IDs, unreleased products, medical images, access badges, or sensitive workplace screens unless the service and your organization explicitly allow it. For private material, use an approved local editor or an offline workflow.
Keep three versions, not one
- Original: Untouched camera or downloaded file.
- Editable master: Layered file with the mask intact.
- Delivery export: PNG, WebP, or JPG sized for the actual platform.
This small file-management habit prevents destructive editing. When a client requests a different color or you notice a missed edge, you can update the mask instead of rebuilding the entire cutout.
Prepare a Source Image the Software Can Understand
AI cannot recover detail that the camera never captured. Motion blur, heavy compression, clipped highlights, and a subject that blends into the background create uncertain edges. A better source image often saves more time than a more expensive editor.
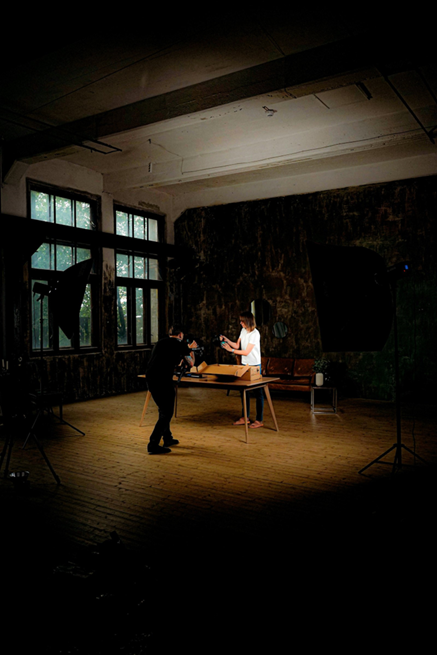
Use contrast, distance, and even light
- Place the subject several feet away from the wall or backdrop when possible. Separation reduces hard background shadows and color spill.
- Use soft, even light from a window, diffuser, or two balanced lights. Avoid a bright background behind a dark subject unless you want rim-lighting problems.
- Choose a backdrop color that differs from the subject. Do not photograph a white product on a white wall when a gray or colored sheet is available.
- Fill the frame without cutting off hair, handles, shoes, or other parts you may need later.
- Focus on the subject’s edge, not only its center. Check eyelashes, fur, fine straps, transparent parts, and reflective surfaces.
| Pro-Tip: For small products, curve a sheet of poster board from the wall onto the table to create a seamless sweep. The smooth transition reduces corners and makes both AI and manual selection easier. |
Choose the Fastest Method That Can Meet the Quality Standard
Not every image requires the same tool. The most efficient workflow is usually AI first, manual refinement second. Starting with a pen tool on a simple portrait wastes time; trusting one-click AI on a glass bottle or flying hair usually leaves visible defects.
| Method | Speed | Control | Best for | Main limitation |
| One-click AI | Seconds | Low to medium | Clear people, products, pets | May remove fine or transparent detail |
| AI plus restore/erase brush | 1–5 minutes | Medium | Most everyday images | Brush quality varies by app |
| Selection tools and mask | 5–30 minutes | High | Hair, uneven edges, mixed backgrounds | Needs patience and zoomed review |
| Pen or path tool | 10–60 minutes | Very high | Cars, furniture, packaging, hard products | Poor for hair and soft edges |
| Color-based selection | 2–15 minutes | Medium to high | Solid studio backgrounds | Fails when subject shares background colors |
Use an AI Background Remover for the First Pass
For most people, the fastest way to learn how to remove background from an image is to begin with an automatic remover. The interface names differ, but the core sequence is similar across web tools, design apps, desktop editors, and phones.
- Upload or open the highest-quality version of the photo. Avoid screenshots when the original file is available.
- Select Remove Background, Cutout, Isolate Subject, or a similarly named command.
- Wait for the tool to create a mask. A checkerboard normally represents transparent pixels; it is not part of the exported picture.
- Zoom to at least 100 percent and inspect the full outline clockwise. Look for missing fingers, holes in clothing, clipped hair, handles, spokes, and gaps between limbs.
- Use Restore or Keep to bring back subject pixels. Use Erase or Remove to clear remaining background patches.
- Preview the cutout over white, black, and a saturated color. Edge halos that disappear on one background often become obvious on another.
- Export a test at the final display size, then check it in the destination layout before processing the rest of the batch.
| 💡 Quick Hack: Duplicate the cutout and place one copy over black and one over white. A bright fringe appears clearly on black; a dark fringe appears clearly on white. Fix the mask until both previews look clean. |
Do not erase the natural contact shadow automatically
A subject with no shadow can look like it is floating. When the original shadow is clean and directionally useful, keep it on a separate layer or rebuild a subtle one after the cutout. Product images usually look more believable with a soft contact shadow directly beneath the object than with a large dramatic drop shadow.
Refine the Cutout With a Layer Mask
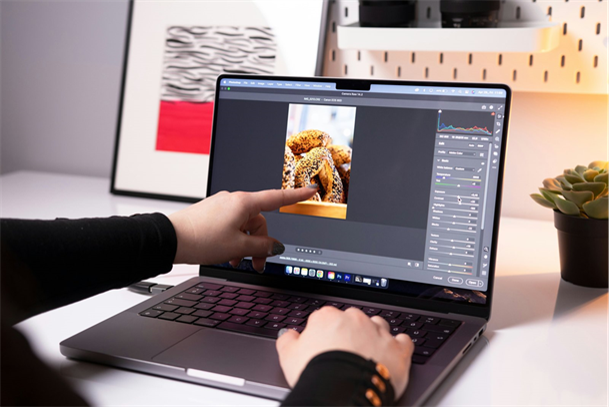
A layer mask hides pixels without deleting them. This is the safest way to refine how to remove background from an image because every correction remains reversible. White areas of a mask reveal the layer, black areas hide it, and gray creates partial transparency.
Work at the correct zoom
Use 100 to 200 percent for normal edges and 300 to 500 percent for tiny defects. Do not polish at extreme zoom for the entire job; an edge can look imperfect pixel by pixel but natural at the final viewing size. Switch between close inspection and actual-size preview.
Match brush hardness to the subject
- Hard brush: Packaging, furniture, phones, tools, signs, and sharp geometric products.
- Medium-soft brush: Clothing, skin, rounded objects, and most general cleanup.
- Soft low-opacity brush: Hair, fur, translucent fabric, smoke, feathers, and soft shadows.
Use a small brush near corners and narrow gaps. For long clean edges, a larger brush or path-based selection creates smoother results than dozens of shaky corrections.
Remove color spill
A green wall can reflect green onto hair and clothing; a red backdrop can tint product edges. Mask refinement alone will not remove that color. Use a low-strength color decontamination, hue/saturation adjustment, or carefully painted neutral color layer clipped to the subject edge.
Contract or expand with restraint
If a pale outline remains, move the mask inward by roughly one pixel at the output resolution. If the subject looks shaved or too thin, expand slightly. Large contractions destroy hair and rounded contours, so make small changes and judge the result at final size.
Use Manual Selection for Hard-Surface Objects
Cars, appliances, boxes, tables, phones, machinery, signs, and packaged products often respond well to a pen or path tool. Manual paths create smooth curves and controlled corners that automatic edge brushes can make lumpy.
- Place anchor points at changes in direction, not at every few pixels.
- Use as few points as possible along smooth curves. Drag handles to follow the contour.
- Move slightly inside a blurred or reflective edge so the old background does not remain as a fringe.
- Close the path, convert it to a selection, and add a mask rather than deleting pixels.
- Inspect interior spaces such as chair legs, handles, wheel spokes, straps, and packaging cutouts.
- Add a tiny feather only when the source edge is naturally soft. Sharp studio products usually need little or none.
| Pro-Tip: Create one clean path around the outside, then separate paths for holes and interior gaps. Complex objects are easier to audit when the selection is built from logical shapes instead of one continuous maze. |
A free desktop option
Readers who want a local, no-subscription workflow can use the official GIMP documentation for the Foreground Select tool. The tool lets you mark the likely foreground and background, then refine the selection before converting it into a mask.
Handle Hair, Fur, Feathers, and Fine Detail
Hair is not a single solid outline. It contains opaque strands, semi-transparent edges, gaps, flyaways, and reflected background color. A believable result preserves the overall hair volume without trying to rescue every strand.
Use a two-stage mask
- Create a solid base selection for the head, face, neck, and main hair mass.
- Run an edge-refinement or foreground-selection tool around the outer hair boundary.
- Use a small radius on sharp hair and a larger radius only where soft curls or fur genuinely need it.
- Paint uncertain areas with a low-flow mask brush instead of making a hard all-or-nothing cut.
- Place the result over the intended background and rebuild a few flyaways with a fine brush when needed.
When how to remove background from an image involves hair, do not force a cutout from a tiny compressed file. Upscaling may make the file larger, but it cannot recreate authentic strands that were blurred or lost. Use the best original, and accept that a clean silhouette can look more professional than noisy fake detail.
| 💡 Quick Hack: If hair refinement still looks rough, place the portrait over a background with similar brightness to the original. The transition becomes more natural and requires less destructive masking than moving dark hair from a dark wall onto pure white. |
Handle Glass, Smoke, Veils, and Transparent Objects
Transparent subjects contain background information inside the object. A glass bottle does not have a simple outside edge; its highlights, refractions, labels, and internal shadows all interact with what sits behind it.
- Preserve bright highlights on a separate layer or with a light-based blend mode.
- Keep labels and opaque caps as a normal solid mask.
- Use partial transparency for the glass body instead of erasing it completely.
- Rebuild subtle inner reflections after the new background is placed.
- Match the replacement background’s light direction and brightness to the original reflections.
For commercial glass products, it is often faster to photograph on a clean neutral sweep and retouch the surface than to create a perfect transparent cutout from a busy lifestyle scene.
Remove a White or Single-Color Background
A plain background looks easy, but it may contain gradients, compression noise, dust, and soft shadows. Color-selection tools can work quickly when the subject does not share the same color.
- Sample the background near the subject and adjust tolerance until most of the backdrop is selected.
- Add discontiguous background areas manually so enclosed spaces are included.
- Subtract any selected highlights or subject areas that share the background color.
- Convert the selection into a mask, then inspect the edge against a contrasting layer.
- Retain a controlled shadow when the item needs to sit naturally on a surface.
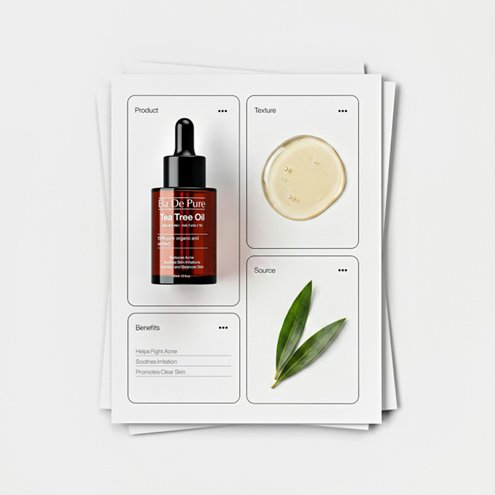
For ecommerce teams, how to remove background from an image should become a repeatable standard rather than a different decision for every file. Define the canvas ratio, subject scale, background color, shadow style, export dimensions, naming format, and quality check before editing a full catalog.
Remove a Background on a Phone
Modern phones can produce a usable cutout without a desktop. The exact menu varies, but most mobile workflows use a long press on the subject, a Cutout or Remove Background command, or an editing app with automatic subject detection.
- Open the original image in the phone’s gallery or approved editor.
- Choose the subject-isolation or background-removal feature.
- Save a copy rather than overwriting the camera original.
- Pinch to zoom and inspect fingers, hair, jewelry, straps, and the lower contact edge.
- Use a stylus when available for small restore and erase corrections.
- Export with transparency, then open the file over a colored background to confirm that the phone did not flatten it onto white.
The phone method is ideal when how to remove background from an image is part of a quick social post, marketplace listing, or message. For large product batches, layered desktop files are easier to standardize, revise, and archive.
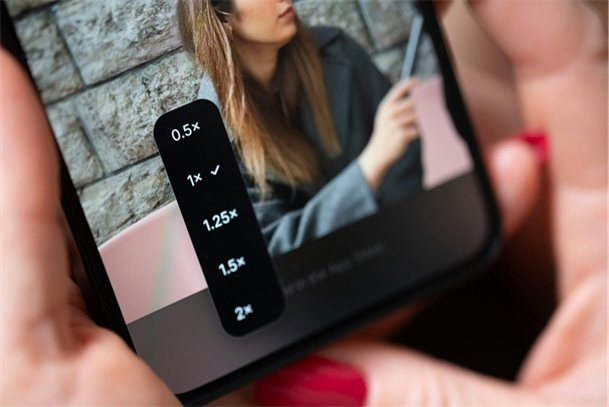
| 💡 Quick Hack: Send the transparent file as a document or file attachment instead of a compressed chat photo. Some messaging apps flatten transparency or reduce edge quality when an image is sent through the normal photo gallery. |
Add a New Background Without Making the Composite Look Fake
A perfect mask can still produce a poor composite. The subject and new scene must agree on perspective, light, color, sharpness, and grain.
Match the visual evidence
- Perspective: Camera height and horizon should feel consistent.
- Light direction: A bright right side on the subject needs a plausible light source on the right of the scene.
- Color temperature: Warm indoor light and cool outdoor shade usually need adjustment before they blend.
- Depth of field: A razor-sharp background behind a softly focused portrait looks artificial.
- Noise and resolution: Add subtle grain or reduce sharpness so both layers share a similar texture.
- Contact: Feet, furniture, and products need a realistic point of contact and shadow.
Build a believable shadow
- Duplicate or paint the subject silhouette on a layer beneath the cutout.
- Fill it with a dark neutral tone rather than pure black.
- Transform it to follow the ground plane and light direction.
- Blur more as the shadow moves away from the contact point.
- Lower opacity until the shadow supports the image without drawing attention.
| Pro-Tip: Temporarily convert the composite to black and white. Mismatched brightness often becomes easier to see when color is removed. Fix the tonal relationship first, then return to color balancing. |
Export the Correct File Format
Export choices determine whether transparency survives and whether the page loads efficiently. Keep the layered master in the editor’s native format, then create purpose-built delivery files.
- PNG: Reliable transparency and crisp edges; useful for products, logos, screenshots, and overlays.
- WebP: Supports transparency and can reduce web file size while maintaining strong visual quality.
- JPEG/JPG: Best for normal photographs when no transparency is needed; it will fill transparent areas with a background color.
- SVG: Suitable for true vector logos and shapes, not normal pixel-based photographs.
- Editable project file: Preserves masks, layers, paths, and future corrections.
For a detailed comparison, see MDN’s image file type and format guide, which explains that PNG is appropriate when transparency or precise reproduction is required and that WebP also supports transparency.
Resize after the mask is clean
Refine the mask at the best practical resolution, then resize for delivery. Cleaning only a tiny export hides problems until the image is reused at a larger size. Conversely, uploading a 6,000-pixel PNG where the layout displays 600 pixels wastes bandwidth.
Use descriptive filenames
A useful pattern is subject-purpose-background-size-version, such as `wireless-headphones-product-transparent-1600-v2.png`. Avoid filenames such as `final-final-new2.png`, which are hard to search and easy to replace accidentally.
Optimize the Finished Image for Search and Accessibility
A clean cutout can support image search, product discovery, and page clarity only when it is published correctly. Place the image near relevant text, use a descriptive filename, provide contextual alt text, and avoid keyword stuffing.
Google’s image SEO best practices recommend standard HTML image elements, supported formats, relevant landing-page content, and useful alt text. For accessibility decisions, use the W3C’s alt text decision tree.
- Describe the subject and purpose, not every visible pixel.
- Do not begin every alt attribute with ‘image of’ or repeat the page title mechanically.
- Use empty alt text for purely decorative images when appropriate.
- Keep text baked into images to a minimum; important wording should also appear as HTML text.
- Compress the delivery file and use responsive image sizes for mobile layouts.
Five Common Mistakes to Avoid
1. Trusting the one-click result without zooming in
Automatic removal can look convincing at thumbnail size while leaving a halo, missing fingers, or background islands. Always inspect at 100 percent and over at least two contrasting colors.
2. Deleting pixels instead of masking
Permanent erasing makes later corrections difficult. Use a reversible mask and keep the original layer untouched whenever the editor supports it.
3. Removing every shadow
Eliminating the contact shadow can make a person or product float. Preserve a useful original shadow or create a restrained replacement that matches the new scene.
4. Exporting transparency as JPG
JPEG does not preserve a transparent background. The removed area will be filled, usually with white or another matte color. Choose PNG or WebP when the subject must remain isolated.
5. Using a low-quality source
A tiny social-media download may contain blur and compression around every edge. Start with the original camera file or highest-resolution approved copy before spending time on detailed masking.
Advanced Tips and Next-Level Hacks
Create a quality-control checklist
- No background islands inside handles, hair, or gaps.
- No bright or dark fringe around the subject.
- No clipped fingers, clothing, product corners, or fine accessories.
- Shadow style is consistent with the destination.
- Transparent file opens correctly in a second application.
- Dimensions, color profile, filename, and compression match the publishing standard.
Standardize batch production
For repeated work, write a one-page specification with source requirements, editing method, edge standard, output dimensions, color space, background options, shadow treatment, file naming, approval status, and archive location. Consistency is more valuable than a different creative choice on every image.
Use actions, templates, and reusable masks
Automate predictable steps such as canvas sizing, background color, export dimensions, and naming. Do not automate uncertain edge decisions until the source photography is consistent. Automation should repeat a proven process, not multiply errors across a catalog.
| 💡 Quick Hack: Place a thin temporary outline around the cutout during inspection. Uneven bumps, missing pieces, and jagged curves become easier to spot. Remove the outline before export. |
How to Remove Background From an Image in Bulk
When how to remove background from an image becomes a weekly production task, process one representative file first and obtain approval before running the entire batch. Lock the canvas, subject scale, background, shadow, naming pattern, and export settings, then use automation only for steps that are genuinely consistent.
Link background removal to a wider content workflow
When the subject came from a screen capture, use the MyFlexBots guide on how to take a screenshot to capture a clean, readable source. For broader automation and editing workflows, see the best AI tools for 2026. If your final asset is going into an editable document, the guide to converting PDF to Word can help preserve a practical publishing workflow.
Troubleshooting and Maintenance Guide
The cutout has a white or colored halo
The mask is probably retaining pixels from the old background, or the subject has reflected color spill. Move the mask inward slightly, refine the edge, remove color contamination, and preview over the actual destination color. Do not over-contract the entire subject to fix one difficult area.
Hair looks crunchy or cut off
Reduce mask contrast, restore the main hair mass, and refine only the outer transition. A few believable strands are better than hundreds of noisy semi-transparent pixels. Use the original background brightness as a guide when choosing the replacement scene.
The transparent file shows a white box
Confirm that the file is PNG or WebP, not JPEG. Open it in an application that displays transparency correctly. Some preview windows use white as the canvas even when the image is transparent, so test it over a colored layer before assuming the export failed.
The subject looks pasted on
Check light direction, edge sharpness, color temperature, noise, scale, and shadow. Blur or sharpen one layer to match the other, adjust brightness before color, and add a contact shadow. A good mask cannot compensate for incompatible lighting.
The AI removed part of the subject
Use the restore brush at a small size and work from the safe interior toward the edge. If large areas are missing, undo and create a rough subject selection before running the automatic tool again. Higher-contrast source photography may be the only reliable fix for repeated failures.
The file is too large for the website
Crop unused transparent space, resize to the maximum display dimensions, and test WebP or optimized PNG. Keep the large master offline. A delivery image should be large enough for its layout and high-density displays, not automatically the full camera resolution.
Maintain a reusable editing system
Treat how to remove background from an image as a small production system. Review your output standard whenever the website theme, marketplace requirements, brand colors, or device mix changes. Keep approved examples, reject examples, and a short checklist so different editors make compatible decisions.
Frequently Asked Questions
What is the easiest way to remove a photo background?
Use an automatic AI remover for the first pass, then inspect and refine the mask with restore and erase brushes. Simple portraits and products can take under a minute; hair, glass, shadows, and low-contrast edges need manual cleanup.
How to remove background from an image for free?
Use a built-in phone or computer feature, a free web remover, or an open-source desktop editor such as GIMP. Choose a service that allows the required resolution and commercial use, and avoid uploading private images to unapproved online tools.
Which format keeps the background transparent?
PNG is the most widely understood choice for transparent still images. WebP also supports transparency and can be smaller for websites. JPEG does not support transparent pixels, so it is unsuitable when the cutout must remain isolated.
Why does the transparent background look checkered?
The checkerboard is an editor’s visual indicator for transparency. It normally will not appear in the exported PNG or WebP. Test the file over a solid color to confirm that the removed area is genuinely transparent.
Can I remove a background without Photoshop?
Yes. Built-in phone tools, online AI removers, presentation software, browser editors, and free desktop applications can all isolate subjects. Photoshop is useful for advanced masks and batch workflows, but it is not required for everyday background removal.
How do I remove a background without losing hair?
Start with a high-resolution image that separates the hair from the backdrop. Preserve the solid hair mass, refine only the outside transition, use a soft low-flow mask, remove reflected background color, and judge the result over the intended final background.
Should product photos have shadows after background removal?
Usually, a subtle contact shadow improves realism and shows that the product rests on a surface. The shadow should be soft, consistent across the catalog, and less noticeable than the item itself. Some marketplaces or design systems may require a completely flat white background, so follow the destination standard.
Final Takeaway
Learning how to remove background from an image is less about finding a magical button and more about following a dependable sequence: start with a strong source, create a fast initial mask, refine the edge non-destructively, match the new scene, and export the correct format. The best result is the one viewers do not notice as an edit.
Which part gives you the most trouble—hair, product edges, transparent objects, mobile export, or realistic shadows? Share your challenge in the comments so other MyFlexBots readers can compare solutions.
editor's pick
latest video
news via inbox
Nulla turp dis cursus. Integer liberos euismod pretium faucibua