

How to Take a Screenshot (Step-by-Step Guide)
A screenshot should be the fastest way to save what is on your screen, yet the wrong shortcut can copy nothing, capture the wrong monitor, or leave you searching through folders for the file. This guide explains how to take a screenshot on Windows, Mac, Chromebook, iPhone, iPad, Android, Linux, and modern web browsers, then shows you how to edit, organize, troubleshoot, and share the result safely.
You do not need paid software for normal screen captures. Once you understand the difference between copying to the clipboard and saving a file, most screenshot tasks take only a few seconds.
How to Take a Screenshot: The 45-Second Answer
To learn how to take a screenshot, open the screen you want, use your device’s built-in capture shortcut, choose the full screen, one window, or a custom area, then save or share the image. Common shortcuts include Windows + Shift + S, Shift + Command + 3 on Mac, and Power + Volume Down on phones.
Essential Tools and Setup
You can capture almost any screen with tools already included in the operating system. Optional accessories and apps become useful when you annotate instructions, produce client documentation, or manage hundreds of images.
| Tool or requirement | Purpose | Estimated cost | Skill level | Best use |
| Built-in screenshot shortcut | Capture full screen, window, or region | Free | Beginner | Everyday captures |
| Keyboard or accessible buttons | Trigger the capture quickly | Included | Beginner | Desktop and mobile |
| Built-in editor or Markup tool | Crop, draw, highlight, and redact | Free | Beginner | Quick explanations |
| Optional stylus or mouse | Create precise arrows and notes | Optional; varies | Beginner | Tutorials and training |
| Cloud or project storage | Back up and organize approved images | Free to paid | Beginner | Long projects and teams |
| Browser full-page tool | Capture content below the fold | Free | Beginner to intermediate | Webpages and receipts |
| OCR-capable app | Extract text from an image | Often free | Beginner | Errors, codes, and references |
Cost note: Built-in screenshot features are free. Optional accessory and storage costs vary by device, provider, and team requirements.
Before capturing anything, clean up the screen. Close unrelated tabs, move personal messages out of view, pause incoming notifications, and increase the zoom level if small text must remain readable. A clean source screen reduces editing time and lowers the risk of exposing information you never intended to share.
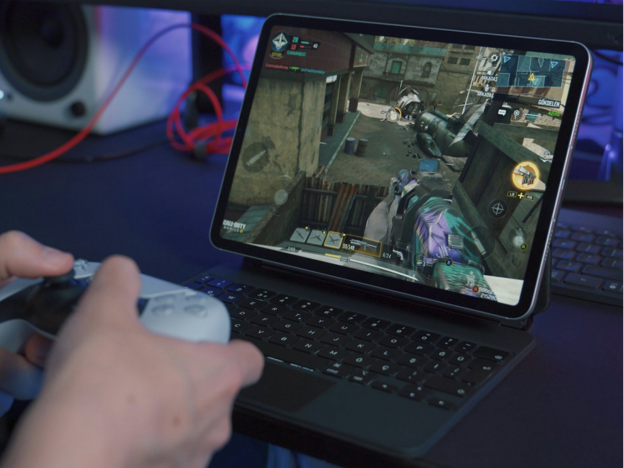
A tidy technology workspace makes it easier to capture readable, professional screenshots without distracting background windows.
Choose the right capture type before pressing a shortcut
Most built-in tools offer four basic modes:
- Full screen: Captures every visible display area. Use it for layout problems, desktop errors, or multi-panel software.
- Active window: Captures one application without the surrounding desktop. This is usually the cleanest option for tutorials.
- Selected region: Lets you drag around a precise area. It is ideal for error messages, menu items, or part of a webpage.
- Scrolling or full-page capture: Saves content longer than the visible screen, such as an article, receipt, chat, or settings page.
A full-screen capture is not automatically better. The smallest capture that preserves the necessary context is easier to read, safer to share, and faster to upload.
Comprehensive Step-by-Step Screenshot Guide
Step 1: Prepare the screen
Open the exact page, app, menu, or message you need. Wait for animations, pop-ups, and loading indicators to finish. If a dropdown menu disappears when you click elsewhere, use a capture tool with a delay timer or open the screenshot interface before expanding the menu.
Check the edges of the frame for names, email addresses, account balances, browser bookmarks, customer records, location details, and notification previews. Cropping later is helpful, but prevention is more reliable than remembering to redact every sensitive item.
Step 2: Decide whether you need a file or the clipboard
A saved image is best when you need to upload, archive, rename, or attach the screenshot. A clipboard capture is faster when you only need to paste the image into an email, document, chat, or image editor.
The clipboard normally holds the latest copied item. If you copy text after taking a clipboard-only screenshot, the image may be replaced before you paste it. Save important captures immediately.
Step 3: Capture, review, and confirm
Take the capture, then inspect it at normal size before sharing. Confirm that the correct window is visible, text is sharp, the pointer is not covering an important label, and private information is removed. A two-second review prevents most embarrassing screenshot mistakes.
How to Take a Screenshot on Windows 11 and Windows 10
Windows offers several methods, and each method has a different result. The most versatile option is the Snipping Tool overlay because it lets you select a rectangle, window, full screen, or free-form region.
Method 1: Use Windows + Shift + S for a selected area
- Arrange the screen exactly as you want it to appear.
- Press Windows logo key + Shift + S.
- When the screen dims, choose a capture mode from the small toolbar.
- Drag over the area you want, or click the window or full-screen option.
- The capture is copied to the clipboard. Click the notification preview to open it in Snipping Tool.
- Crop, draw, highlight, copy, or save the image.
For the current controls and accessibility options, link readers to use Snipping Tool to capture screenshots.
�� Quick Hack: Press Windows + Shift + S, capture the region, and immediately press Ctrl + V inside an email, Word document, support ticket, or chat. This skips file management when the image is temporary.
Method 2: Save the entire screen automatically
Press Windows logo key + Print Screen. On most Windows computers, the screen briefly dims and the file is saved in Pictures > Screenshots. This is the fastest repeatable method when you need several full-screen images.
On compact keyboards, Print Screen may share a key with another function. Try Fn + Windows logo key + Print Screen, or check the small secondary labels on the top row.
Method 3: Copy the full screen or active window
- Press Print Screen to copy the full desktop to the clipboard on many systems.
- Press Alt + Print Screen to copy only the active window.
- Paste with Ctrl + V into Paint, Word, PowerPoint, an email, or a messaging app.
Windows can be configured so the Print Screen key opens screen snipping instead of silently copying the desktop. If the result differs from what you expect, search Windows Settings for “Print Screen” and check the keyboard option.
Method 4: Use a timer for menus and tooltips
Open Snipping Tool from the Start menu. Choose a delay, such as three or five seconds, then select New. During the countdown, open the menu, hover over the tooltip, or arrange the temporary interface you need to document.
A timer is especially useful for right-click menus, account menus, hover cards, and error states that vanish as soon as another tool receives focus.
Where Windows screenshots are saved
Captures made with Windows + Print Screen usually appear in the Screenshots folder inside Pictures. Snipping Tool captures may remain on the clipboard until you save them, although newer versions can also save captures automatically depending on settings. If OneDrive backup is active, the image may be redirected to a OneDrive Pictures folder.
Pro-Tip: Use a simple filename pattern such as `2026-06-16-checkout-error-step-03.png`. Dates keep files in order, descriptive words make search easier, and step numbers preserve tutorial sequence.
Keyboard shortcuts are fastest when you know whether the result is copied to the clipboard or saved as an image file.

How to Take a Screenshot on a Mac
Mac screenshot shortcuts are consistent and powerful. They can capture the whole screen, a selected region, a specific window, or open a control panel with save-location and timer options.
Capture the entire screen
Press Shift + Command + 3. The image is normally saved to the desktop unless you changed the destination. If a thumbnail appears in the corner, click it to edit the capture before it is saved.
Capture a selected portion
- Press Shift + Command + 4.
- Drag the crosshair around the area you want.
- Release the mouse or trackpad button to capture.
- Press Escape before releasing if you want to cancel.
While dragging, hold the Space bar to move the selected box without changing its dimensions. This small shortcut is useful when the size is right but the frame is slightly misaligned.
Capture one window or menu
Press Shift + Command + 4, release the keys, then press Space bar. The pointer changes to a camera. Click the window or open menu you want to capture.
Hold Option while clicking if you want to exclude the window shadow. This produces a tighter image for documentation, presentations, and website tutorials.
Open the Screenshot toolbar
Press Shift + Command + 5 to open the Screenshot toolbar. From there, choose full screen, window, selected region, full-screen recording, or selected-region recording. The Options menu lets you choose a save location, timer, pointer visibility, and other capture behavior.
Apple maintains the current shortcut details in its take a screenshot on Mac instructions.
�� Quick Hack: Add Control to a Mac screenshot shortcut to copy the result instead of saving a file. For example, Control + Shift + Command + 4 copies a selected region so you can paste it directly into another app.
Change where Mac screenshots are saved
Open the Screenshot toolbar with Shift + Command + 5, select Options, and choose a destination such as Desktop, Documents, Clipboard, Mail, Messages, Preview, or another folder. Creating a dedicated Screenshots folder prevents the desktop from becoming cluttered.
Users comparing computers for documentation, remote work, or content production may also find the MyFlexBots guide to best laptops for work and productivity useful.
How to Take a Screenshot on a Chromebook
ChromeOS includes a dedicated Screen Capture tool. On Chromebooks with a Screenshot key, press it to open capture controls. Otherwise, press Shift + Ctrl + Show windows; the Show windows key usually looks like a rectangle with two lines beside it.
Full-screen Chromebook capture
Press Ctrl + Show windows to capture the full screen immediately. If you use an external keyboard without the Show windows key, Ctrl + F5 commonly performs the same action.
Partial capture or one window
Press Shift + Ctrl + Show windows to open the toolbar. Choose full screen, partial screen, or window capture, then follow the on-screen selection controls. The same interface can switch to screen recording when a still image is not enough.
Screenshots usually appear in the Downloads area unless you selected another destination. Open the Files app and check Recent or Downloads if the notification disappears before you click it.
Pro-Tip: Pin the Files app to the shelf while making a tutorial. After every capture, rename the file immediately instead of trying to identify a group of nearly identical thumbnails later.
How to Take a Screenshot on iPhone and iPad
The correct button combination depends on whether the Apple device has a Home button. Press the buttons together and release them quickly; holding them too long may open the power or emergency controls.
iPhone with Face ID
Press the Side button + Volume Up at the same time, then release. Open the screenshot preview when available to crop, mark up, share, copy, or save the image. Screenshots are stored in Photos and grouped under the Screenshots media type.
iPhone with a Home button
Press the Side button + Home button together. On older models where the power button is on top, press Top button + Home button.
iPad without a Home button
Press the Top button + either Volume button together, then release. On an iPad with a Home button, use Top button + Home button.
Take an iPhone or iPad screenshot without physical buttons
Use AssistiveTouch when buttons are difficult to press or damaged:
- Open Settings.
- Go to Accessibility > Touch > AssistiveTouch.
- Turn AssistiveTouch on.
- Customize the menu or a single-tap, double-tap, or long-press action for Screenshot.
You can also ask Siri to take a screenshot in many situations. Voice capture is convenient when one hand is occupied or a button combination is unreliable.
�� Quick Hack: Before capturing a mobile app, enable Do Not Disturb or a Focus mode for a minute. This prevents private message previews and one-time codes from appearing at the top of the screenshot.
Mobile screenshots are easiest when notifications are silenced and the important content is centered before the buttons are pressed.
How to Take a Screenshot on Android
On most Android phones and tablets, press Power + Volume Down at the same time and release. A preview appears after the capture, usually with options to edit, share, delete, or capture more content.
If the button method does not work, hold the Power button briefly and look for Screenshot, check the recent-apps screen for a screenshot command, or consult the device maker’s gesture settings. Manufacturers sometimes add palm swipes, three-finger gestures, edge panels, stylus commands, or back-tap actions.
Google’s current guidance is available in its take a screenshot or record your screen on Android help page.
Take a scrolling screenshot on Android
On Android 12 and later, many scrollable screens show Capture more after a normal screenshot. Tap it, adjust the crop handles to include the required length, then save. The option only appears in supported apps and on content that the system can extend.
Find Android screenshots
Open Google Photos or the phone’s gallery app and look for the Screenshots album. In a file manager, screenshots are commonly stored under Pictures > Screenshots. The exact path can differ by manufacturer and camera/gallery app.
Pro-Tip: For app instructions, capture one action per image. A sequence of four tightly cropped screenshots is usually clearer than one tall image containing every step.
How to Take a Screenshot on Linux and Ubuntu
Linux shortcuts vary by desktop environment, but GNOME-based systems such as standard Ubuntu commonly use the Print key to open the screenshot overlay. Select an area, full screen, or window, then capture.
Useful GNOME shortcuts include Alt + Print for the focused window and Shift + Print for the entire screen. Captures are generally saved under Pictures > Screenshots and copied to the clipboard as well.
KDE Plasma, Linux Mint, and other desktops may use a different built-in app, but the Print key remains the best starting point. Search the application launcher for Screenshot, Spectacle, or Screen Capture if the shortcut has been reassigned.
Capture a Full Webpage or Scrolling Page
Understanding how to take a screenshot of an entire page starts with recognizing that a normal capture only records visible pixels. For a long webpage, you need a browser’s full-page capture tool, a supported mobile scrolling capture, or several images stitched together.
Firefox full-page screenshot
In Firefox, right-click an empty part of a webpage and choose Take Screenshot when available. Select Save full page to capture the entire page from top to bottom, or Save visible for only the current viewport.
Browser developer tools method
Chromium-based browsers can capture a full page through developer tools, although the exact menus can change. Open Developer Tools, open the command menu, search for “screenshot,” and choose the full-size screenshot command when available. This is useful for designers and developers, but it is slower than a built-in browser button.
Mobile full-page capture
On supported iPhone or iPad pages, open the screenshot editor and look for Full Page. Depending on the device and app, the result may be saved as an image or PDF. On Android 12 and later, use Capture more when the button appears.
�� Quick Hack: For receipts and forms, print the page to PDF instead of making a very tall screenshot. PDF preserves text more clearly, supports multiple pages, and is easier to search or archive.
Full-page capture is useful for long webpages, but a PDF is often better when text quality and searchability matter.
Edit, Annotate, and Share Screenshots Clearly
Capturing the screen is only half the job. A useful screenshot directs the viewer’s attention without forcing them to inspect every pixel.
Crop aggressively, but keep enough context
Remove empty desktop space, unrelated browser tabs, and other apps. Keep enough surrounding interface for the viewer to recognize where the highlighted control is located. Cropping too tightly can turn a useful instruction into an unexplained fragment.
Use arrows, boxes, and numbered steps
One arrow is usually more effective than several circles. For a multi-step process, use numbered labels that match the written instructions. Keep annotations away from the exact text or button they explain.
Blur or cover sensitive information
Hide names, addresses, phone numbers, email addresses, payment details, order numbers, API keys, account IDs, QR codes, login links, and private browser tabs. A solid opaque rectangle is safer than a weak blur because some blur effects can leave text recognizable.
Choose PNG or JPG intentionally
- PNG is best for interfaces, text, diagrams, error messages, and flat colors. It keeps edges crisp.
- JPG is smaller for photographs and complex imagery but can make small interface text look fuzzy.
- PDF is useful for full pages, receipts, documents, and anything that should remain searchable or printable.
Share at a readable size
Do not shrink a screenshot until the text becomes unreadable. When sending through chat apps that compress images, attach the screenshot as a file or document instead of pasting it as a photo. For email, check the attachment after sending a test to yourself.
Pro-Tip: Use a consistent annotation style across an article: one arrow color, one box style, and one font size. Consistency makes a guide look professional even when the source screens come from different devices.
Common Screenshot Mistakes to Avoid
1. Capturing private information
The most serious mistake is sharing more than intended. Browser tabs, notification banners, file names, usernames, and account balances can remain visible even when the main subject looks harmless.
Prevention: Use Focus or Do Not Disturb, close unrelated apps, crop the image, and perform a final edge-to-edge review at full size.
2. Confusing clipboard capture with automatic saving
A user presses Print Screen, looks in the Screenshots folder, and assumes the feature failed. In reality, the image may be waiting on the clipboard.
Prevention: Paste into an editor with Ctrl + V, or use a shortcut that explicitly saves a file, such as Windows + Print Screen.
3. Sending a blurry or compressed image
Text-heavy screenshots can become unreadable after messaging apps resize them. Repeated editing and resaving as JPG creates additional quality loss.
Prevention: Keep the original PNG, crop instead of shrinking, and send it as a file when clarity matters.
4. Capturing too much screen
A full desktop image may include two monitors, tiny text, and unrelated windows. The viewer cannot immediately tell what to look at.
Prevention: Capture the active window or a selected region, then add one clear annotation.
5. Using a screenshot when another format is better
Screenshots are poor substitutes for editable text, spreadsheets, searchable PDFs, or exported reports. They are also inefficient for very long pages.
Prevention: Copy text when it should remain selectable, export data when it should be analyzed, and use PDF for multi-page content.
Understanding how to take a screenshot includes knowing when not to use one. Choose the format that preserves the information the recipient actually needs.
Advanced Tips and Next-Level Screenshot Hacks
Build a repeatable capture workflow
For articles, training manuals, and client onboarding, decide the image width, filename pattern, annotation style, and storage folder before the first capture. A repeatable workflow prevents inconsistent images and reduces cleanup at the end.
A practical sequence is: prepare screen, capture region, rename file, annotate a copy, insert into the document, and archive the untouched original. Keep originals because later edits are easier when labels and arrows are not baked into the only available file.
Use OCR to recover text
Modern phones, photo apps, note tools, and operating systems can often recognize text inside screenshots. OCR is helpful when you cannot select an error message, serial number, or address directly. Always proofread extracted text because similar characters such as 0/O and 1/l are easily confused.
Create a dedicated screenshot folder with cloud backup
A single folder makes cleanup and searching easier. Sync that folder only when the images do not contain confidential client or company data. For sensitive work, use an approved business storage location instead of a personal cloud account.
Use clipboard history for rapid documentation
Windows clipboard history can retain multiple recent items after it is enabled. This helps when capturing several regions before pasting them into a document. Still save critical images because clipboard history is not a permanent archive.
Pair screenshots with automation carefully
Browser automation, documentation tools, and AI assistants can speed up naming, summarizing, and arranging screenshots. Review every generated caption and redact sensitive data before uploading images to any external service. The MyFlexBots roundup of best AI tools for productivity can help readers compare broader workflow options.
�� Quick Hack: Keep a blank “redaction bar” image in your editor or presentation template. Duplicate it over names, emails, and numbers instead of drawing a new shape each time.
A consistent naming, editing, and storage workflow saves more time than learning dozens of rarely used shortcuts.
Photo source: Unsplash
Troubleshooting: What to Do When Screenshots Fail
Knowing how to take a screenshot is not enough when a shortcut, app, display, or storage location behaves unexpectedly. Work through the symptoms below before installing another capture utility.
The shortcut does nothing
First, test another method. On Windows, open Snipping Tool from Start; on Mac, open the Screenshot toolbar; on Android or iPhone, use the accessibility or voice method. If the alternative works, the original shortcut may be reassigned, disabled, or dependent on an Fn key.
Restart the device if the capture tool has stopped responding. On a managed work computer, policy settings may disable screen capture in certain apps.
The screenshot is black, blank, or missing video
Streaming services, banking apps, password managers, private workspaces, and protected video players may block screenshots for copyright or security reasons. This is intentional, and changing screenshot apps may not bypass the protection.
A black region can also appear when graphics acceleration, remote desktop software, virtual machines, or overlays interfere with capture. Try capturing a different app, disabling an unnecessary overlay, or using the application’s built-in export or support feature.
The wrong monitor is captured
Full-screen shortcuts may capture all monitors as one wide image. Use window capture or selected-region mode instead. On Windows, Windows + Shift + S is usually the quickest fix; on Mac, use Shift + Command + 4 and drag around one display.
The screenshot cannot be found
Check the notification immediately after capture, then search by date. Look in Pictures > Screenshots, Desktop, Downloads, Photos > Screenshots, or a cloud-synced Pictures folder. Also paste into an editor in case the image exists only on the clipboard.
Phone buttons open the power menu or change volume
Press both buttons at exactly the same time and release quickly. Do not hold them. Remove a thick case if it prevents simultaneous contact, or assign Screenshot to AssistiveTouch, Quick Tap, a gesture, or the accessibility menu.
Scrolling capture is missing
The page or app may not support it, the visible content may not actually scroll, or the device may be running an older operating system. Try the feature on a long settings page to confirm whether the tool works elsewhere. For webpages, use a browser full-page capture or save to PDF.
The screenshot looks washed out or too dark
HDR content can look different after capture because the screenshot is viewed in a non-HDR app or converted to another format. Capture a standard dynamic range version when possible, or export from the original application instead of photographing the screen.
Text is too small to read
Return to the source, increase browser or app zoom, and capture a smaller region. Cropping a huge desktop screenshot after the fact does not restore detail that was never recorded at a readable scale.
Screenshot Organization and Maintenance
Screenshots multiply quickly because they are easy to create and easy to forget. A small maintenance routine keeps them useful.
- Weekly: Delete duplicates, temporary verification codes, accidental captures, and images already inserted into finished work.
- Monthly: Move important screenshots into project folders and check whether cloud backup is appropriate.
- Before sharing: Review privacy, crop unused space, verify text size, and use a descriptive filename.
- For long projects: Keep an untouched originals folder and a separate edited folder.
- For teams: Document the approved storage location, naming pattern, annotation style, and retention period.
Avoid storing passwords, recovery codes, identity documents, or private customer data as ordinary screenshots. Use a password manager, secure document system, or approved encrypted storage instead.
Frequently Asked Questions
How do I take a screenshot without a Print Screen key?
Use Windows + Shift + S to open the Snipping Tool overlay. On some compact Windows keyboards, Fn + Windows logo key + Space can also capture the screen. You can always open Snipping Tool from the Start menu if hardware shortcuts are unavailable.
Where are screenshots saved?
Windows automatic captures commonly go to Pictures > Screenshots; Mac captures usually go to the desktop unless the location was changed; Chromebook captures commonly appear in Downloads; iPhone and iPad captures appear in Photos; Android captures are usually in a Screenshots album or Pictures > Screenshots.
How do I capture only one window?
On Windows, select window mode after pressing Windows + Shift + S, or use Alt + Print Screen for the active window. On Mac, press Shift + Command + 4, then Space bar, and click the window. Chromebook capture controls also include a window option.
How do I capture a whole webpage?
Use a browser’s full-page screenshot feature, Android’s Capture more option, or Apple’s Full Page control where supported. For documents, forms, invoices, and articles, printing to PDF often gives a cleaner and more searchable result.
Why is my screenshot black?
The app may block captures to protect video, financial data, passwords, or private content. Graphics acceleration, remote sessions, and overlays can also cause black areas. Test another app and use the original app’s export, download, or share function when available.
Is PNG or JPG better for screenshots?
PNG is usually better for user interfaces, text, and diagrams because edges remain sharp. JPG is smaller for photographs but can introduce visible compression around letters and icons. Keep the original PNG when the screenshot is evidence, documentation, or a troubleshooting record.
Conclusion
Once you know how to take a screenshot on each device, the larger skill is choosing the right capture type, protecting private information, and delivering an image the recipient can understand immediately. Use built-in shortcuts first, save important captures with descriptive names, and choose PDF or editable text when a screenshot is not the best format.
editor's pick
latest video
news via inbox
Nulla turp dis cursus. Integer liberos euismod pretium faucibua
[…] MyFlexBots guide: how to take a screenshot — helpful when saving generator settings, scan results, or errors for later […]
[…] a quick way to save your before-and-after Task Manager screen? See MyFlexBots’ how to take a screenshot […]