How to Scan a Document with Your Phone:Step-by-Step Guide
You need a clean, sendable copy of a document right now, and the nearest scanner is either broken, three floors away, or doesn’t exist. The good news: the device already in your pocket can do the job better than most standalone scanners from a decade ago. This guide walks you through exactly how to scan a document with your phone, from the app you should use to the lighting tricks that separate a blurry mess from a crisp, print-ready file.
By the end of this guide you’ll know how to scan a document with your phone in under 60 seconds, fix the most common scanning mistakes, and turn any photo of paper into a searchable PDF you can email, sign, or archive.
Paper piles up — leases, receipts, insurance forms, kids’ school permission slips — and at some point almost every one of them needs to exist as a digital file, whether that’s for an email attachment, a tax folder, or just so you can finally throw the physical copy away. Learning how to scan a document with your phone once means you never have to hunt for a scanner again, and the files you produce are often sharper than what a flatbed office scanner spits out, because your phone’s camera resolution now outpaces most dedicated scanning hardware.
Quick Answer: How to Scan a Document with Your Phone
To scan a document with your phone, open your phone’s built-in Notes or Files scanning tool (or a dedicated scanner app), place the document on a flat, well-lit, high-contrast surface, align it inside the on-screen frame, and let the app auto-capture and auto-crop the edges. Save the result as a PDF, then rename and share it directly from your phone.
That’s the 40-second version. The rest of this guide covers the tools, the technique, and the fixes for when your scan doesn’t come out looking like the sample on the App Store listing.
Essential Tools & Materials Breakdown
You don’t need to buy anything to scan a document with your phone, but which app you use will change the quality and features you get. Here’s how the main options stack up.
| Tool | Cost | Skill Level | Best For |
| iPhone Notes app (built-in) | Free | Beginner | Quick single-page scans, iOS users |
| Google Drive scan (Android) | Free | Beginner | Android users who already live in Google Workspace |
| Adobe Scan | Free (paid tier optional) | Beginner | OCR text recognition and cloud sync |
| Microsoft Lens | Free | Beginner | Whiteboards, business cards, receipts |
| CamScanner | Free (paid tier optional) | Intermediate | Batch scanning multi-page documents |
| A tripod or phone stand | $10–$25 | Beginner | Overhead scans of large or bound documents |
| A desk lamp or ring light | $15–$40 | Beginner | Low-light rooms, evening scanning |
💡 Quick Hack: If you only scan documents occasionally, skip the paid apps entirely. The scanner built into your phone’s Notes (iPhone) or Files/Drive app (Android) already produces publication-quality results for free.
Comprehensive Step-by-Step Execution Guide
Choose the Right App
It’s worth saying up front: you do not need a fancy app to get great results. The apps below mostly differ in extras — OCR accuracy, cloud sync, batch tools — rather than raw scan quality, since the actual capture-and-crop engine on the built-in tools is already excellent. Pick based on what you’ll do with the file afterward, not on app-store ratings alone.
Every modern smartphone has a document scanner hiding in plain sight. On iPhone, it’s built directly into the Notes app. On Android, it lives inside Google Drive or the Files app. If you want extra features like text recognition (OCR), multi-page batching, or cloud backup, a dedicated app like Adobe Scan or Microsoft Lens is worth the download. For most people learning how to scan a document with your phone for the first time, the built-in tool is the fastest path — no account, no download, no learning curve.
On iPhone:
- Open the Notes app.
- Tap the camera icon, then select “Scan Documents.”
- Point your phone at the page.
On Android:
- Open Google Drive.
- Tap the “+” button, then “Scan.”
- Point your phone at the page.
Set Up Your Lighting and Surface

This is the step almost everyone skips, and it’s the single biggest factor in scan quality. A dim room or a glossy tabletop will introduce glare, shadows, and washed-out text no matter how good your camera is.
- Use natural daylight from a window whenever possible — it’s softer and more even than overhead bulbs.
- If you’re scanning at night, position a lamp at a 45-degree angle to the page, not directly above it, to avoid a hot spot in the center of the scan.
- Place the document on a matte, non-reflective, high-contrast surface. A dark desk works well for white paper; a light-colored placemat works well for dark or glossy pages.
- Flatten creased or curled paper under a book for a minute before you scan it — curled edges confuse the auto-crop feature.
Pro-Tip: Turn off your camera flash before you scan a document with your phone. Flash creates a bright hotspot directly under the lens and makes auto-crop far less reliable.
Frame and Align the Document
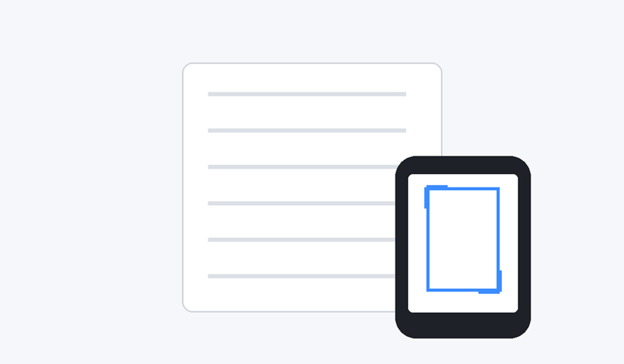
Hold your phone directly above the document, parallel to the surface, not at an angle. Most scanning apps show a live yellow or blue outline that snaps to the edges of the page as you move — wait for that outline to lock onto all four corners before capturing. If the app can’t find the edges automatically, most tools let you drag the corners manually after the shot.
- Keep the full page inside the frame with a small margin of background visible on all sides.
- Hold the phone steady for a full second after the frame locks — motion blur is the second most common reason scans come out illegible.
- For multi-page documents, most scanning apps let you keep capturing pages without leaving the scan screen; each page gets added to the same file automatically.
💡 Quick Hack: Prop your phone on a stack of books or a small tripod at the correct height instead of holding it freehand. It removes hand shake entirely and is the fastest upgrade you can make if you scan a document with your phone regularly.
Crop, Rotate, and Enhance

Once the app captures the page, you’ll land on an editing screen. This is where a mediocre photo becomes an actual scan.
- Check the auto-crop first — drag any corner that missed the true edge of the page.
- Rotate the image if it captured sideways or upside down.
- Choose a filter: “Black & White” or “Grayscale” boosts text contrast dramatically and is the best choice for text-heavy pages; “Color” is better for anything with photos, diagrams, or colored ink.
- Adjust brightness/contrast manually if the automatic filter still looks dim.
Pro-Tip: Always preview at full screen size before saving. Cropping errors and blurry text are much easier to catch zoomed in than on the small thumbnail preview.
Add More Pages (If Needed)
If you’re digitizing a multi-page contract, receipt stack, or report, don’t close the app after page one. Tap the “+” or camera icon again to add the next page to the same file, repeating steps 2–4 for each sheet. Reorder or delete individual pages before you save the final document.
Export and Save
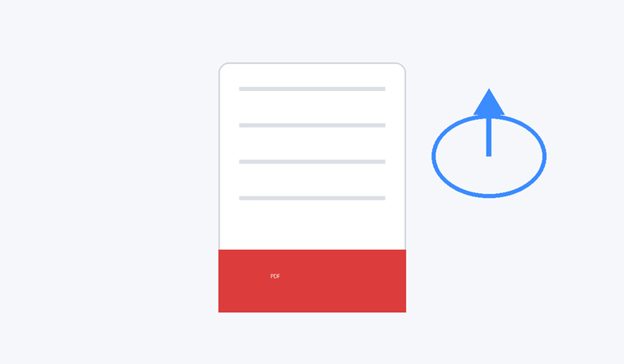
- Choose your file format — PDF is the standard for anything you’ll email, print, or sign, while JPEG works fine for a single quick reference image.
- Rename the file something searchable, like “Lease-Agreement-2026” instead of “Scan001.”
- Save it to your phone, or directly to cloud storage (iCloud, Google Drive, Dropbox) so it’s backed up automatically.
- Share it straight from the export screen via email, text, or AirDrop — no need to reopen a separate app.
💡 Quick Hack: If the recipient needs to edit or search the text (not just view it), run the file through an OCR tool like Adobe Scan or Microsoft Lens before sending — OCR converts the flat image into searchable, selectable text.
Common Mistakes to Avoid
Even people who’ve learned how to scan a document with your phone dozens of times still run into these five errors.
- Scanning at an angle instead of straight overhead. An angled shot distorts the page into a trapezoid shape, and auto-crop tools struggle to correct it. Always hold the phone flat and parallel to the document.
- Using the camera flash. Flash bounces off glossy paper and creates a glare spot that can blot out entire lines of text. Rely on ambient light instead.
- Skipping the crop-and-rotate step. A rushed export locks in a crooked or partially cropped page permanently. Always review the edit screen before saving.
- Scanning on a cluttered or matching-color background. If your page is white and your desk is white, the app’s edge-detection has nothing to grab onto. Use a contrasting surface.
- Saving everything as separate JPEGs instead of one PDF. A ten-page contract saved as ten individual photos is a nightmare to send or file. Batch multi-page scans into a single PDF from the start.
Advanced Tips / Next-Level Hacks
Once the basics feel automatic, these upgrades will make your workflow faster and your files more useful.
- Turn on automatic OCR. Apps like Adobe Scan and Microsoft Lens can convert scanned text into a searchable, copy-pasteable layer behind the image — genuinely useful when you need to search years of scanned receipts for one specific word.
- Use a document-scanning shortcut or widget. Both iOS and Android let you add a scan shortcut to your home screen or lock screen, cutting the process down to a single tap.
- Batch-scan with a phone stand. For anyone who regularly needs to scan a document with your phone — small business owners, freelancers doing expense reports, students digitizing notes — an overhead phone stand turns scanning into an assembly line: place page, tap capture, swap page, repeat.
- Set up automatic cloud sync. Most scanning apps can auto-upload every finished scan to a specific cloud folder, which doubles as a backup in case your phone is lost or damaged.
- Compress large PDFs before emailing. Multi-page color scans can balloon past most email attachment limits; most scanning apps include a “reduce file size” or “optimize” option in the export menu.
Pro-Tip: If you scan the same type of document repeatedly (invoices, IDs, forms), save a custom preset in your scanning app for filter, color mode, and file format — it removes several taps from every future scan.
- Password-protect sensitive scans. IDs, tax documents, and signed contracts often deserve more than a plain PDF sitting unlocked in your camera roll — most scanning apps and PDF viewers offer a quick password-lock option in the share menu.
- Name files with a consistent pattern. A format like “Date_DocumentType_Name” (2026-08-16_Insurance_Claim) makes a folder of dozens of scans searchable at a glance instead of a wall of “IMG_” filenames.
Troubleshooting & Maintenance Guide
Problem: The scan is blurry.
Hold the phone steadier and wait for the app’s autofocus indicator (usually a small square) to confirm focus before capturing. Cleaning your camera lens with a microfiber cloth also solves this more often than people expect — pocket lint and fingerprints are a surprisingly common culprit.
Problem: Auto-crop keeps cutting off part of the page.
Increase the contrast between the document and the surface beneath it, and make sure all four corners of the page are visible inside the frame before you capture. If auto-crop still misses, drag the corner handles manually on the edit screen.
Problem: The text looks washed out or faint.
Switch the filter to “Black & White” or “Grayscale” rather than “Color” or “Photo,” and increase the contrast slider on the edit screen. Faint pencil or thermal-paper receipts benefit the most from this fix.
Problem: The file size is too large to email.
Use your app’s built-in compression/optimize option, switch from color to grayscale, or split a long multi-page PDF into two smaller files.
Problem: The app can’t detect the document’s edges at all.
This almost always comes down to background contrast or lighting. Move to a plain, contrasting surface and add more even light before trying again; as a last resort, most apps allow a fully manual capture with manual cropping afterward.
Maintenance tip: Periodically clear your scanning app’s cache and delete duplicate or test scans — a cluttered scan history makes it harder to find the file you actually need, and old cached thumbnails can slow the app down over time.
Frequently Asked Questions
Is it better to scan a document with your phone or take a regular photo?
A dedicated scanning tool is significantly better than a regular camera photo because it automatically detects and squares off the page’s edges, corrects perspective distortion, and applies contrast filters built specifically for text and paper — a plain photo does none of that.
Do I need to download an app to scan a document with my phone?
No. Both iPhone (via the Notes app) and Android (via Google Drive or Files) include a built-in scanning tool that requires no extra download.
What’s the best file format for a scanned document?
PDF is the best format for anything with multiple pages, anything you’ll print, and anything you’ll send for signature, since it preserves page order and formatting across every device.
Can I make a scanned document searchable?
Yes — enable OCR (optical character recognition) in your scanning app, which detects the text within the image and layers a searchable, selectable text version underneath it.
Why does my scan look darker or blurrier than the original paper?
This is almost always a lighting or focus issue rather than a limitation of the phone’s camera — add more even ambient light, remove the flash, and confirm the autofocus square has locked before capturing.
How do I scan a document that’s larger than a single page, like a poster or blueprint?
Most scanning apps include a “multi-shot” or panorama-style stitching mode for oversized documents — check your app’s settings, or as a workaround, scan the item in overlapping sections and combine them afterward in a photo-editing or PDF-merging tool.
Wrapping Up
Once you’ve done it a couple of times, learning how to scan a document with your phone stops feeling like a workaround and starts feeling like the obvious way to handle paperwork — no scanner, no printer, no waiting. Good lighting, a steady overhead angle, and a quick crop-and-filter pass are really all it takes to get office-scanner-quality results from the phone already in your hand.
Bookmark this guide the next time you’re staring at a stack of paperwork and no printer in sight — every step here works whether you’re on a five-year-old phone or the newest flagship, because the technique matters far more than the hardware.
What’s the most annoying document you’ve had to scan — a wrinkled receipt, a giant blueprint, an old family photo? Drop it in the comments and we’ll help you troubleshoot it.
editor's pick
latest video
news via inbox
Nulla turp dis cursus. Integer liberos euismod pretium faucibua