How to Compress a Video: Step-by-Step Guide
A video can look perfect on your phone and still be too large to email, upload, store, or send to a client. The wrong fix is to crush the quality with a random slider; the right fix is to control the few settings that actually determine file size.
This guide explains how to compress a video on Windows, Mac, iPhone, Android, online, and with FFmpeg. You will learn which codec, resolution, frame rate, bitrate, and audio settings to change, how to hit a target file size, and how to avoid the blurry, blocky results that make compression look amateur.
What Is the Best Way to Compress a Video?
| DIRECT ANSWER To learn how to compress a video, keep the original frame rate, remove unwanted footage, export as MP4 with H.264 for broad compatibility, lower the bitrate gradually, and reduce resolution only when necessary. Test a short preview first, compare it with the original, then encode the full file once. |
What Video Compression Actually Changes
Compression makes a video smaller by storing visual and audio information more efficiently. Most practical exports are lossy: the encoder removes detail that viewers are least likely to notice, then uses prediction and repeated patterns so it does not have to store every frame as a complete image.
Five controls do most of the work. Resolution controls the number of pixels. Frame rate controls how many frames are stored each second. Video bitrate controls how much data is available for those frames. The codec controls the compression method. Audio bitrate controls the sound portion of the file.
The container is the file wrapper, such as MP4, MOV, or MKV. The codec is the compression system inside it, such as H.264, H.265/HEVC, VP9, or AV1. Changing a filename from .mov to .mp4 does not automatically re-encode or shrink the video; a real export or transcode is required.
Best universal delivery format: MP4 container, H.264 video, AAC audio.
Best when smaller size matters and devices are modern: H.265/HEVC.
Best for advanced web delivery and maximum efficiency: AV1, with slower encoding and uneven device support.
Best archival practice: keep the original master and create separate delivery copies.
Essential Tools and Settings Breakdown
You do not need expensive editing software. A free desktop transcoder is enough for most work, while a command-line tool gives repeatable control for advanced or batch jobs. Use the comparison below to choose the lightest tool that solves the actual problem.
| Tool or Material | Best Use | Estimated Cost | Skill Level | Key Setting |
| Original video copy | Safety backup and quality comparison | Free | Beginner | Never overwrite the master |
| HandBrake | Free desktop compression on Windows, macOS, and Linux | Free | Beginner | Constant Quality / RF |
| FFmpeg | Precise commands, automation, and batch processing | Free | Intermediate | CRF, preset, codec, scale |
| Mobile video editor | Quick exports from iPhone or Android | Free to paid | Beginner | Resolution, FPS, quality |
| Online compressor | One-off, non-sensitive clips | Free to paid | Beginner | Target size or quality |
| Storage space | Room for temporary files and the output copy | Existing storage | Beginner | Keep at least 2x source size free |
| Preview player | Check sharpness, motion, audio sync, and color | Free | Beginner | Review at 100% size |
| Target-size calculator | Estimate the required total bitrate | Free | Intermediate | Size × 8 ÷ duration |
Before You Start: Define the Delivery Goal
A smaller file is not automatically a better file. The correct settings depend on where the video will be viewed, how large it can be, and whether the viewer needs text, faces, fast action, or fine product detail to remain clear.
When deciding how to compress a video, write down three facts before opening any software: the maximum acceptable file size, the playback destination, and the lowest acceptable resolution. A five-minute training clip for email has a different goal from a 4K product master or a vertical social post.
For email or messaging: prioritize size and compatibility.
For a website: prioritize fast start, reasonable bitrate, and responsive playback.
For social platforms: preserve the intended aspect ratio and avoid unnecessary re-encoding.
For client delivery: preserve a high-quality master and export a review copy separately.
For long-term storage: do not use aggressive compression as the only archive.
| 💡 Quick Hack: Create a three-column note named Original, Test, and Final. Record file size, resolution, codec, and settings for each export. One minute of documentation prevents repeated guessing later. |
Calculate the Bitrate Needed for a Target File Size
When a platform gives you a hard size limit, knowing how to compress a video means using bitrate instead of dragging a vague quality slider. The practical estimate is: total bitrate in megabits per second equals target size in megabytes multiplied by 8, divided by duration in seconds.
Example: a 100 MB limit for a five-minute video gives 100 × 8 ÷ 300 = 2.67 Mbps total bitrate. Subtract roughly 0.128 Mbps for 128 kbps audio, leaving about 2.54 Mbps for video. Encode slightly below the theoretical maximum to allow for container overhead and bitrate variation.
A target-bitrate export is useful when file size must be predictable. Constant-quality encoding is usually better when visual consistency matters more than the exact final size. HandBrake’s documentation recommends constant quality for many general workflows, while multi-pass average bitrate is the better fit for a strict size target.
| Pro-Tip: For a hard upload limit, aim 5% to 10% below the maximum. A file calculated to land exactly at the limit can exceed it because bitrate is not perfectly uniform and the container adds overhead. |
Inspect the Source Before Compressing
Right-click the file and inspect its duration, resolution, frame rate, codec, and current bitrate. On a phone, use the information panel in the Photos or Gallery app, or open the clip in an editor that displays export details.
Look for clues that the file has already been heavily compressed. Small 1080p clips downloaded from social media may already have low bitrate and visible artifacts. Re-encoding them can make the picture worse without producing a meaningful size reduction.
Duration: longer videos need more data at the same quality.
Resolution: 3840×2160 has four times as many pixels as 1920×1080.
Frame rate: 60 fps generally needs more data than 30 fps for similar quality.
Codec: H.265 and AV1 can be more efficient than H.264, but compatibility varies.
Bitrate: An unusually high bitrate is the easiest opportunity for size reduction.

Trim, Crop, and Clean the Video First
Cutting unwanted footage is lossless in concept: every second removed is data you no longer need to encode. Delete long countdowns, repeated takes, accidental camera movement, dead air, and unnecessary outros before reducing quality.
Crop only when the frame contains permanent unused space, such as thick black borders or an accidental edge. Avoid aggressive cropping that forces the remaining picture to be enlarged; enlarging soft footage makes compression artifacts more obvious.
Clean the audio too. Remove unused tracks, silent duplicate channels, or surround audio when the final destination only needs stereo. For speech, 96 to 128 kbps AAC is often sufficient; music-heavy work may justify 160 to 256 kbps.
| 💡 Quick Hack: Trim first, compress second. Removing 20% of the running time usually removes close to 20% of the final data without sacrificing image quality. |
Choose the Right Codec and Container
For the broadest compatibility, choose MP4 with H.264 video and AAC audio. This combination works across browsers, phones, computers, presentation software, social platforms, and most client systems.
Choose H.265/HEVC when you need a smaller file at similar visual quality and you control the playback devices. It is useful for 4K footage, modern phones, and storage copies, but older devices, browsers, or business systems may not play it smoothly.
AV1 can deliver excellent efficiency, especially for web video, but software encoding may be slow. Use it when the destination supports it and the reduced delivery size justifies longer processing. Keep H.264 as a fallback when compatibility matters more than the last percentage of savings.
The official FFmpeg documentation describes encoding as typically lossy, meaning smaller files come from a controlled reduction in information. That is why choosing the right codec is only half the job; the quality target and preset determine whether the savings look acceptable.
Use Resolution as a Strategic Lever
Resolution reduction produces one of the largest size savings, but it also removes real detail. Keep 4K when viewers will crop, zoom, grade, or display on large screens. Use 1080p for most web, business, training, and social delivery. Use 720p for small screens, quick previews, or strict transfer limits.
Do not upscale a low-resolution source. Exporting a 720p original as 1080p adds pixels but not detail, and it may create a larger file. Preserve the source resolution unless the delivery goal clearly benefits from a smaller frame.
4K to 1080p: major reduction with a visible detail trade-off on large screens.
1080p to 720p: useful for email, messaging, and small embedded players.
Vertical video: keep 1080×1920 when text and faces need to remain crisp.
Square video: 1080×1080 is a practical social-media delivery size.
Keep or Reduce the Frame Rate Carefully
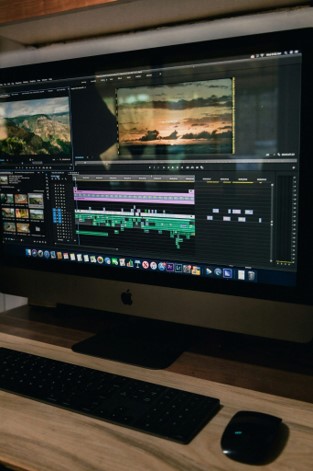
Keep the same frame rate as the source whenever possible. Converting 30 fps footage to 60 fps creates duplicate or synthesized frames, increases processing, and does not create genuine motion detail. Converting 60 fps to 30 fps can reduce size, but fast motion may look less fluid.
Use 24, 25, or 30 fps for talking-head videos, tutorials, interviews, screen presentations, and ordinary social clips. Keep 50 or 60 fps for sports, gaming, fast demonstrations, or footage intended for slow motion.
YouTube’s official upload guidance recommends using the same frame rate that was recorded. That principle applies beyond YouTube because unnecessary frame-rate conversion can create judder, uneven motion, or audio-sync problems.
Set Quality, Bitrate, and Encoder Speed
Quality-based encoding is the simplest method for most people. In HandBrake, the RF control is a constant-quality setting: a lower RF value preserves more detail and makes a larger file, while a higher value increases compression and makes a smaller file.
For H.264, begin around RF 20 to 23 for 1080p general-purpose delivery. Move one or two points higher for a smaller file, then compare a difficult section with motion, hair, water, foliage, screen text, or low-light noise. There is no universal perfect number because clean animation compresses differently from handheld night footage.
The encoder preset controls the time-versus-efficiency trade-off. A slower preset spends more processing time finding ways to store the picture efficiently. It may create a smaller file at the same quality target, while a very fast preset usually needs more data or produces a weaker picture.
Need speed now: use a faster preset and accept a slightly larger file.
Need the smallest delivery file: use a slower preset and test before a long encode.
Need an exact size: use average bitrate with two-pass encoding.
Need consistent quality: use constant quality / CRF / RF.
| Pro-Tip: Test one difficult 20- to 30-second section before encoding the full video. A short preview reveals blockiness, banding, noisy shadows, and unreadable text in minutes instead of after a one-hour export. |
How to Compress a Video with HandBrake
HandBrake is the most practical free desktop option for beginners because it exposes professional controls without requiring command-line work. The following workflow creates a compatible MP4 and lets you control quality methodically.
- Install HandBrake from its official website and open the source video.
- Choose a preset close to the destination, such as Fast 1080p30. A preset is a starting point, not a locked rule.
- Open the Summary tab and select MP4. Enable Web Optimized when the file will be served online so playback can begin before the full file downloads.
- Open Dimensions. Keep the source resolution for the first test, or choose 1920×1080 or 1280×720 when downsizing is part of the plan.
- Open Video. Choose H.264 for universal compatibility or H.265 for modern devices and smaller files.
- Set frame rate to Same as Source. Use constant frame rate only when an editor or platform has trouble with variable-frame-rate footage.
- Select Constant Quality. Start around RF 20–23 for H.264 1080p, then adjust after previewing.
- Choose a medium or slow encoder preset when time allows. Avoid placebo settings; extreme slowness rarely produces a useful real-world gain.
- Open Audio. Keep one required track, choose AAC, and set a sensible bitrate such as 128 kbps for ordinary stereo speech.
- Choose a new output filename, encode, then compare the result against the original at 100% viewing size.
| 💡 Quick Hack: Save a custom HandBrake preset for each repeat job: Client Review 1080p, Email 720p, Website H.264, and Archive HEVC. Consistent presets reduce errors and make team output predictable. |
How to Compress a Video with FFmpeg
FFmpeg is ideal when you want exact, repeatable settings, batch processing, or automation. The basic command below converts the source to H.264 MP4, uses a balanced constant-quality target, compresses audio, and moves playback metadata to the front for faster web start.
-c:v libx264 selects the H.264 encoder.
-crf 23 controls visual quality; lower is higher quality and larger.
-preset medium balances encoding speed and compression efficiency.
-c:a aac -b:a 128k creates compatible stereo audio at a practical bitrate.
+faststart helps web playback begin sooner by moving MP4 metadata forward.
ffmpeg -i input.mov -c:v libx264 -crf 23 -preset medium -c:a aac -b:a 128k -movflags +faststart output.mp4
FFmpeg Command for 1080p Output
Use scaling when the source is larger than the delivery frame. The -2 value lets FFmpeg calculate an even height while preserving the aspect ratio. This avoids distorted output and codec errors caused by odd dimensions.
ffmpeg -i input.mp4 -vf scale=1920:-2 -c:v libx264 -crf 23 -preset slow -c:a aac -b:a 128k -movflags +faststart output-1080p.mp4
FFmpeg Command for a Target Bitrate
For a strict size requirement, calculate the available video bitrate and use two-pass encoding. The first pass analyzes complexity; the second allocates bits more intelligently. The exact null output syntax differs between Windows and macOS/Linux, so use the correct null device for your system.
ffmpeg -y -i input.mp4 -c:v libx264 -b:v 2500k -pass 1 -an -f mp4 NUL
ffmpeg -i input.mp4 -c:v libx264 -b:v 2500k -pass 2 -c:a aac -b:a 128k output-target.mp4
How to Compress a Video on iPhone or Android
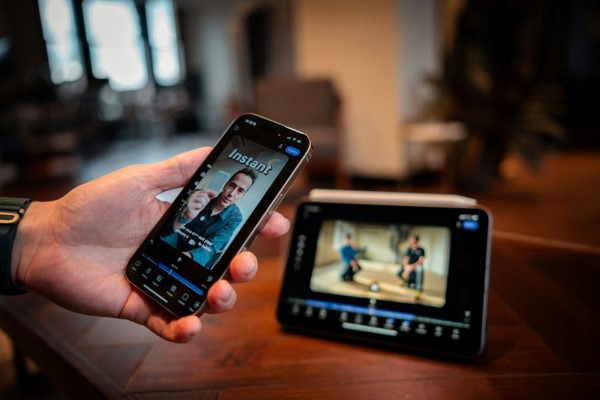
A phone editor can create a smaller delivery copy without moving the original to a computer. Open the clip in a reputable editor, select Export or Share, then set resolution, frame rate, and quality manually instead of accepting the largest default.
For most vertical social or messaging clips, start with 1080p, the original frame rate, and a medium-to-high quality setting. Drop to 720p only when the file remains too large or the recipient will view it on a small screen.
Avoid downloading and re-uploading the same clip through several apps. Every app may re-encode the file, and repeated lossy compression creates smeared detail, ringing around text, and blocky movement.
| 💡 Quick Hack: Record future clips at the resolution you truly need. Shooting every casual clip in 4K creates storage and transfer problems that later compression must solve. |
How to Compress a Video Online Safely
Online compressors are convenient for a short, non-sensitive clip when you cannot install software. Upload the file, choose MP4/H.264, select a target quality or size, download the result, and play the entire video before deleting the upload from the service when that option is available.
Do not upload confidential client footage, unreleased ads, personal documents, medical recordings, legal evidence, or proprietary training videos to an unknown site. Review the provider’s privacy policy, retention policy, upload limits, and whether files are used for model training or marketing analysis.
Browser tools can also fail on unstable connections or large files. For anything important, HandBrake or FFmpeg keeps the source local and gives you better control.
Best Settings by Use Case
Use these starting points as test settings, not rigid laws. Motion, grain, animation, screen recordings, and low-light footage require different amounts of data. Always preview the hardest section of the video before committing.
| Use Case | Resolution | Codec / Container | Frame Rate | Starting Quality |
| Email or quick review | 720p | H.264 / MP4 | Same as source, max 30 fps when acceptable | RF 23–26 or target bitrate |
| Website embed | 1080p or 720p | H.264 / MP4 | Same as source | RF 21–24, fast start |
| YouTube upload | Source resolution | H.264 / MP4 | Same as recorded | High-quality master; avoid over-compressing |
| Vertical social clip | 1080×1920 | H.264 / MP4 | 30 or source fps | Medium-high quality |
| 4K storage copy | 2160p | H.265 / MP4 or MKV | Same as source | Careful visual test |
| Screen recording | Native or 1080p | H.264 / MP4 | 30 fps often enough | Protect text sharpness |
| Talking-head training | 1080p | H.264 / MP4 | 25 or 30 fps | RF 21–24, AAC 96–128k |
Common Mistakes to Avoid
Most poor results come from changing too many controls at once or exporting repeatedly. Avoid these five errors before blaming the software.
- Overwriting the original. Compression is a delivery process, not a reason to destroy the master. Save the output with a clear suffix such as -web, -email, or -720p.
- Lowering every setting at once. If resolution, frame rate, bitrate, and audio quality all drop together, you will not know which change caused the damage. Test one major lever at a time.
- Using an incompatible codec. H.265 or AV1 may create a smaller file, but the recipient’s device or platform may reject it. Use H.264 when universal playback is the priority.
- Compressing an already compressed download. Social-media copies may have little clean detail left. Ask for the original camera file or project export whenever possible.
- Judging only by file size. A tiny file with unreadable text, crushed shadows, noisy faces, or delayed audio is not successful. Review the full output on the device that matters.
Advanced Tips and Next-Level Compression Hacks
Once you understand how to compress a video reliably, you can build faster, more predictable workflows for teams, websites, and recurring content. The following methods save more time than chasing one magical setting.
Create a Master-and-Delivery System
Store one high-quality master, then create delivery variants from that master only. A practical folder can contain Master, Web 1080p, Social Vertical, Client Review, and Thumbnail assets. Never create the next version from an already compressed delivery copy.
Use Content-Aware Testing
Compression difficulty varies by scene. Grain, smoke, confetti, water, leaves, crowds, fast camera movement, and dark gradients need more data than a static presentation slide. Test the hardest scene rather than the easiest talking-head moment.
| Pro-Tip: If a noisy low-light clip will not compress cleanly, apply gentle denoising before encoding. Random sensor noise is expensive because the encoder treats it as changing detail in every frame. |
Use Hardware Encoding Selectively
Modern GPUs and processors can encode H.264 or H.265 much faster than software. Hardware encoding is excellent for rapid drafts, livestreaming, and high-volume work, but software encoders may produce better efficiency at the same visible quality. Compare on a short test before standardizing the workflow.
Batch Repetitive Jobs
HandBrake queues and FFmpeg scripts can process multiple files overnight. Use consistent filenames, preserve folder structure, log failed jobs, and verify a sample from each camera type. Batch processing is powerful only when the preset has already been tested.
Protect Text and Screen Recordings
Screen recordings punish low bitrate because thin fonts, interface lines, and cursor movement expose artifacts quickly. Keep native resolution when possible, reduce frame rate before resolution for mostly static tutorials, and use a slightly higher quality target than you would for camera footage.
Move MP4 Metadata for Faster Web Playback
An MP4 can contain its index metadata near the end of the file, forcing a browser to wait. Enable Web Optimized in HandBrake or use -movflags +faststart in FFmpeg to move that metadata to the beginning. This does not materially shrink the file, but it improves perceived speed on websites.

Troubleshooting Video Compression Problems
Compression problems are usually diagnosable. Compare the source and output properties, then change the setting connected to the symptom instead of starting from zero.
The Compressed File Is Larger Than the Original
The source may already use an efficient codec or low bitrate. You may also have selected a lower CRF/higher quality target, lossless audio, extra tracks, a larger resolution, or a faster preset that needs more data. Check both files with a media-information tool and confirm the actual video and audio bitrates.
Fix: raise CRF/RF slightly, remove unnecessary audio tracks, keep or lower resolution, or choose H.265 when playback compatibility is confirmed. Do not expect major savings from a source that is already small and visibly compressed.
The Picture Looks Blocky or Smeared
Blockiness means the encoder did not have enough data for the scene. Smearing around faces, grass, hair, or moving objects often appears when bitrate is too low or resolution has been reduced too aggressively.
Fix: lower the CRF/RF number, increase target bitrate, use a slower preset, restore a higher resolution, or apply light denoising to difficult footage. Compare the output during motion, not only on a paused frame.
Fine Gradients Show Bands
Banding appears in skies, shadows, studio backgrounds, and animated gradients when subtle tonal steps are lost. Heavy compression and 8-bit source material make it more visible.
Fix: increase quality, avoid repeated exports, preserve 10-bit processing when the source and destination support it, and add very subtle grain only as an advanced final remedy. Do not use a high-contrast monitor setting to judge the file.
Audio Is Out of Sync
Variable-frame-rate phone or screen recordings can confuse some editors and players. Audio may drift over a long clip even when the beginning looks correct.
Fix: transcode to a constant frame rate that matches the typical source rate, keep the sample rate consistent, and test the final minutes of the file. Do not randomly change to a different frame rate without checking the source.
The Video Will Not Play or Upload
The container may be accepted while the codec inside it is not. A site might accept .mp4 but reject HEVC, unusual audio, variable dimensions, unsupported color profiles, or damaged metadata.
Fix: export MP4 with H.264 video and AAC audio, use standard even-numbered dimensions, keep progressive scan, and enable fast start for web delivery. YouTube’s recommended upload settings are a useful compatibility reference for mainstream MP4 delivery.
Colors Look Washed Out After Export
HDR footage can look flat or washed out when it is converted to SDR without correct tone mapping or when color metadata is interpreted differently by the player. This is not solved by bitrate alone.
Fix: preserve the source color space for an HDR delivery workflow, or use a controlled HDR-to-SDR conversion in an editor that supports tone mapping. Compare in more than one player and avoid assuming the first preview app is accurate.
Encoding Takes Too Long
High resolution, slow presets, AV1, software encoding, denoising, and multiple passes can make compression slow. A 4K source contains far more pixels than 1080p and may take several times longer.
Fix: test a faster preset, use hardware encoding for drafts, downscale when the destination allows it, close heavy applications, and queue final jobs overnight. Do not use the slowest preset automatically; choose the slowest setting that delivers a measurable benefit.
Maintenance: Keep a Reliable Compression Workflow
A good workflow should be repeatable six months from now. Keep the original files, record the software version and preset, and name outputs with meaningful details. For example: product-demo_v3_web-1080p-h264.mp4 is safer than final-final-small2.mp4.
Review your presets when cameras, software, platforms, or audience devices change. A preset designed for 1080p talking heads may fail on 4K drone footage or detailed screen recordings. Test after major updates instead of assuming the old output is identical.
Keep two backups of important masters, ideally on different devices or services.
Store the project file, fonts, graphics, captions, and original audio with the master.
Document approved presets in a shared team guide.
Spot-check the beginning, middle, and end of every final delivery.
Periodically verify archived files can still be opened and copied without errors.
Frequently Asked Questions
How to Compress a Video Without Losing Quality
You can reduce file size with little or no visible loss, but most practical compression is technically lossy. Start by trimming unused footage, using a more efficient codec, selecting a slower preset, and lowering bitrate gradually. True lossless compression usually creates files too large for ordinary sharing.
What Is the Best Format for a Small Video File?
MP4 with H.264 and AAC is the safest general answer because it balances compression, quality, and compatibility. H.265 can be smaller at similar quality on modern devices, while AV1 may be more efficient for supported web workflows but takes longer to encode.
How Do I Make a Video Small Enough for Email?
Trim the clip, export at 720p, keep 24–30 fps when appropriate, use H.264/AAC, and calculate a target bitrate from the provider’s attachment limit. When the result would be too degraded, upload the video to secure cloud storage and email a controlled-access link instead.
Should I Lower Resolution or Bitrate First?
Lower bitrate first when the source resolution matches the viewing destination. Reduce resolution when the available bitrate is too low to keep that many pixels clean, or when the video will be watched in a small player. A crisp 720p file can look better than a starved 1080p file.
Why Does WhatsApp or Social Media Reduce Video Quality?
Messaging and social platforms often re-encode uploads to reduce bandwidth and standardize playback. Starting with a clean, correctly sized MP4 prevents the platform from doing more work than necessary. Avoid sending a video through multiple platforms before posting the final version.
Is H.265 Better Than H.264 for Compression?
H.265 is generally more efficient and especially useful for high-resolution footage, but H.264 remains more universally compatible and often encodes faster. Choose H.265 when you control playback or storage; choose H.264 when the file must work almost everywhere.
What CRF or RF Value Should a Beginner Use?
For H.264 1080p, start around CRF/RF 20 to 23 and test a difficult scene. Increase the number for a smaller file or decrease it for higher quality. The best value depends on motion, noise, detail, resolution, codec, and the size of the playback screen.
Conclusion: Make the File Smaller, Not the Experience
The best compression workflow is controlled and reversible: protect the master, trim first, preserve the original frame rate, choose a compatible codec, test a short difficult section, and change one major setting at a time. That method produces smaller files without turning the final video into a blurry compromise.
Now that you know how to compress a video for desktop, mobile, web, email, and social delivery, build two or three reusable presets around your most common jobs. Which file gives you the most trouble: a 4K phone recording, a long tutorial, a screen capture, or a social clip? Share the use case in the comments on MyFlexBots.
editor's pick
latest video
news via inbox
Nulla turp dis cursus. Integer liberos euismod pretium faucibua