How to Make a GIF: Step-by-Step Guide
A great GIF can explain a process, capture a reaction, demonstrate a product, or turn a dull social post into something people actually notice. The frustrating part is that beginners often end up with a blurry, oversized file that loads slowly or loops with an awkward jump.
This guide explains how to make a gif from a video, a set of photos, a screen recording, or a phone clip. You will learn how to choose the right source, trim it tightly, control speed, add text, create a clean loop, reduce file size, and publish it without sacrificing quality.
How Do You Make a GIF?
To make a GIF, choose a short video or image sequence, trim it to the essential moment, import it into a GIF editor, set the frame size and speed, add text if needed, preview the loop, and export. Keep the animation short, reduce unnecessary colors, and compress the final file before publishing.
Before You Start: What Makes a Good GIF?
Knowing how to make a gif is less about clicking an export button and more about controlling motion. A strong GIF communicates one clear action in a few seconds. It starts quickly, loops cleanly, remains readable on a small screen, and does not make the viewer wait for a large download.
The best source clips usually share four qualities:
One obvious subject: A hand clicking a button, a person reacting, or a product changing state.
Short duration: Two to six seconds is enough for most reactions, tutorials, and product demonstrations.
Stable framing: Excessive camera shake makes compression artifacts more noticeable.
Simple colors and backgrounds: GIF supports a limited color palette, so clean scenes usually export better than gradients, smoke, shadows, or fast-changing footage.
GIF stands for Graphics Interchange Format. It can store an animation as a sequence of frames, but it has a maximum palette of 256 colors per frame. That limitation is one reason photographic GIFs can show banding or grain. For a technical overview, read the GIF format and color limitations explanation from MDN.
💡 Quick Hack: Decide the purpose before opening an editor. Write one sentence such as “show the three clicks needed to enable dark mode.” This prevents you from keeping extra footage that makes the file larger and the message weaker.
Essential Tools and Materials Breakdown
You do not need expensive software to learn how to make a gif, but a good workflow uses the right tool at each stage. A free browser editor is enough for occasional reaction GIFs. Repeated marketing, support, or tutorial work benefits from a desktop editor that saves presets and keeps editable project files.
Use the comparison below as a practical buying and setup map. Costs are typical ranges, not fixed quotes; free limits and subscription prices can change by region and plan.
| Tool or material | Best use | Typical cost | Skill level | Practical notes |
| Source video or photos | The raw motion, reaction, tutorial, or image sequence | Free if self-created | Beginner | Use a short, steady, well-lit source with a simple background. |
| Browser GIF maker | Fast conversion without installing software | Free to about $15/month | Beginner | Best for non-sensitive files and occasional use. Check upload limits and watermarks. |
| Mobile GIF app or shortcut | Creating from phone clips, burst photos, or motion photos | Free to about $10/month | Beginner | Convenient, but trimming and compression controls may be limited. |
| Desktop timeline editor | Precise trimming, frame timing, text, masks, and reusable presets | Free options to about $30/month | Intermediate | Best for branded, repeated, or client-facing work. Save the editable master. |
| Screen recorder | Software tutorials, cursor demonstrations, and product walkthroughs | Built-in or free to about $20/month | Beginner | Enlarge the interface, hide notifications, and record only the intended action. |
| Image editor | Cropping, background cleanup, labels, arrows, and color correction | Free to about $25/month | Beginner to intermediate | Prepare frames before animation; keep all frames the same size. |
| Brand kit | Consistent logo, font, text style, and callout design | Usually existing assets | Beginner | Use subtle branding and large mobile-readable text. |
| Storage and master archive | Keeping source files, editable projects, posters, and export notes | Existing drive or cloud plan | Beginner | Do not treat the compressed GIF as the only master file. |
Choose a Workflow Based on the Job
Use an online GIF maker when speed matters and the source is not private. Use a mobile app when the footage is already on your phone. Use Photoshop or another timeline-based desktop editor when you need frame-level control, branded text, masking, or consistent exports for a business.
For confidential client material, internal dashboards, customer records, or unreleased product footage, prefer an offline editor. Uploading sensitive media to a public web tool may create unnecessary privacy and compliance risks.
Plan the Animation Before You Edit
A GIF should solve one small communication problem. A useful way to practice how to make a gif is to begin with a single action that lasts only a few seconds. Do not begin with a ten-minute video and hope the editor will reveal the best moment. Review the source, mark the exact start and end points, and decide what viewers should understand after one loop.
Ask these questions:
- What is the single action or reaction?
- Does the viewer need text to understand it without audio?
- Should the loop feel continuous, pause at the end, or play once?
- Where will it appear: a website, email, help article, presentation, or social feed?
- What is the maximum acceptable file size for that platform?
A reaction GIF can be expressive and loose. A tutorial GIF must be slower, tightly cropped, and readable. A website GIF should usually be smaller and more restrained than one posted in a chat app.
Pro-Tip: Sketch the loop as three beats: setup, action, reset. A button tutorial might show the cursor entering the frame, clicking, and returning to its starting position. Planning the reset creates a smoother loop.
Capture or Select Better Source Footage
The fastest route to a clean result is a clean source. Record at a reasonable resolution, keep the camera steady, and avoid digital zoom. If you are capturing a screen, enlarge the interface before recording so important labels remain readable after the GIF is reduced.
For Screen Recordings
Close unrelated tabs, hide notifications, and remove personal information. Position the cursor near the first action before recording. Record one clean take instead of a long session containing mistakes and pauses.
The MyFlexBots guide on how to take a screenshot is also useful when you need a static fallback image or a step-by-step companion to the animation.
For Camera or Phone Clips
Use bright, even light. Lock focus and exposure if your camera app allows it. Keep the background simple, especially when the subject contains subtle colors or gradients.
If the GIF will demonstrate a product, record the action from the angle that makes the change obvious. A close-up of a switch, hinge, screen, or control is usually more useful than a wide shot of the entire room.
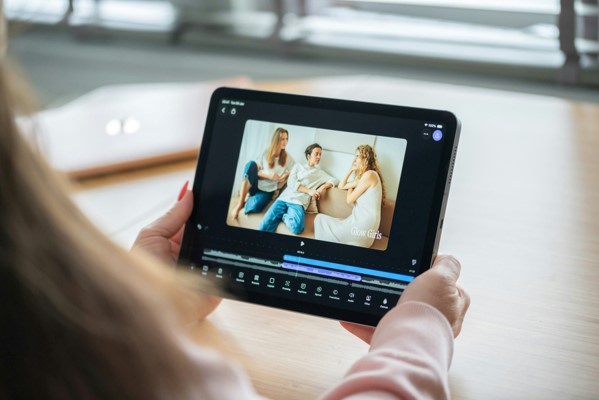
💡 Quick Hack: Record the action three times without stopping the camera. The middle attempt is often the smoothest because the performer is comfortable but not yet rushing. Trim the best take later.
Trim the Source to the Essential Moment
Trimming is the most important file-size decision. Every unnecessary second adds frames, and every frame adds data. A six-second clip exported at 15 frames per second contains about 90 frames. Cutting two seconds can remove roughly one-third of the animation before compression even begins.
Start the clip just before the action becomes understandable. End it immediately after the result appears. Avoid long introductions, silent pauses, and extra hand movement.
For a tutorial, leave a brief visual hold after the result. Viewers need enough time to confirm what changed. You can create that hold by duplicating the final frame several times instead of extending the entire video.
Pro-Tip: Trim the source video in a normal video editor before converting it. Video editors are usually faster and more precise for cutting, cropping, stabilizing, and changing speed than simple GIF tools.
How to Make a GIF From a Video in an Online Tool
The simplest way to learn how to make a gif from a video is to use a reputable browser-based converter. The labels vary, but the workflow is nearly identical across most tools.
- Open the converter and upload the clip. Use MP4, MOV, or WebM when supported. Avoid uploading confidential footage.
- Set the start and end time. Keep only the useful action. Aim for two to six seconds.
- Crop the frame. Remove empty margins, browser chrome, and distracting objects.
- Choose the output width. Start around 600 to 900 pixels for a blog illustration and smaller for chat or email.
- Set the frame rate. Try 12 to 15 frames per second for tutorials. Use 18 to 24 only when motion looks noticeably choppy.
- Add text or captions. Keep the message short and place it away from the main action.
- Choose looping behavior. Infinite looping is common, but some tools allow a fixed number of repeats.
- Preview the full loop. Watch the restart, not only the middle.
- Export and compress. Download the first version, check its size and quality, then make targeted reductions.
Do not change every setting at once. Export a baseline first. If the file is too large, reduce dimensions before destroying the frame rate. A smaller, smooth GIF often looks better than a large, choppy one.
💡 Quick Hack: Before uploading, resize the video to the approximate final dimensions. The online tool processes faster, and you reduce the chance of accidentally exporting an oversized animation.
Create a GIF in Photoshop or a Timeline Editor
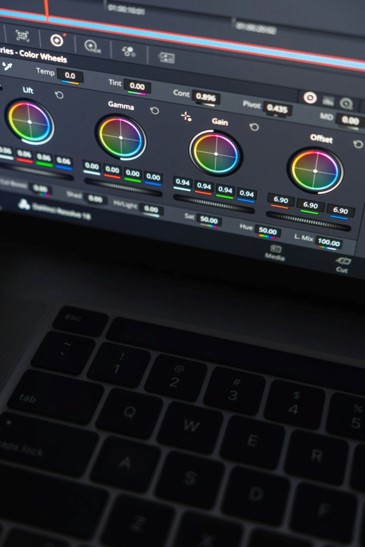
A timeline-based editor gives you more control over individual frames, masks, text, color, and timing. The exact menu names vary by application, but the professional workflow is consistent.
Import the Video or Frames
Import the video as layers or place the clip on a timeline. If the program offers a frame-skipping option, begin by importing every second frame for high-frame-rate footage. You can add more frames later if the motion is too rough.
For an image sequence, name files in order, such as frame-01, frame-02, and frame-03. Consistent naming prevents the editor from loading them in the wrong sequence.
Clean and Crop the Canvas
Crop around the subject and set the final aspect ratio. Use square for many social feeds, vertical for phone-focused content, and landscape for blog tutorials or product demonstrations.
Apply major color corrections before reducing the palette. Fix exposure, white balance, and contrast while the source still contains full color information.
Build the Frame Animation
Convert layers or timeline positions into frames. Set delay times for each frame. A delay of 0.06 to 0.10 seconds per frame often feels smooth, but the correct timing depends on the action.
Use longer delays for instructional holds. For example, the cursor movement might use short delays while the completed menu selection remains visible for half a second.
Add Text and Branding
Place text on a high-contrast area or add a solid or semi-transparent backing shape. Keep it large enough to read on mobile. Use one short sentence, not a paragraph.
Add branding subtly. A small logo in a corner is usually enough. Excessive overlays increase visual noise and can create more colors for the encoder to manage.
Export for Web
Choose GIF, set looping, select a palette method, preview dithering, and compare file size. Use a perceptual or adaptive palette for photographic content. Reduce colors when the scene is simple; icons and screen recordings may look acceptable with 32, 64, or 128 colors.
Knowing how to make a gif in a desktop editor is valuable because you can save the editable master. When the website layout, caption, logo, or dimensions change, you can re-export instead of rebuilding the animation.
How to Make a GIF on iPhone or Android
You can create a GIF on a phone using built-in shortcuts, photo features, or a dedicated editor. The main challenge is not conversion; it is precise trimming and file-size control on a small screen.
- Open the clip in your selected app or shortcut.
- Trim the beginning and end closely.
- Crop to the final viewing area.
- Choose a moderate output size rather than the maximum resolution.
- Set speed and loop style.
- Add a short text overlay if the animation needs context.
- Export, then open the file in your gallery or browser to confirm it plays correctly.
Some phone features can convert burst photos or motion photos into looping animations. These are useful for casual content but may offer limited control over frame rate, color, and compression.
To learn how to make a gif on mobile without frustration, edit the source video first. Remove dead time in the phone’s normal video editor, then send the short clip to the GIF tool.
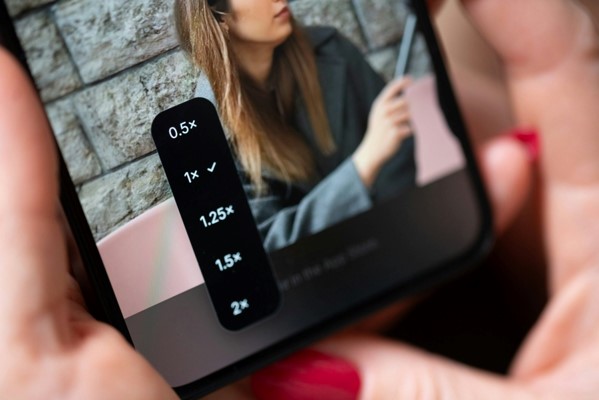
💡 Quick Hack: Use your phone’s “bounce” or back-and-forth loop when a normal restart looks abrupt. Reversing the final frames creates a natural return to the starting position, especially for hand movements, product rotations, and facial reactions.
Make a GIF From Photos or Illustrations
Photo-sequence GIFs are ideal for before-and-after comparisons, stop-motion demonstrations, simple diagrams, product color changes, and illustrated explainers. When learning how to make a gif from photos, consistency between frames matters more than the number of images.
Prepare all images at the same dimensions. Align the subject so it does not jump between frames. If you are showing a process, keep the camera position and lighting fixed.
Import the photos in order, assign frame delays, and preview the sequence. Use a longer delay on frames containing text or a final result. Short delays work for motion; longer delays work for understanding.
For a before-and-after animation, avoid switching too quickly. A one-second hold on each state gives viewers time to compare. Add a small “Before” and “After” label rather than relying on the user to guess.
When source images need cleaner edges, transparent backgrounds, or consistent framing, use the MyFlexBots guide on how to remove background from an image before building the animation.
Pro-Tip: Add two or three duplicate frames at the beginning and end. This creates a deliberate pause without changing the timing of every other frame.
Add Text, Captions, Arrows, and Branding
GIFs do not carry useful audio, so text often provides the missing explanation. Add only what the viewer needs to understand the action.
Good text overlays are:
Short enough to read in one glance.
Large enough for a phone screen.
Positioned away from the cursor, face, product, or key action.
High contrast against every frame.
Consistent in font, placement, and capitalization.
For tutorials, use arrows or circles sparingly. One pointer is helpful; several moving callouts compete with the action. Keep the annotation visible long enough to be noticed.
If you need original background artwork, decorative elements, or branded scene variations, review the MyFlexBots comparison of the best AI image generators 2026. Generate or design the static assets first, then animate only the elements that need motion.
Create a Seamless Loop
A clean loop makes the animation feel intentional. A poor loop jumps from the final frame back to the first, forcing the viewer to notice the edit every few seconds.
Use one of these methods:
Match the start and end pose: Record the subject returning to the original position.
Boomerang loop: Play the frames forward, then reverse them.
Crossfade: Blend the last frames into the first when the background is stable.
Cut on repeated motion: End on the same stage of a cycle, such as a rotating wheel or blinking indicator.
Add a pause: Hold the last frame so the reset feels less sudden.
Avoid a boomerang loop when reversed motion looks physically wrong. Liquid pouring upward, text untyping itself, or a broken object reassembling may distract from the message unless the effect is intentional.
💡 Quick Hack: Duplicate the first frame at the end and reduce its delay to a fraction of a second. This does not fix every loop, but it can soften a minor visual jump.
Optimize Dimensions, Frame Rate, Colors, and File Size
Export settings determine whether the GIF feels polished or painful. The goal is not the smallest possible file. The goal is the smallest file that remains clear enough for its purpose.
Dimensions
Crop first, then resize. A GIF displayed at 700 pixels wide does not need to be exported at 2000 pixels. Large dimensions multiply the number of pixels stored in every frame.
Start with these practical ranges:
Chat and email reactions: roughly 320 to 600 pixels wide.
Blog tutorials: roughly 600 to 900 pixels wide.
Product or interface detail: large enough that labels remain readable, but no larger than the content column.
Frame Rate
Higher frame rates create smoother motion and larger files. For many screen tutorials, 10 to 15 frames per second is enough. Reactions and fast physical motion may need 18 to 24.
Test by reducing the frame rate gradually. If cursor motion becomes hard to follow or facial movement looks jerky, restore a few frames.
Color Count and Dithering
GIF’s limited palette makes color reduction essential. Simple illustrations can use fewer colors. Photographic footage needs more colors and may use dithering to simulate missing shades.
Dithering can hide banding but adds a visible pattern and often increases file size. Compare versions rather than assuming the highest dithering setting is best.
Compression Order
Use this order when the file is too large:
- Trim more time.
- Crop empty areas.
- Reduce dimensions.
- Lower frame rate slightly.
- Reduce the number of colors.
- Lower or change dithering.
- Apply lossy GIF compression only after the structural changes.
This order protects the message. Aggressive compression applied too early often creates noisy edges while leaving unnecessary seconds and pixels untouched.
Pro-Tip: Keep a high-quality master as MP4 or an editable project. GIF is a delivery format, not a good archive. Repeatedly editing and re-exporting an already compressed GIF compounds quality loss.
Publish the GIF for Websites, Email, and Social Media
Once you understand how to make a gif, the final job is publishing it responsibly. Rename the file with a descriptive, readable filename such as enable-dark-mode-settings.gif, not final-v7.gif.
Add useful alt text that explains the action and outcome, not every frame. A good example is: “Cursor opens Display settings and enables dark mode.” Place the GIF near the text it supports and add a static caption if the action could be misunderstood.
Google recommends descriptive filenames, relevant surrounding text, and meaningful alt text in its Google image SEO best practices. These steps help search engines understand the image and also improve the page for readers using assistive technology.
Accessibility and Motion Control
Avoid flashing content and rapid high-contrast changes. If an animation starts automatically, lasts more than five seconds, and plays beside other content, provide a way to pause, stop, or hide it where your publishing system allows. Review the W3C guidance on pause, stop, or hide animated content when GIFs are used on important public pages.
Provide a static alternative when possible. A poster image, written steps, or a short MP4 with controls may be more accessible and efficient than an endlessly looping GIF.

Common Mistakes to Avoid
- Starting With a Clip That Is Too Long
Beginners often convert an entire video segment and try to compress it afterward. The result is a large file with long pauses. Trim first. Every second should contribute to the message.
- Exporting at the Source Resolution
A 4K phone clip does not need to become a 4K GIF. Match the output to the actual display width. Oversized dimensions are one of the fastest ways to create a slow-loading page.
- Using Too Many Frames
More frames are not automatically better. A simple interface demonstration can remain clear at a moderate frame rate. Remove duplicate or near-identical frames and keep extra frames only where motion needs them.
- Adding Small, Low-Contrast Text
Text that looks fine on a desktop editor may become unreadable in a phone feed. Preview at the expected display size. Use a backing shape, outline, or shadow when the background changes.
- Ignoring the Loop Transition
The jump between the final and first frame can ruin an otherwise strong animation. Preview several loops in a row. Adjust the cut, add a hold, reverse frames, or record a better reset.
- Treating GIF as the Best Format for Every Job
Long, full-color, high-frame-rate footage is usually better as MP4 or WebM. Use GIF for short, silent, repeatable motion. Choose video when you need audio, controls, better compression, or longer duration.
Advanced Tips and Next-Level Hacks
Build Reusable Export Presets
Create presets for blog width, email width, social square, and support documentation. Save dimensions, frame rate, palette, and text style. Presets reduce inconsistency and speed up repeat work.
Use Selective Motion
Keep most of the frame static and animate only the important area. Cinemagraph-style motion can look premium and compress well because fewer pixels change between frames.
Separate Instructional Text From Decorative Text
Burn essential instructions into the animation only when they must remain attached to the frames. Place longer explanations in the page text or caption. Search engines and screen readers can understand HTML text more reliably than words embedded inside an image.
Create Two Delivery Versions
Export a smaller GIF for email or chat and a higher-quality version for the website. One file rarely serves every platform well.
Test on a Real Phone and a Slow Connection
Desktop preview can hide problems. Open the published page on a phone, confirm the text is readable, and watch how long the animation takes to appear. A technically valid GIF that loads after the reader scrolls away has failed its job.
💡 Quick Hack: Place a lightweight static preview before the animation in long articles. It gives readers immediate context while the GIF loads and provides a useful fallback when motion is blocked.
Troubleshooting Guide
The GIF Is Too Large
Trim duration, crop tighter, and reduce dimensions first. Then lower frame rate and colors. Check whether the animation would be better delivered as MP4 or WebM.
The GIF Looks Blurry
Confirm that the page is not stretching the file beyond its exported width. Export at the exact display size or slightly larger for high-density screens. Do not enlarge a small GIF in the browser.
Colors Look Grainy or Banded
Use a better palette method, increase the color count, or add moderate dithering. Simplify the background and avoid heavy gradients. For photo-real motion, consider video instead.
Text Flickers or Changes Shape
Render text as a stable layer across all frames. Avoid re-rasterizing it independently on every frame. Use simple fonts and keep text away from noisy backgrounds.
The Animation Plays Too Fast
Increase frame delay or duplicate important frames. Add a longer hold on the result frame. Do not slow the entire animation if only one step needs more reading time.
The Loop Jumps
Match the opening and closing position, use a boomerang sequence, add a crossfade, or cut at a repeated motion point. Preview at least five loops before exporting the final version.
The GIF Does Not Play After Uploading
Check whether the platform converts animated GIFs into static images or video. Confirm that the file extension is .gif, test the local file in a browser, and review the platform’s size and dimension limits.
The Website Feels Slow
Compress the GIF, lazy-load it when appropriate, and avoid placing several auto-playing animations above the fold. Consider replacing large animations with modern video formats and a poster image.
Long-Term Maintenance for Published GIFs
If you are documenting how to make a gif for a team, store the editable project, source clip, final GIF, and a static poster image together. Use clear filenames and record the export settings in a small text note. This makes future updates much faster.
Review important tutorial GIFs whenever the software interface changes. An outdated animation can be more confusing than no animation. Update product names, menu labels, brand colors, and cursor paths as needed.
Check external platforms after upload. Some services recompress files, change frame timing, crop previews, or convert the GIF into a video. Keep the original master so you can create a platform-specific replacement.
Frequently Asked Questions
Can I make a GIF without installing software?
Yes. A browser-based converter can create a GIF from a video or image sequence without installation. Trim the source first, avoid uploading sensitive media, select moderate dimensions and frame rate, preview the loop, and compress the result before publishing.
How long should a GIF be?
Most useful GIFs are about two to six seconds. Reaction GIFs may be shorter, while a small tutorial may need up to ten seconds. If the animation needs more time, multiple steps, audio, or playback controls, use a video instead.
What is the best frame rate for a GIF?
Start around 12 to 15 frames per second for screen tutorials and simple motion. Increase the rate for fast reactions or detailed physical movement. Lower it when the file is too large, but stop before motion becomes difficult to follow.
How do I make a GIF from YouTube or another online video?
Use footage only when you have permission or a lawful basis to reuse it. Obtain an authorized source file or use the platform’s approved clipping tools, trim the required moment, and convert the short clip. Do not bypass access controls or download protected media without permission.
How can I make a transparent GIF?
Create source frames with transparent backgrounds, keep the subject edges clean, and export with transparency enabled. GIF transparency is limited and does not handle smooth semi-transparent edges as well as modern formats. Test the result on both light and dark backgrounds.
Why does my GIF look worse than the original video?
GIF uses a restricted color palette and is less efficient than modern video formats for photographic motion. Quality can drop through color reduction, dithering, resizing, and frame removal. Use a short, simple source and switch to MP4, WebM, or animated WebP when better color and compression are more important than GIF compatibility.
Is a GIF good for SEO?
A useful GIF can improve engagement and explain a process, but a large file can slow the page. Use a descriptive filename, relevant caption, meaningful alt text, proper dimensions, and compression. Place it near supporting text and provide a static or text alternative when appropriate.
Conclusion
Learning how to make a gif is straightforward once you stop treating conversion as the whole job. The best results come from a short, well-framed source, precise trimming, controlled timing, readable text, a smooth loop, and deliberate compression.
Start with one small animation: a reaction, a product action, or a three-click screen tutorial. Export a baseline, test it on the device where people will view it, and improve only the setting that is causing a problem. What type of GIF are you planning to create first for your website, social media, or support content?
editor's pick
latest video
news via inbox
Nulla turp dis cursus. Integer liberos euismod pretium faucibua