How to Start Streaming on Twitch: Step‑by‑Step Guide
Going live can feel intimidating when every tutorial assumes you already understand encoders, bitrates, scenes, capture cards, audio routing, and moderation. This guide explains how to start streaming on Twitch from the first account setting to the final pre-stream test, with practical recommendations that prevent the most common beginner failures. By the end, you will have a lean setup, dependable OBS configuration, clear audio, a repeatable show flow, and a plan for improving after every broadcast.
How Do You Start Streaming on Twitch?
Featured snippet answer: To learn how to start streaming on Twitch, create and secure a Twitch account, install OBS Studio, connect your account, add game, microphone, and camera sources, choose stable bitrate and resolution settings, test audio and video, configure moderation, then run a private-quality test before starting your first public broadcast.
Essential Tools and Materials Breakdown
You do not need a professional studio to begin. The smartest first setup spends money on stability and sound before decoration, extra monitors, premium cameras, or animated overlays.
Estimated costs below are broad US-dollar ranges, not live retail quotes. Prices vary by country, taxes, availability, and whether you buy new, refurbished, or used equipment.
| Tool or resource | What it does | Required? | Estimated starting cost | Skill level |
| Twitch account | Hosts your channel, live video, chat, clips, and dashboard | Yes | $0 | Beginner |
| OBS Studio | Combines video, game capture, audio, alerts, and scenes | Yes for PC/Mac workflow | $0 | Beginner to intermediate |
| Computer or console | Runs the game/content and sends the broadcast | Yes | Existing device to $1,500+ | Beginner |
| Stable internet connection | Uploads the stream without dropped frames | Yes | Existing monthly service | Beginner |
| Ethernet cable | Reduces Wi-Fi instability and packet loss | Strongly recommended | $5-$20 | Beginner |
| Microphone or headset mic | Carries your voice and personality | Yes for most channels | $0-$150 | Beginner |
| Headphones | Prevents speaker audio from feeding back into the mic | Strongly recommended | $15-$150 | Beginner |
| Webcam | Adds face-to-face connection | Optional | $25-$150 | Beginner |
| Basic light | Improves webcam clarity more than a costly camera upgrade | Optional | $0-$60 | Beginner |
| Capture card | Captures an external console or second PC | Optional | $60-$250 | Intermediate |
| Second monitor or phone | Shows chat, alerts, stream health, and notes | Optional | Existing device to $250 | Beginner |
| Stream graphics | Adds a starting screen, alerts, panels, and brand consistency | Optional | $0-$100+ | Beginner |
| Moderator or moderation tools | Controls spam, harassment, and disruptive chat | Recommended | $0 | Beginner |
| 💡 Quick Hack: Start with a headset, Ethernet cable, existing computer, OBS Studio, and one clean scene. Upgrade only after three to five broadcasts reveal a real limitation. Buying equipment before identifying the bottleneck is how beginner budgets disappear. |
Define the Stream Before Buying Equipment
A clear channel concept makes every later decision easier. Before learning how to start streaming on Twitch at a technical level, decide what viewers should expect when they click your channel.
Write a one-sentence promise using this structure:
“I stream [specific content] for [specific audience] with [distinctive angle or experience].”
Examples:
Competitive shooters explained for players who want to improve without toxic commentary.
Cozy strategy games with relaxed conversation after work.
Live digital-art sessions that show the full sketch-to-finish process.
Beginner coding projects where every decision is explained aloud.
Just Chatting streams focused on practical technology and creator tools.
Choose one primary category for the first month. Variety can work later, but a new channel grows faster when a returning viewer knows what the next stream will contain.
Plan a simple three-part show:
- Opening, 5-10 minutes: Welcome early viewers, explain the goal, and check audio naturally.
- Main segment, 60-120 minutes: Play, teach, build, react, create, or discuss with a visible objective.
- Closing, 5-10 minutes: Summarize progress, mention the next stream, thank viewers, and raid another relevant channel when appropriate.
| Pro-Tip: Pick a stream objective that can be stated in one sentence: “Tonight we are reaching Gold,” “We are building the landing page,” or “We are finishing the character sketch.” A visible objective gives the broadcast direction and gives viewers a reason to stay. |
Create and Secure Your Twitch Account
Create an account with a name that is easy to say, spell, and remember. Avoid long strings of numbers, confusing punctuation, or a name tied so tightly to one game that it becomes restrictive later.
After registration, complete these tasks before connecting any broadcasting software:
Verify the email address and phone number where available.
Enable Twitch two-factor authentication.
Upload a recognizable profile image.
Write a two-sentence bio that states your content and schedule.
Add a banner that remains readable on desktop and mobile.
Review privacy, security, and blocked-user settings.
Never share screenshots that expose account tokens or a stream key.
Your stream key authorizes broadcasting software to send content to your channel. Treat it like a password. OBS can usually connect through Twitch account authorization, which is safer and easier than manually copying keys. When manual access is necessary, follow the official Twitch stream key guidance, keep the key private, and reset it immediately if it appears in a recording, screenshot, chat, or support message.
Build a useful channel page
Your About section should answer four questions quickly:
Who are you?
What do you stream?
When do you normally stream?
What behavior is expected in chat?
Keep panels simple. New viewers do not need ten decorative boxes. Start with About, Schedule, Rules, Social Links, and Equipment or FAQ only when those sections add useful information.
Choose the Right Streaming Method
The easiest answer to how to start streaming on Twitch depends on the device producing the content. A PC gives the most control, a console offers the fastest gaming path, and a phone is useful for mobile gaming or IRL content.
PC or Mac with OBS Studio
This is the most flexible route. OBS can combine gameplay, desktop windows, cameras, microphones, media, browser alerts, and graphics in one broadcast.
Choose this path when you want:
Custom layouts and scene transitions
Detailed audio control
Overlays, alerts, labels, and chat widgets
Local recordings
Multiple cameras or capture devices
More control over bitrate, encoder, and resolution
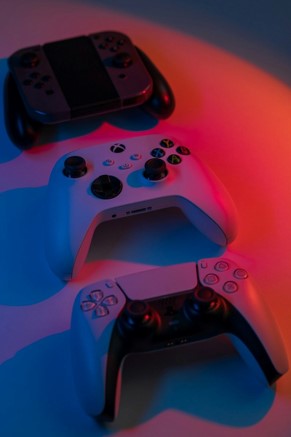
Console streaming without a capture card
Modern consoles can broadcast directly through built-in Twitch integration. This is inexpensive and fast, but visual customization and audio routing are more limited.
Use direct console broadcasting when your priority is to begin now. Add a capture card only when you need higher production control, custom OBS scenes, advanced audio, or a dedicated streaming computer.
Mobile streaming
The Twitch mobile app and supported mobile broadcasting tools can stream camera-based or mobile content. Use Wi-Fi with a strong connection, monitor battery temperature, enable Do Not Disturb, and protect location privacy before an IRL broadcast.
For mobile streams, check the background for addresses, mail, car plates, school or workplace identifiers, reflections, and notifications. A technically perfect stream can still create a privacy problem if the environment reveals too much.
Check Your Computer and Internet Before Installing Extras
Streaming asks the system to run content, encode video, manage audio, render OBS scenes, and upload data at the same time. A computer that plays a game smoothly may still struggle when encoding is added.
Hardware checklist
For a typical gaming stream, prioritize:
A modern multi-core processor
A supported hardware video encoder on the graphics card or integrated graphics
Enough memory for the game, OBS, browser sources, and chat tools
Storage space for test recordings and clips
Cooling that can sustain long sessions
USB ports with enough bandwidth for webcam, microphone, and capture devices
Laptop users should connect power, select an appropriate performance mode, keep ventilation clear, and test temperatures. The best laptops for streaming and creative work are not automatically the most expensive models; the correct choice is the machine that can sustain the game, encoder, cooling, and ports required by your workflow.
Internet upload checklist
Twitch notes that upload capacity should exceed the chosen stream bitrate, with additional headroom for network variation and other devices. A practical target is at least 30 percent more upload speed than the configured video bitrate, and more headroom is better on a shared connection.
For example, a 6 Mbps video stream should not be attempted on a connection that barely reaches 6 Mbps in ideal conditions. Test at the time of day you plan to broadcast, because neighborhood congestion and household use can change performance.
Use these rules:
Connect through Ethernet when possible.
Pause cloud backups, large uploads, game updates, and file synchronization.
Ask household members to avoid heavy upstream use during critical streams.
Test multiple times, not only once.
Watch upload speed, latency, jitter, and packet loss, not download speed alone.
| 💡 Quick Hack: A $10 Ethernet cable often improves stream stability more than a $100 overlay package. If the router is far away, test a temporary long cable before spending on mesh networking or powerline adapters. |
Set Up OBS Studio and Connect Twitch
Download OBS Studio from the official OBS website, install the current stable release, and run the Auto-Configuration Wizard. The official OBS Studio Quick Start Guide explains that the wizard evaluates your streaming goal, hardware resources, and network conditions, making it the best starting point for a first configuration.
Run the Auto-Configuration Wizard
In OBS, go to Tools > Auto-Configuration Wizard if it does not appear automatically. Select the option that prioritizes streaming, choose your preferred canvas, connect to Twitch when prompted, and allow OBS to test settings.
Do not treat the wizard as a permanent answer. It provides a safe baseline, then your local recording and Twitch tests reveal whether the settings need adjustment.
Connect Twitch to OBS
Open Settings > Stream, select Twitch as the service, and use account connection when available. This can integrate chat and stream information without exposing your stream key during normal setup.
Before going live, open the Twitch Creator Dashboard in a browser or on a second device. Set the stream title, category, tags, language, and content classification accurately. A misleading category may attract the wrong audience and create a poor first impression.
Understand scenes and sources
A scene is a complete layout. A source is an individual element inside that layout.
Build only four scenes at first:
- Starting Soon: A clean screen with a short countdown or static message.
- Main Scene: Game or main content, microphone, optional webcam, and minimal alerts.
- BRB: A privacy-safe screen used when stepping away.
- Ending: A closing message with schedule or social information.
Useful sources include:
Game Capture: Best starting choice for many Windows games.
Window Capture: Captures one application window.
Display Capture: Captures an entire monitor; use cautiously because notifications and private tabs may appear.
Video Capture Device: Webcam or capture card.
Audio Input Capture: Microphone or interface.
Audio Output Capture: Desktop or application audio.
Browser Source: Alerts, chat widgets, labels, and web-based overlays.
Image and Media Source: Logos, backgrounds, music, or videos you have permission to use.
Place sources in the correct layer order. The top source in the list appears in front. Lock each source after positioning it so a rushed mouse movement does not drag the webcam across the screen during a broadcast.
| Pro-Tip: Duplicate a working scene before making major changes. Rename the copy “Main Scene Test.” This creates a safe sandbox for experimenting with overlays, filters, and browser sources without breaking the live version. |
Configure Resolution, Frame Rate, Encoder, and Bitrate
The best Twitch settings are not the highest settings your computer can briefly produce. They are the highest settings your computer and connection can sustain for the entire broadcast while viewers can still watch comfortably.
A stable 720p60 or 936p60 stream often looks better than unstable 1080p60. Fast games need more bitrate per frame than a static art, coding, or talk stream.
Practical starting settings
Twitch’s broadcasting guidance has commonly recommended CBR, a two-second keyframe interval, and the following bitrate targets. Check the current Twitch broadcasting guidelines before publishing future updates.
| Output resolution | Frame rate | Practical video bitrate | Good for |
| 1280 × 720 | 30 fps | About 3,000 kbps | Talking, art, strategy, slower games, limited upload |
| 1280 × 720 | 60 fps | About 4,500 kbps | Fast gameplay on moderate hardware or upload |
| 1920 × 1080 | 30 fps | About 4,500 kbps | Detailed but slower content |
| 1920 × 1080 | 60 fps | About 6,000 kbps | Strong hardware, stable upload, fast motion |
Recommended baseline controls:
Rate control: CBR
Keyframe interval: 2 seconds
Audio sample rate: 48 kHz when your devices support it consistently
Video encoder: Hardware encoder when available and stable; x264 when CPU headroom is genuinely sufficient
Base canvas: Match the main content or monitor layout
Output resolution: Choose for stability and readability, not prestige
Hardware encoder or x264?
Use a modern GPU or integrated hardware encoder when gaming already places pressure on the CPU. Hardware encoding normally reduces the CPU cost of the broadcast and is the easiest choice for a single-PC gaming setup.
Use x264 when you understand CPU presets, have spare CPU capacity, and testing proves it does not hurt the game or create encoding overload. Do not choose x264 merely because an old guide labels it “better.” Modern hardware encoders can produce strong results with far less system disruption.
Why viewer accessibility matters
Not every channel receives every quality option at every moment. Sending a very high-bitrate stream can make viewing difficult for people on slower connections when lower transcoded options are unavailable. Twitch’s Enhanced Broadcasting can provide multiple encodes from supported software and hardware, but it adds upload and system considerations.
For a first month, choose a dependable output that the likely audience can watch. Reliability builds trust faster than a resolution badge.
Make the Microphone Sound Clear
Viewers will tolerate an average camera. They leave quickly when the voice is hard to understand, distorted, full of room echo, or buried beneath the game.
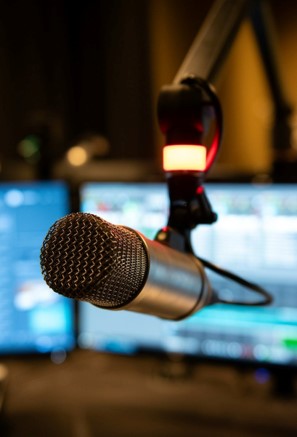
Place the microphone close to your mouth and lower its gain. Distance is the enemy: a far microphone must amplify your voice, room reflections, keyboard, fans, and street noise together.
Set microphone level first
Speak at the volume you will use during exciting moments, not only a quiet test voice. In OBS, normal speech should remain comfortably below clipping, while louder reactions should avoid hitting the red end of the meter.
A useful starting target is:
Normal speech often peaking around -12 to -6 dB
Loud moments staying below 0 dB
Game audio sitting clearly below the voice during speech
These are starting references, not rigid laws. Record and listen through ordinary headphones and a phone speaker.
Add filters in a sensible order
OBS microphone filters can include:
- Noise suppression: Reduces steady background noise; too much can make the voice metallic.
- Expander or noise gate: Lowers the mic when you are not speaking; aggressive settings cut off quiet words.
- Compressor: Controls sudden loud peaks and makes speech more consistent.
- Limiter: Prevents extreme peaks from clipping the output.
- Gain: Use sparingly after correct physical placement and device gain.
| 💡 Quick Hack: Hang a thick blanket behind the microphone or face an open clothes wardrobe when testing in a reflective room. Soft materials reduce echo cheaply and often improve sound more than another software filter. |
Prevent echo and duplicate audio
Wear headphones rather than playing the stream through speakers. In OBS Advanced Audio Properties, avoid monitoring a source back into the same device that OBS is capturing.
If the voice sounds doubled, check for:
The same microphone added globally and as a separate source
Webcam microphone plus main microphone active together
Desktop audio capturing an open Twitch preview
Monitoring set to “Monitor and Output” unnecessarily
A browser source or communication app replaying the mic
Set Up the Webcam and Lighting
A webcam is optional. Use it only when it supports the content and you are comfortable appearing on camera.
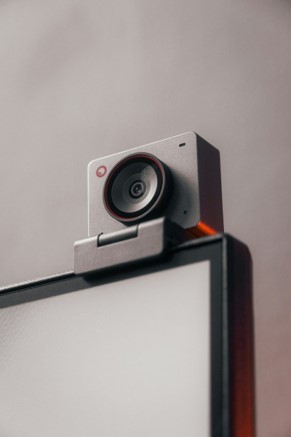
Place the camera near eye level, clean the lens, and frame from the chest or shoulders upward unless the content needs a wider shot. Leave a small amount of headroom and avoid placing a bright window directly behind you.
Lighting matters more than camera price. Put a soft light slightly above eye level and about 30-45 degrees to one side. A shaded lamp bounced from a pale wall can work when a dedicated light is unavailable.
Camera checklist:
Disable auto exposure if it constantly brightens and darkens.
Set white balance manually when the color shifts during movement.
Use 30 fps unless 60 fps serves a clear purpose and the camera supports it well.
Crop distracting room areas.
Remove reflective objects that reveal private screens or windows.
Check clothing patterns that create shimmer or moiré.
| Pro-Tip: Shrink the webcam in the main scene until it stops covering critical game information. Then enlarge it only for a dedicated chatting scene. One camera size rarely works for every moment. |
Add Alerts, Overlays, and Branding Without Clutter
A stream should look intentional, but excessive overlays reduce readability and increase system load. Start with one alert style, one font family, one accent color, and generous empty space.
Useful beginner assets:
Starting Soon screen
BRB screen
Ending screen
Follow or subscription alert when relevant
Simple webcam frame, only when it improves separation
Channel panels and banner
Optional recent-event label
Avoid:
Constant animated borders
Large chat boxes covering content
Loud alerts that overpower the microphone
Tiny text designed for a 27-inch monitor but unreadable on phones
Copyrighted characters, logos, music, or artwork without permission
Use your own artwork, licensed assets, or free commercial-use resources. The MyFlexBots AI image generator guide for stream graphics can help compare tools for creating original concept art, but generated assets still require a review for accuracy, brand conflicts, text errors, and commercial-use terms.
| 💡 Quick Hack: Build the overlay at 100 percent browser zoom, then take a screenshot and view it on your phone. If labels or chat cannot be read instantly, simplify or enlarge them before going live. |
Configure Moderation, Safety, and Copyright Controls
A new channel still needs boundaries. Configure Twitch moderation settings before the first public stream rather than after the first disruptive visitor.
Set up:
AutoMod at a level appropriate for the audience
Blocked terms and phrases
Link restrictions when spam becomes a risk
Email or phone verification requirements for chat if needed
Clear chat rules
At least one trusted moderator for larger or sensitive streams
A plan for timeouts, bans, appeals, and raids
Do not argue with obvious trolls during the broadcast. Moderate, continue the show, and review the incident later.
Copyright basics
Only broadcast games, music, video, images, and clips you have the right to use. A subscription to a music service does not automatically include public broadcasting rights.
Use:
Original music
Properly licensed creator music
Music supplied through a service with explicit livestreaming permission
Game audio permitted by the publisher and platform rules
Keep records of licenses and source pages. Copyright problems are easier to prevent than repair after a muted VOD, takedown, or account penalty.
Personal safety checklist
Hide desktop notifications.
Use a separate browser profile for streaming.
Remove legal names from visible folders and window titles.
Delay discussing travel until after returning.
Avoid showing mail, bills, school details, workplace badges, or exterior views.
Use a BRB scene before opening private applications.
Do not display account recovery codes or payment dashboards.
Test the Entire Broadcast Before Going Public
Testing is the difference between “the settings look correct” and “the broadcast works.” When people ask how to start streaming on Twitch without embarrassing technical failures, the answer is to test the complete signal path under realistic load.
Make a local recording
Record 10-15 minutes while running the real game or application. Speak quietly, normally, and loudly. Trigger alerts, change scenes, open menus, move quickly in the game, and watch CPU/GPU usage.
Review the file for:
Voice clarity and level
Game-to-voice balance
Video smoothness during fast motion
Webcam focus and lighting
Private information
Scene transition timing
Alert size and loudness
Lip-sync or game-audio delay
For help creating and organizing test captures, use the MyFlexBots screen recording guide.
Run a Twitch network test
Use the Twitch Inspector broadcast health test to observe connection stability, bitrate behavior, and dropped frames without treating the public first stream as the experiment. Twitch Inspector can identify network instability that a local recording cannot reveal.
In OBS, watch View > Stats. Pay attention to:
Dropped frames due to network
Frames missed due to rendering lag
Skipped frames due to encoding lag
CPU usage
Average time to render a frame
Each metric points to a different problem. Lowering bitrate will not fix an overloaded encoder, and changing encoder presets will not repair packet loss.
Use a preflight checklist
Before every broadcast:
- Restart unstable applications and close unnecessary software.
- Confirm title, category, tags, and content labels.
- Check microphone movement in the mixer.
- Confirm desktop/game audio.
- Verify the correct scene is active.
- Hide notifications and private windows.
- Start local recording if desired.
- Test an alert.
- Open chat and stream health monitoring.
- Keep water nearby and begin on schedule.
Run Your First Live Stream
Once the test passes, how to start streaming on Twitch becomes a performance routine rather than a settings project. Set the Starting Soon scene for only a few minutes, confirm the dashboard shows a healthy connection, then move into the main scene and begin with a clear welcome.
Do not wait silently for viewers. Speak as though someone will watch the VOD later. Explain decisions, react to the content, ask focused questions, and summarize what is happening whenever the stream has a quiet moment.
A simple first-stream script
Opening:
“Welcome in. Tonight the goal is to finish the first three levels without using fast travel. I will explain the build as we go, and I am testing a new audio setup, so let me know if the game ever covers my voice.”
During the stream:
Restate the objective when new viewers arrive.
Read usernames carefully before addressing people.
Ask questions that are easy to answer.
Avoid narrating every obvious action; explain decisions and reactions instead.
Thank followers without interrupting the best moments.
Closing:
“Tonight we cleared two of the three levels and found the build change that made the biggest difference. The next stream is Thursday at 8 p.m., when we will finish the challenge. Thank you for hanging out.”
For the first broadcast, 60-120 minutes is enough. Stop while your energy and audio quality are still good. A five-hour stream with long silent sections creates more footage but not necessarily more value.
Review the Stream and Improve One Bottleneck
After the broadcast, wait until you are rested, then review sections of the VOD. Do not judge only by peak viewer count.
Track:
Average and peak concurrent viewers
Unique chatters
Follows or returning viewers
Drop-off points
Audio problems
Technical errors
Moments that could become clips
Topics that created conversation
Whether the title and category matched the content
Choose one production improvement and one content improvement for the next stream. Examples:
Production: Raise the microphone 3 dB and reduce game audio.
Content: State the challenge objective every 20-30 minutes.
Production: Replace Wi-Fi with Ethernet.
Content: Prepare three discussion prompts before going live.
This narrow improvement loop prevents endless rebuilding. Consistency plus small corrections beats a complete redesign every week.
Common Mistakes to Avoid
Beginners researching how to start streaming on Twitch often focus on equipment and overlook the operational mistakes that viewers notice immediately.
- Starting at 1080p60 because it sounds professional
High resolution can create dropped frames, encoding overload, or an inaccessible bitrate. Start with the setting that survives the worst ten minutes of your test, not the best ten seconds.
- Buying a camera before fixing the microphone
A clear voice carries the show. Move the microphone closer, reduce echo, and balance game audio before purchasing a premium webcam.
- Capturing the entire desktop carelessly
Display Capture can expose messages, email, passwords, customer files, browser tabs, or personal details. Prefer Game Capture or Window Capture and keep a privacy-safe BRB scene ready.
- Adding too many browser sources and animations
Each widget can consume resources, fail, or cover content. Remove anything that does not improve comprehension, interaction, or branding.
- Waiting for chat before speaking
New viewers rarely type into a silent room. Narrate the objective, choices, and reactions so a visitor immediately understands why the stream is worth watching.
Advanced Tips and Next-Level Hacks
Once how to start streaming on Twitch is no longer a technical mystery, improve the system without making it fragile.
Create a reusable scene collection
Build one clean collection with nested components for webcam, alerts, and lower thirds. Reusing a nested scene means one camera adjustment can update multiple layouts.
Keep a backup export of:
Scene collection
OBS profile
Overlay files
Browser-source URLs stored securely
Audio filter values
Hotkey map
Separate audio for cleaner editing
Local recordings can use multiple audio tracks: a full mix, microphone-only, game-only, and communication audio. This gives editors more control and allows a damaged balance to be repaired later.
Do not assume the livestream and local recording need identical audio tracks. Test every track before relying on the setup.
Use hotkeys and a control device carefully
Assign hotkeys for mute, BRB, main scene, clip marker, and push-to-talk. Avoid keys used by the game or application.
A phone app, inexpensive macro pad, or keyboard numpad can replace a premium control deck at the beginning.
| 💡 Quick Hack: Print a one-page control sheet and tape it below the monitor. It is faster to glance at “F9 = mute” than search menus while live. |
Design content for clips without forcing moments
Prepare segments with a beginning, tension, and outcome. Challenges, before-and-after builds, ranked attempts, speed tests, tutorials, and reactions naturally create clip points.
After each stream, save two or three moments and publish only the strongest. A small library of good clips is more useful than dozens of context-free fragments.
Build a schedule viewers can trust
Choose fewer reliable sessions rather than an ambitious schedule you cancel. Consistency helps viewers plan and gives you enough recovery and preparation time.
A practical beginner schedule might be:
Tuesday, 8:00-10:00 p.m.
Thursday, 8:00-10:00 p.m.
Optional weekend event announced in advance
Use analytics as diagnosis, not self-worth
Low retention near the start may mean the opening is slow. Quiet chat may mean questions are too broad. A sudden drop during a scene change may reveal dead air, an ad break, or an audio problem.
Treat analytics as evidence about the format, not a verdict on personality.
Troubleshooting and Maintenance Guide
A reliable answer to how to start streaming on Twitch must include what to do when the system fails. Diagnose the metric first, then change one variable at a time.
Problem: Dropped frames due to network
Symptoms: OBS reports network dropped frames, bitrate swings, Twitch Inspector shows instability, or the stream disconnects.
Fixes:
Use Ethernet.
Stop uploads, backups, and synchronization.
Lower bitrate by 200-500 kbps and test again.
Restart modem/router when appropriate.
Select an automatic or better ingest server.
Test at the actual stream time.
Contact the ISP with packet-loss evidence if the issue persists.
Problem: Encoding overloaded or skipped frames
Symptoms: OBS reports encoding lag, CPU reaches very high usage, or video freezes while audio continues.
Fixes:
Switch to a supported hardware encoder.
Use a faster x264 preset if using CPU encoding.
Lower output resolution or frame rate.
Close heavy browser tabs and background apps.
Cap in-game frame rate to create GPU/CPU headroom.
Simplify browser sources and animated overlays.
Problem: Rendering lag or missed frames
Symptoms: The game may appear smooth locally, but OBS misses frames because the GPU is fully occupied.
Fixes:
Cap the game below maximum frame rate.
Lower in-game graphics settings.
Run OBS with appropriate permissions on Windows when required by current OBS guidance.
Disable unnecessary animated sources.
Reduce canvas complexity.
Monitor GPU usage during the worst gameplay scene.
Problem: Black screen in Game Capture
Fixes:
Confirm the game is selected in Game Capture properties.
Try capturing a specific window.
Match OBS and game GPU selection on laptops with integrated and discrete graphics.
Disable conflicting overlays temporarily.
Run the game in borderless windowed mode.
Use Window Capture as a test before resorting to Display Capture.
Problem: Microphone is too quiet, noisy, or metallic
Fixes:
Move the mic closer before increasing gain.
Select the correct input device.
Disable duplicate suppression in OBS and device software.
Reduce aggressive noise suppression.
Check Windows/macOS input level and interface gain.
Test another USB port or cable.
Record a raw sample without filters to isolate the cause.
Problem: Viewers hear echo or duplicate sound
Fixes:
Mute the open Twitch preview.
Wear headphones.
Remove duplicate audio sources.
Disable the webcam microphone.
Check monitoring settings.
Make sure a communication app is not returning the stream mix.
Problem: Audio and video are out of sync
Fixes:
Identify whether the delay belongs to the microphone, webcam, capture card, or game.
Add a sync offset only to the source that arrives early.
Match audio sample rates across the operating system, interface, and OBS.
Avoid unnecessary processing chains.
Clap on camera during a test recording to measure the offset.
Problem: Stream looks blurry during movement
Fixes:
Lower resolution before raising bitrate beyond platform guidance.
Use 720p60 for fast motion when 1080p60 lacks enough bitrate.
Reduce visual noise such as motion blur, film grain, or dense overlays.
Ensure the encoder preset is not too fast for the available hardware.
Confirm OBS is actually outputting the selected resolution and bitrate.
Problem: Alerts or chat widgets do not appear
Fixes:
Refresh the browser source cache.
Verify the source URL and account connection.
Move the browser source above the game source.
Check source visibility in the active scene.
Test the alert from the provider dashboard.
Reauthorize the service if tokens expired.
Maintenance schedule
Before every stream:
Test mic and game audio.
Confirm title/category.
Check disk space.
Close private or heavy apps.
Verify network stability.
Every month:
Update OBS after checking release notes and plugin compatibility.
Update GPU, audio, and capture-device drivers cautiously.
Export OBS profiles and scene collections.
Remove unused sources and plugins.
Inspect cables and USB connections.
Review moderation terms and blocked phrases.
Every three months:
Re-run the Auto-Configuration Wizard as a comparison, not an automatic replacement.
Review VODs on phone, laptop, and headphones.
Reassess schedule and content categories.
Identify the single upgrade with the highest measurable impact.
Frequently Asked Questions
Can I stream on Twitch with only a laptop?
Yes. A laptop can stream when it has adequate sustained performance, cooling, ports, and a stable internet connection. Use hardware encoding, connect power and Ethernet, cap game frame rate, and test temperatures. For demanding games, lower output resolution or use a second device for chat instead of adding more load.
What upload speed do I need for Twitch streaming?
Your upload speed should exceed the configured stream bitrate with meaningful headroom. Twitch has advised roughly 30 percent extra as a general practice. A 6 Mbps stream therefore needs more than a 6 Mbps test result; aim for at least around 8 Mbps of stable upload and verify packet loss and jitter.
Do I need a webcam to grow on Twitch?
No. Strong voice commentary, useful content, consistency, and interaction can build a channel without a camera. A webcam helps when facial reactions or personal connection support the format, but it should not be treated as mandatory.
Can I stream from a console without a capture card?
Yes. Supported consoles can broadcast directly to Twitch. A capture card becomes useful when you want OBS scenes, custom overlays, detailed audio routing, local recording, multiple cameras, or a separate streaming computer.
Is OBS Studio the best software for beginners?
OBS Studio is a strong default because it is free, open source, widely documented, and flexible. Its interface takes time to learn, but the Auto-Configuration Wizard and a four-scene setup keep the first build manageable. Other software can be easier visually, yet may use more resources or place features behind paid plans.
How long should my first Twitch stream be?
Aim for 60-120 minutes. That is long enough to test the format, interact, and collect useful VOD evidence without exhausting yourself. A shorter focused broadcast is better than a long stream filled with silence, technical problems, and declining energy.
Conclusion: Build a Stable Show, Then Improve It
The practical method for how to start streaming on Twitch is straightforward: secure the account, choose a focused content promise, build a lean OBS scene collection, make the microphone clear, select conservative output settings, test the real workload, configure moderation, and improve one bottleneck after every broadcast.
Do not postpone the first stream until the setup looks like a full-time creator’s studio. Start with a dependable signal and a clear reason to watch, then let real viewers and real tests guide the next upgrade. Which part of your setup needs the most work before you go live: internet stability, audio, OBS scenes, camera, or content planning?
editor's pick
latest video
news via inbox
Nulla turp dis cursus. Integer liberos euismod pretium faucibua